
Let's be honest, organizing your desk cables is one of those tasks that's easy to put off. You tell yourself you'll get to it "this weekend," but that tangled mess of wires just keeps growing. The thing is, that small effort—unplugging everything, grouping wires, and tucking them away—can completely transform your workspace from chaotic to focused.
Why Organized Desk Cables Boost Productivity
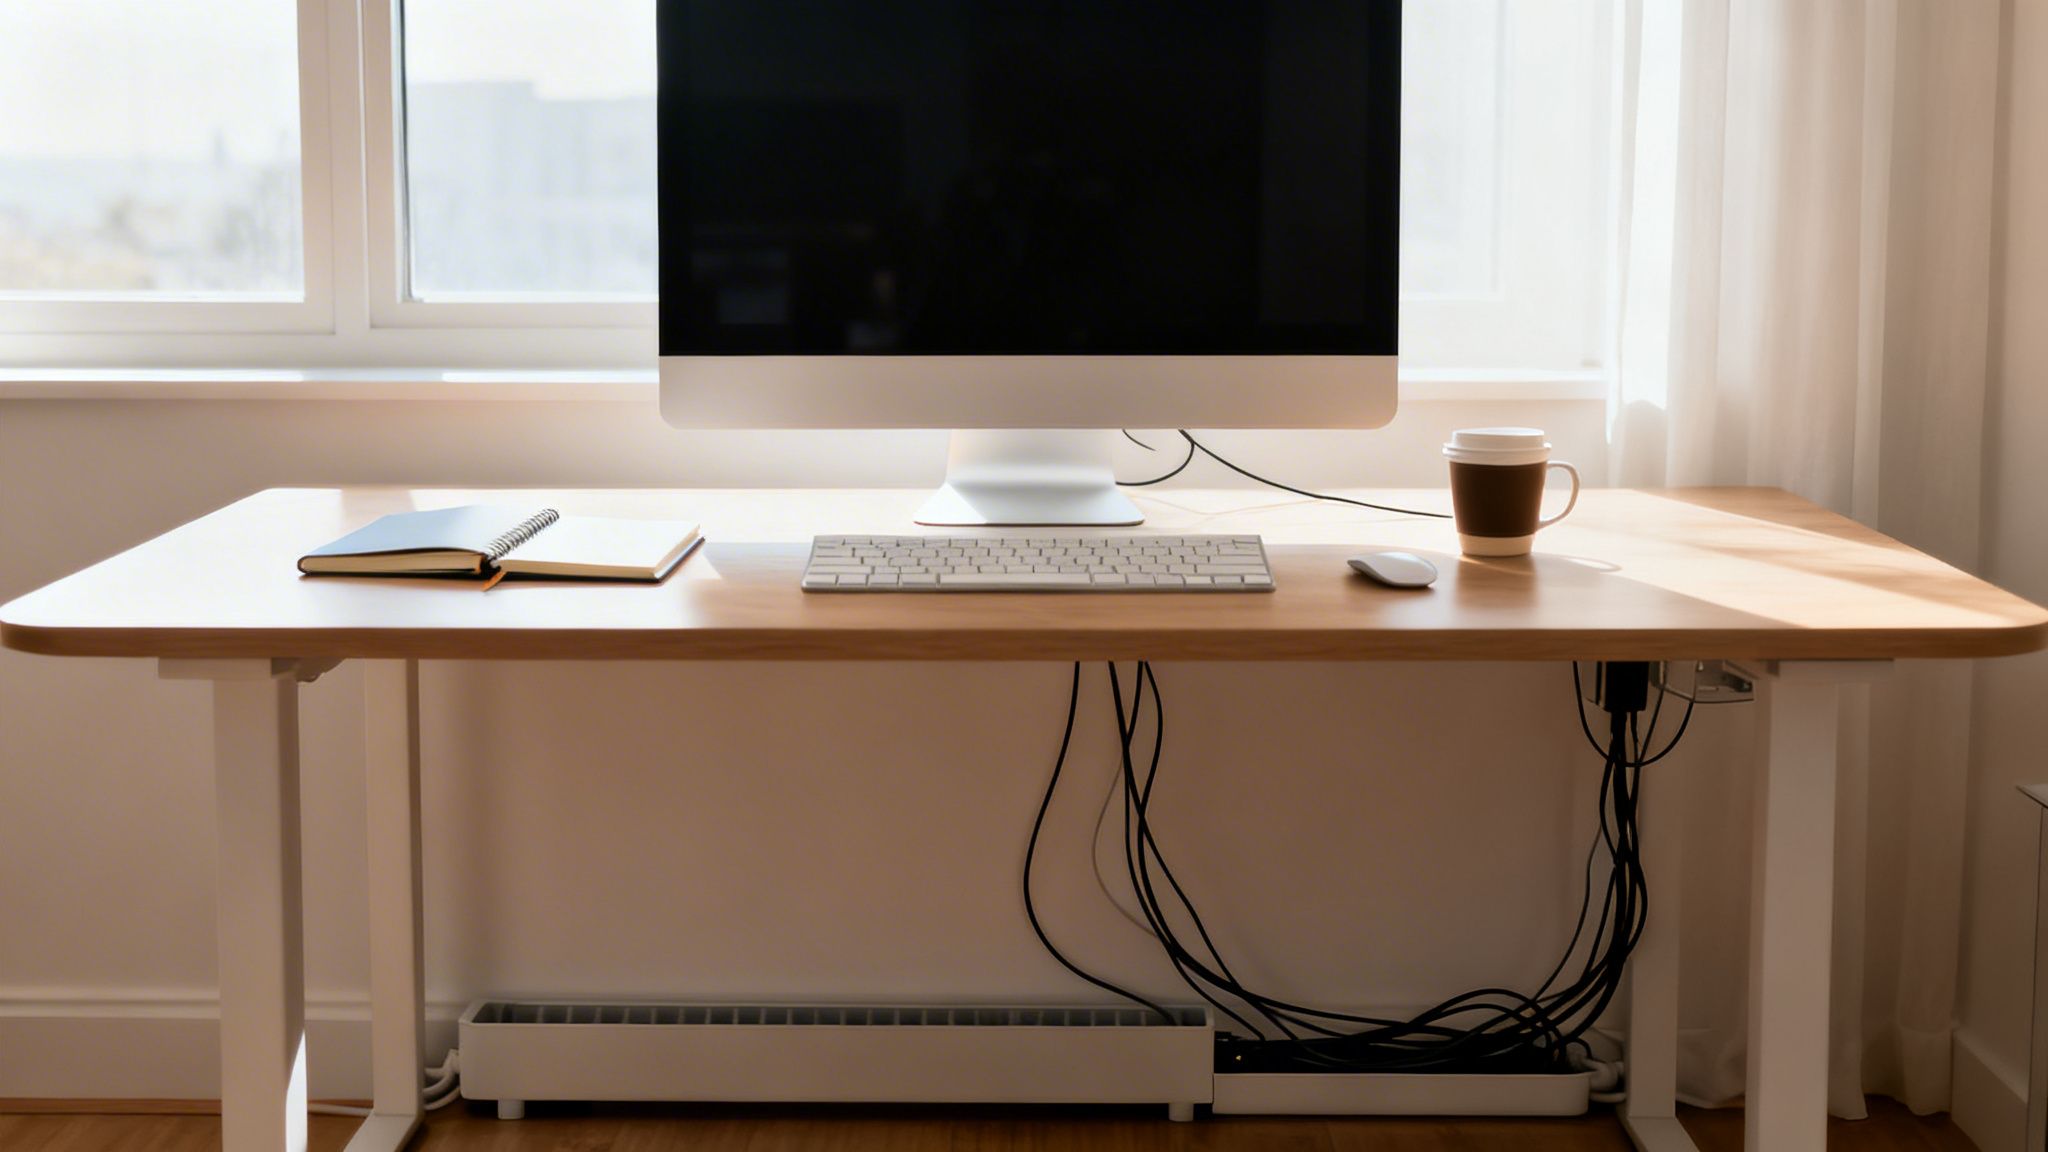
Before we get into the how, let's talk about the why. A rat's nest of wires under your desk is more than just ugly; it’s a silent killer of focus and efficiency. Every time your eyes catch that mess, it creates a tiny mental distraction, pulling you just a little bit further away from deep work.
The Real Cost of Cable Clutter
The impact of that disorganization is very real. This isn't just about aesthetics—it's about performance. Research shows that a tidy workspace can slash distractions and boost your output by up to 20%.
In a recent survey of 5,000 professionals, a staggering 68% said that tangled cables cause daily interruptions. They admitted to wasting an average of 45 minutes every single week just trying to untangle or troubleshoot a messy connection. You can dig into the numbers yourself in this detailed report on productivity.
A clean setup does more than just give you back that lost time. It creates a calmer, more controlled environment that pays off in a few key ways:
- Better Focus: With fewer visual distractions, it's way easier to get into a state of flow and stay there.
- A Safer Space: Let's face it, loose wires are a trip hazard waiting to happen. Managing them properly keeps you and anyone else walking by safe.
- Longer-Lasting Gear: When cables are organized, they're less likely to get bent, snagged, or crushed by your chair. That means less wear and tear, and fewer expensive replacements.
From Chore to Investment
Try to reframe cable management. It’s not a boring chore—it's a strategic investment in your command center. Spending a couple of hours now to create a streamlined system will pay you back every single day. The next time you need to unplug your webcam, you won’t have to play a frustrating game of "follow the wire."
The goal isn't just to hide the mess, but to build a logical, accessible system. A truly organized desk lets you swap out devices or troubleshoot a problem without having to rip everything apart.
Ultimately, taking control of your cables is about taking control of your workspace. It's a foundational step in building a desk setup that actually supports your best work instead of quietly working against you.
Planning Your Cable Management Strategy
Ever grabbed a handful of zip ties and dived right into bundling? More often than not, that ends in a rat’s nest and a sore wrist. Instead, spend 10 minutes mapping out your setup—this simple pause can save you hours of frustration later.
Mapping Your Cable Routes
Start by picturing each cord’s journey. Where does your HDMI cable kick off, and where should it land? Running cables along existing lines—like a monitor arm or desk edge—keeps things tucked away.
Here are a few questions to guide you:
- Which cables can hug the back of your desk versus dropping straight down?
- Can any wires ride along your monitor arm to an under-desk hub?
- Are there natural ledges or clips you can use instead of free-hanging lines?
By tracing power and data flows before you touch a single tie, you build a clear path instead of chasing loose ends.
Creating A Simple Inventory
Before you start unplugging, list every device and cable. That makes sure nothing slips through the cracks—and flags cables you can shortcut.
Your Desk Cable Inventory Checklist
Use this checklist to inventory all devices and cables before you begin organizing. This helps ensure nothing is forgotten and you have the right tools for the job.
| Device Name (e.g., Monitor 1, Laptop) | Cable Type (e.g., HDMI, USB-C, Power) | Cable Length (Approx.) | Destination (e.g., Power Strip, Monitor) |
|---|---|---|---|
Once you’ve filled it out, you’ll spot any overlong cords—like a 10-foot power cable when your outlet sits just 2 feet away—and know exactly where to swap in a shorter run.
For extra tips on effective cable management and gear that hides wires inside its design, check out our roundup of the best monitor arms for dual monitors.
This planning phase sets you up for success. With a clear inventory and mapped routes, you can choose the right tools and build a system that stays tidy for years.
Choosing the Right Cable Management Tools
Having the right gear can turn cable management from a frustrating chore into a genuinely satisfying project. You’ve got a plan, but the market is flooded with options. Let's cut through the noise and look at which tools actually solve specific problems at your desk.
I like to think of the toolkit in terms of layers. The first layer is for the heavy lifting—getting all the bulky power bricks and strips off the floor and completely out of sight.
- Under-Desk Cable Trays: These are the unsung heroes of any serious setup. It's essentially a metal basket that screws to the underside of your desk, creating a hidden home for your power strip and all those clunky adapters. Getting everything off the floor in one move is a massive first win.
- Cable Raceways: Think of these as clean, enclosed highways for your wires. They're adhesive-backed channels that stick to the back or underside of your desk, letting you run multiple cables along a straight path where they just disappear from view. They're perfect for routing monitor, power, and peripheral cords together.
Fine-Tuning Your Cable Routes
With the main power sources handled, the next layer is all about guiding and bundling the individual wires. This is where you bring a sense of order to the smaller, more visible cables connecting your devices.
Reusable velcro ties are your best friend here. I stopped using single-use zip ties years ago because they're so final. With velcro, if you add a new monitor or swap out a keyboard, you can just unwrap and re-bundle your cables in seconds without having to cut anything.
When you've got a group of cables all heading to the same spot—like from your monitors down to your PC—a cable sleeve is a game-changer. This fabric tube wraps around multiple wires and merges them into a single, clean-looking trunk. This is especially clutch for cables running up a monitor arm, where a tidy appearance makes all the difference.
Pro Tip: Don't overtighten your bundles. Give your cables a little room to breathe. Cinching them down too hard can damage the internal wiring over time, which is a real risk with standing desks that move up and down all day.
The Final Touches for a Flawless Finish
Finally, you have the small but mighty tools for those last few stubborn wires. Small, adhesive-backed cable clips are perfect for guiding a single mouse or keyboard cord along the edge of your desk, keeping it exactly where you need it. These little clips are great for preventing wires from snagging or falling behind your desk every time you move something.
To learn more about hiding every last wire, you can explore our detailed guide on using a https://eveo.store/blogs/news/cable-cord-hider.
And don't forget about the cables you don't use every day. For travel chargers or less-frequently used cords that still need a home, dedicated cable organizer bags keep them from turning into another junk drawer disaster. By combining these different tools, you're creating a complete system that addresses every wire, from the bulky power bricks hidden underneath to the single USB cable you reach for daily.
Alright, let's get that cable situation sorted out. This is the part where the real magic happens—turning that tangled mess into something clean, organized, and genuinely satisfying.
But before you grab a single tool, do this one thing: unplug everything.
Seriously. It’s the only way. Trying to manage a live web of wires is like trying to solve a puzzle with all the pieces still connected. It’s a frustrating, inefficient mess. Start with a clean slate.
With everything unplugged, you can finally see what you're working with. Lay out the cables and start sorting them into logical groups. Your video cables (HDMI, DisplayPort) go in one pile. Your USB devices (keyboard, mouse, webcam, microphone) go in another. Finally, you have the power cords, which are usually the biggest culprits. This little bit of prep work makes everything that follows so much easier.
Creating Your Main Cable Pathways
Now that you have your piles, it's time to bundle them into clean "trunks." I always recommend reusable velcro ties for this. They're cheap, effective, and you can easily add or remove a cable later without having to snip a plastic zip tie and start over.
If you have cables running up a monitor arm—a common sight in modern setups—a fabric cable sleeve is a game-changer. It wraps all those individual wires into one sleek-looking tube, making the whole thing look incredibly professional.
This isn’t just about looking good, either. It’s a legitimate safety issue. Disorganized cables are a surprisingly common cause of workplace accidents. Tripping over a stray power cord is no joke, but thankfully, it's a simple problem to solve.
Remember, the goal isn't just to bunch wires together. It's to create clean, logical pathways that guide them from source to destination as invisibly as possible.
This flowchart breaks down how to pick the right tools for the job.
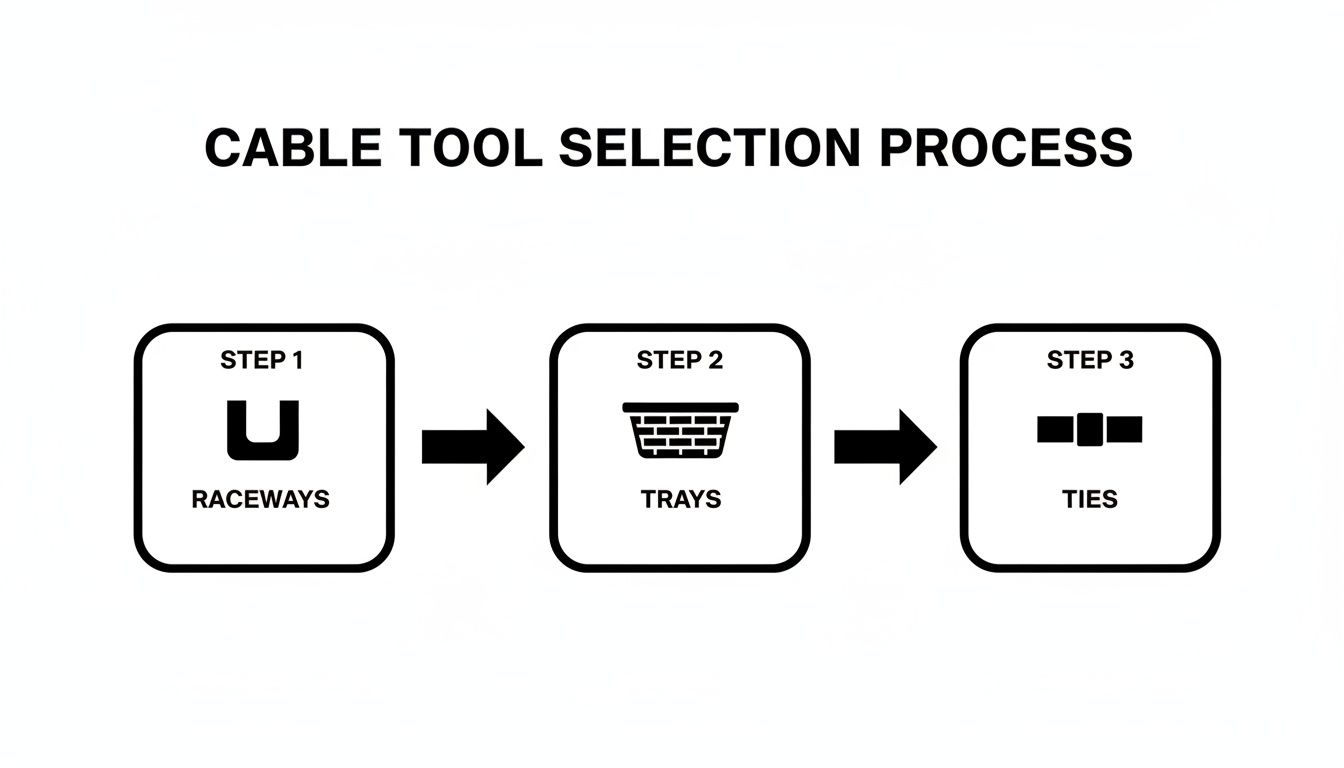
As you can see, it's about using raceways, trays, and ties together to create a complete system. Each one has a specific job to do.
Mounting Power Strips and Hiding Wires
Here's the single biggest win for any desk cleanup: getting that bulky power strip off the floor.
The best way to do this is with an under-desk cable tray or basket. Just mount it to the underside of your desk, usually toward the back, and place your power strip and all those clunky power bricks inside. Instantly, the worst of the clutter just vanishes.
For the cables running from your gear to this new power hub, an adhesive-backed cable raceway is your best friend. These are simple plastic channels that stick right to the underside of your desk, creating a hidden highway for your wires.
To get a perfect installation without damaging your desk, follow these quick steps:
- Prep the Surface: First, wipe down the area where you'll mount the raceway with an alcohol wipe. This gets rid of any dust or oils and gives the adhesive a clean surface to grip.
- Do a Dry Run: Before peeling the backing, hold the raceway in place to make sure your path is clear and looks right.
- Stick it in Sections: Peel back just a few inches of the adhesive at a time, pressing the raceway firmly into place as you go. This helps you keep it straight and avoid mistakes.
- Load and Lock: Once it's mounted, tuck your bundled cables inside and snap the cover on. Done.
If you want a deeper dive into picking and installing these, our guide on raceway cable management has some great extra tips. This whole workflow gives you a repeatable process you can use on any desk to get a result that’s not just tidy, but also safe and easy to maintain down the road.
Pro Tips for a Flawless and Future-Proof Setup
You've bundled the main wires and mounted your power strip. Nice. Now it's time for the finishing touches that take a setup from just "tidy" to truly professional. These are the small details that make a huge difference in the long run.
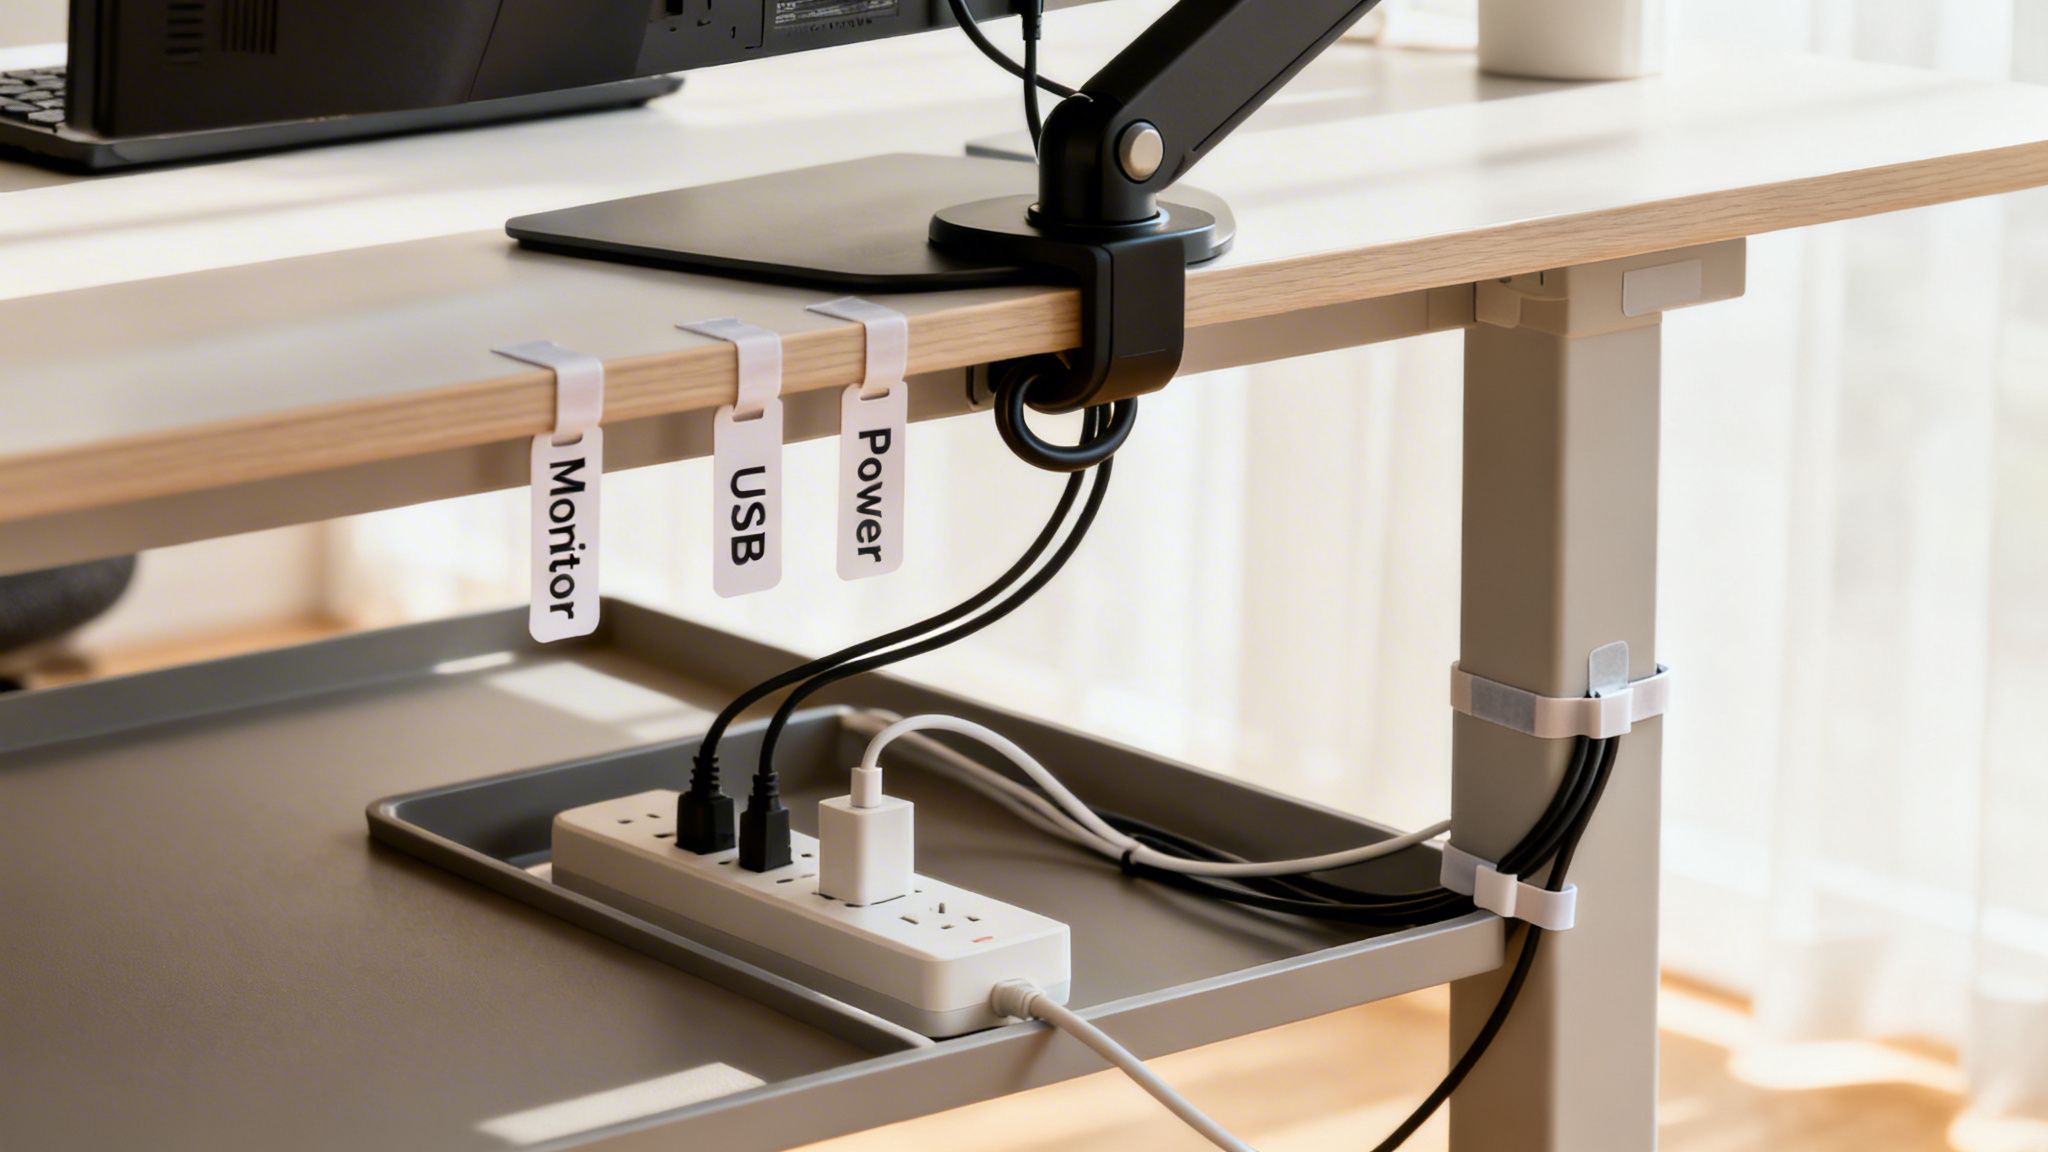
One of the simplest things you can do is label your cables. Seriously. Grab a label maker or even just some masking tape and a Sharpie. Mark both ends of your essential cords—the monitor's DisplayPort cable, the power brick for your dock, you name it.
The next time you need to unplug that one specific thing, you won't be playing a guessing game, yanking on identical black cords. This is a two-minute job that will save you a world of frustration down the road.
Build in Some Wiggle Room
Another pro move is to create what’s called a 'service loop'. It sounds technical, but it’s just a small, neat coil of extra cable you leave near a connection point, secured with a velcro tie. This gives you a few precious inches of slack when you need it.
That little bit of slack is a lifesaver. Need to shift your monitor over? Adjust your standing desk? You can do it without everything pulling taut or, worse, having to undo all your hard work.
Think of a service loop as built-in flexibility. It’s the difference between a rigid setup that breaks the second you touch it and one that adapts to how you actually work. For standing desks, this isn't just a tip—it's essential.
The cost of messy cables is surprisingly high. Businesses lose millions every year replacing cords that get crushed, bent, and sag, often cutting their lifespan from 5 years down to just 2.5. One recent analysis even put the cost of cable clutter at $1,200 per workstation annually. Using durable solutions like cord hiders rated for 10,000+ bends can extend cable life by 200% and slash those replacement costs. You can learn more about the hidden cost of cable clutter.
Advanced Tactics for That Final Polish
For that perfectly clean, minimalist look, the goal is to get every plug hidden in one central spot. The best way to pull this off is by mounting your power strip directly inside your under-desk cable tray. Everything connects there, leaving just a single power cord running to the wall outlet. Clean and simple.
Here are a few other tricks I’ve picked up over the years:
- Use Right-Angle Adapters: For those tight spots behind a monitor or PC case, a right-angle adapter for your HDMI or power cord prevents sharp, damaging bends. It's a small part that makes a big impact.
- Color-Code Your Bundles: Grab a pack of multi-colored velcro ties. Use one color for power, another for video, and a third for USB. It makes identifying an entire bundle instantaneous.
- Plan for the Future: Think you might add a second monitor or a new gadget soon? Run an extra HDMI or USB cable with your main bundles now. It's way easier to leave an unused cable tucked away than it is to rip open your raceways a few months from now.
These are the kinds of techniques that make your desk not just look good, but feel effortless to use and maintain.
Answering Your Toughest Cable Management Questions
Even with the best plan, you're bound to hit a few snags. It happens to everyone. Let's walk through some of the most common cable management headaches and how to solve them like a pro.
What's the Best Way to Handle Cables for a Standing Desk?
This is the big one for sit-stand setups. The single biggest mistake I see is people running all their cables directly from their gear down to a power strip on the floor. The moment you raise the desk, everything gets yanked tight, which is a disaster waiting to happen for your ports and plugs.
The trick is to make your power source part of the desk itself. Get a solid power strip and mount it directly to the underside of your desktop. An under-desk cable tray is perfect for this, but even heavy-duty adhesive strips can work in a pinch.
Now, only one cable—the one from your power strip to the wall—needs enough slack for the desk to travel up and down. For all the other cables connecting your monitors, PC, and peripherals to that power strip, bundle them together inside a flexible fabric sleeve. This creates a single, unified "umbilical cord" that moves smoothly with the desk, preventing snags and tension.
How Can I Hide That Ugly Power Strip and All Its Bulky Bricks?
Getting that clunky power strip and its army of chunky adapters off the floor is probably the most satisfying part of any cable management project. It instantly makes your whole setup look cleaner. The most effective way to do this is with an under-desk cable management tray or basket.
These are just simple metal or plastic containers that you screw right into the bottom of your desk. You just drop the entire power strip and all those bulky power bricks inside. This solves two problems at once:
- It gets everything up off the floor, so you can actually vacuum under your desk without creating a tangled mess.
- It tucks the entire mess completely out of sight from your normal sitting or standing view.
It's a brilliantly simple solution that hides the absolute biggest source of cable chaos.
A well-placed under-desk tray acts as the central nervous system for your setup. Everything plugs in there, hidden from sight, turning a dozen messy connections into one clean, manageable hub.
My Cables Are Too Short to Reach My Newly Hidden Power Strip. Now What?
Don't worry, this happens all the time, especially right after you've neatly mounted your power strip and are trying to plug everything in. Before you buy anything, see if you can solve it by just rearranging things a bit. Sometimes shifting a monitor over by an inch is all it takes to get that last bit of length.
If that doesn't work, the best fix is a few short, high-quality extension cords. I'm talking about the 1-foot to 3-foot ones. They're perfect for bridging that small gap for a single device without adding a whole new coil of cable you have to manage. It's a much cleaner fix than using a long, six-foot extension that you just have to bundle up anyway.
Just remember the most important safety rule here: never "daisy-chain" power strips by plugging one into another. That’s a major fire hazard because it can easily overload the circuit. Only use short, single-outlet extensions for individual devices when you absolutely need to.
Ready to build a workspace that’s as clean and efficient as your workflow? EVEO offers premium monitor arms and cable management solutions designed to create a productive, clutter-free environment. Explore our collections at https://eveo.store and discover why millions of professionals trust us to organize and protect their gear.
Your Guide to a Perfect Cable Raceway Wall Installation
Finding Your Ideal Standing Desk Height for Peak Performance