Cable raceways are the single best way to conquer that tangle of wires behind your desk or TV, turning visual chaos into a clean, safe, and professional-looking space. This isn't just about hiding wires; it's a smart system of enclosed channels that protects your cords, gets rid of trip hazards, and makes your entire setup simpler to manage.
More Than Just Tidy: The Real Wins of Using Cable Raceways
Let's be honest, that "cable nest" behind every modern desk is a source of constant, low-grade stress. You've got power cords for monitors, speakers, chargers, and a dozen other peripherals all fighting for space. It looks messy, it’s a magnet for dust, and finding the right plug can feel like a frustrating guessing game. This is exactly where raceway cable management changes everything.

Think of raceways as a framework for total control over your wiring. By containing every cord within a sleek, mountable housing, you instantly get a handful of benefits that go way beyond just looking good.
Boosting Safety and Professionalism
The most immediate win is safety. Loose cables snaking across the floor are a massive trip hazard, especially in homes with kids or pets, or in any busy office. A properly installed raceway system removes that risk entirely.
This organized approach also gives your space a polished, professional look. Whether it's a home office where you take video calls or the living room entertainment center, clean cable runs signal a real attention to detail.
Making Maintenance a Breeze
Anyone who's tried to dust behind a media console knows the struggle. Tangled wires create impossible-to-reach "dust traps." When those same cables are tucked into a smooth raceway, dusting and vacuuming around your electronics becomes completely effortless.
Troubleshooting becomes incredibly simple. Instead of wrestling with a tangled mess to unplug one device, you can easily open the raceway, identify the labeled cord, and swap it out in seconds.
Cable raceways are a huge part of the larger cable management industry, a market expected to grow from USD 17.87 billion in 2025 to USD 28.93 billion by 2030. In offices, raceways support ergonomic setups—like those using EVEO monitor arms—by improving airflow, which can reduce equipment failure by 15%. Using code-compliant, fire-retardant materials also helps prevent a huge number of cable-related electrical fires. You can find out more about the cable management market's growth and see just how big this is becoming.
Ultimately, installing a raceway system is a small investment that pays off big in your environment's safety, function, and appearance. It lays the foundation for a workspace that isn't just nice to look at, but is also more efficient and safer for everyone.
How to Plan Your Raceway Layout Like a Pro
A killer cable management setup doesn't start with peeling off the first strip of adhesive. The real magic happens before you even open the box. The difference between a sleek, professional-looking install and a messy, temporary fix is all in the planning. Taking a few minutes to map things out will ensure you buy the right amount of raceway, conquer tricky corners with ease, and build a system that lasts.
Think like a route planner for your cables. Your first task is to trace the entire path from the power outlet to each device. Walk the route. Take note of every obstacle. Will you need to navigate around a doorway, hop over a baseboard, or sneak behind a chunky piece of furniture?
These aren't problems—they're just data points for your plan. For instance, hiding the cables for a wall-mounted TV means planning a clean vertical run from the screen down to an outlet. You’ll often have to account for a soundbar or other media gear along the way.
Measure Twice, Buy Once (With a Buffer)
Once you've mapped the path, grab a tape measure. Get precise measurements for each straight section of your route. As you tally up the total length, here’s the golden rule: add an extra 10-15% to your final number.
This buffer is your best friend. It covers you for slight miscalculations, the extra bits needed for making clean corner cuts, or any unexpected detours you have to make. Trust me, coming up just a few inches short is one of the most common and easily avoidable frustrations in any DIY project.
Choosing the Right Raceway Size
With your length sorted, it’s time to pick the right raceway size. This is crucial. Choosing one that’s too small is a project-killing mistake, while one that’s too big can look clunky and out of place on your wall.
Getting it right is surprisingly simple. Just gather all the cables you plan to run through a single section of the raceway. For your entertainment center, this might be a couple of power cords, an HDMI cable, and an ethernet cable. For your desk, maybe it's two monitor cables, a keyboard cord, and a phone charger.
Once you have your bundle:
- Group the Cables: Use a velcro tie or a bit of tape to hold the cables together, mimicking how they'll sit inside the channel.
- Measure the Bundle: With a ruler or calipers, measure the thickness (diameter) of the cable bundle at its widest point.
- Pick Your Raceway: Select a raceway with an interior dimension slightly larger than your measurement. That little bit of extra breathing room is vital for airflow and makes it infinitely easier to add another cable down the road without tearing everything apart.
To make this even easier, here’s a quick reference guide.
Choosing the Right Raceway Size
| Raceway Size (Width) | Typical Capacity (Example Cables) | Best For |
|---|---|---|
| 0.5" - 0.75" | 1-3 thin cables (e.g., phone charger, speaker wire) | Single device runs, speaker setups, minimal desk wiring. |
| 1.0" - 1.25" | 3-5 standard cables (e.g., power cord, HDMI, ethernet) | TV entertainment centers, basic home office desks. |
| 1.5" - 2.0" | 5-8+ cables or thicker bundles | Complex gaming setups, workstations with multiple monitors. |
Remember, these are just guidelines. Always measure your specific bundle to be sure!
Pro Tip: Always plan for future growth. You might add a new gaming console or a second monitor next year. Leaving a little extra room now will save you from a complete re-install later.
For more heavy-duty setups, like a home office with a standing desk and a ton of peripherals, you might need a more comprehensive system. Products like the EVEO under-desk cable management kit are designed to work perfectly with wall-mounted raceways, giving you a complete, clean solution from desk to wall.
Don't Forget About Dynamic Setups
Your plan has to account for things that move. A standing desk is the perfect example. A rigid raceway fixed to the wall won't do you any good for cables that need to travel up and down with the desk.
For a situation like this, your plan needs two parts. First, mount a power strip directly to the underside of the desk itself—this gets all your device plugs consolidated in one mobile spot. From there, you only need to run a single power cord from that strip to the wall outlet, ideally using a flexible cable sleeve. This approach keeps everything neat and functional, no matter the desk height.
This kind of detailed planning is what turns cable management from a simple chore into a strategic upgrade for your entire space.
Installing Cable Raceways for a Flawless Finish
With your plan locked in, it’s time for the most satisfying part of the project: the installation. This is where the cable chaos finally disappears, and that vision of a clean, organized space comes to life. Getting a professional, seamless finish is all about nailing a few key details, from prepping your walls to making precise cuts.
This simple flowchart breaks down the essential planning steps that lead to a successful installation.
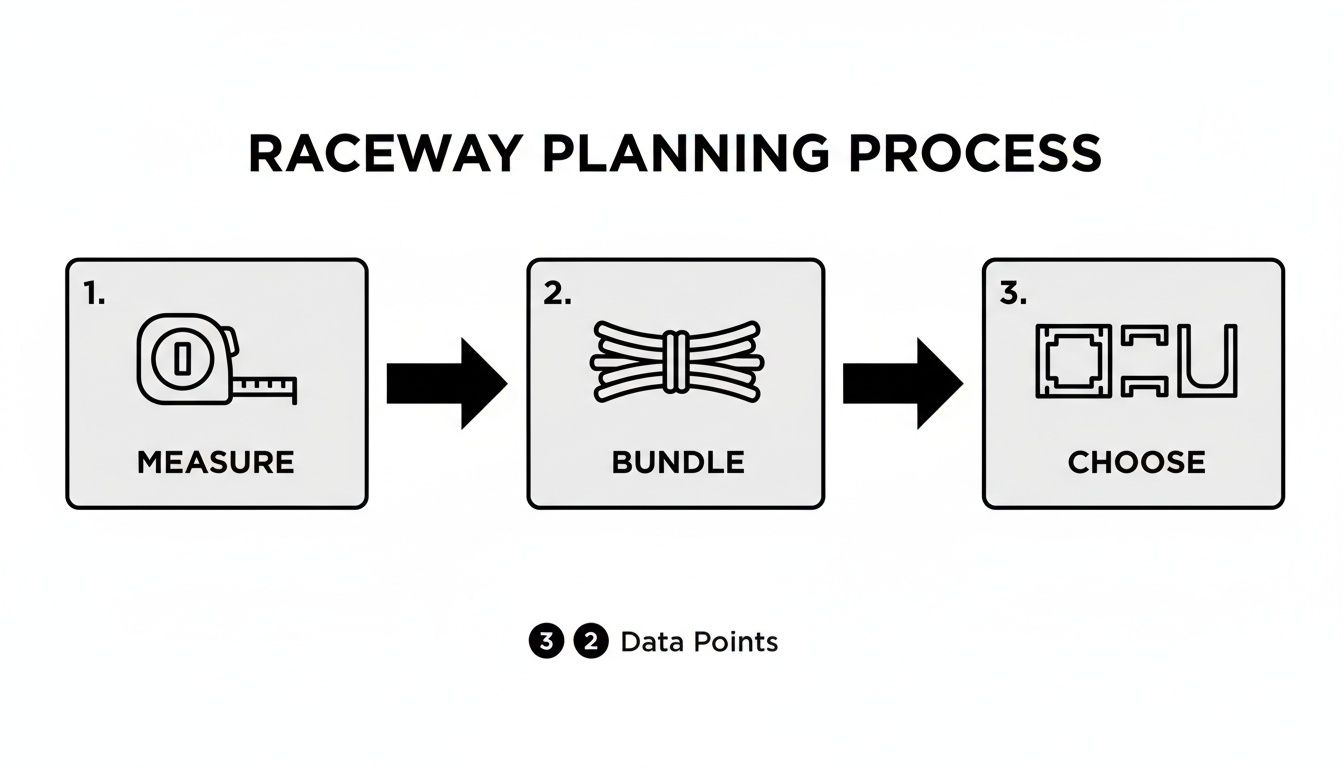
Following this measure, bundle, and choose sequence makes sure you have everything you need before a single piece touches the wall.
Prepping Your Surface for a Lasting Bond
If there's one step you can't skip, it's surface prep. This is the single most important part of the process, and it directly impacts how well the adhesive backing holds up over time. Think of it like painting—you wouldn't just slap a fresh coat on a dusty wall and expect it to stick, right?
Start by wiping down the entire path where the raceway will go. A clean cloth lightly dampened with isopropyl alcohol is perfect for this, as it cuts through any grease, dust, or grime that could weaken the adhesive's grip.
Just make sure the surface is completely dry before you move on. This simple five-minute task can be the difference between a permanent install and one that starts peeling away from the wall in a few months.
Choosing Your Mounting Method
Most raceway cable management kits, including those from EVEO, give you two ways to mount them. The best choice for you really depends on your wall's surface and how heavy your cable bundle is.
- Self-Adhesive Backing: This is your best bet for smooth, flat surfaces like painted drywall, finished wood, or metal. It’s incredibly fast, clean, and requires zero tools. Just peel the protective layer off and press the raceway firmly against the wall.
- Screws and Anchors: For textured walls (think plaster or "orange peel" finishes), brick, or concrete, the adhesive just can't make enough contact to form a strong bond. This method is also a good idea if you're running a particularly heavy bundle of cables, since the extra weight can eventually pull the adhesive loose.
Here's a pro tip: use a hybrid approach for ultimate security. On a long, straight run across drywall, you can rely mostly on the adhesive but add a single screw at the very beginning and end of the run. It’s great for extra peace of mind.
Achieving Those Clean, Professional Lines
It’s the details that take an installation from "good" to "great." To avoid that crooked, amateur look, always use a level. Before you even think about peeling off the adhesive backing, hold the raceway section against the wall, place a level on top, and make a few light pencil marks to guide you. This guarantees a perfectly straight line that looks sharp and intentional.
When you need to cut a piece of raceway to a custom length, precision is everything. A fine-toothed hacksaw is your best friend here. For the cleanest possible cut—especially when creating angles for corners—pair that hacksaw with a miter box. This simple tool holds the raceway steady and guides your saw for a perfect 45- or 90-degree cut every single time. A quick pass with fine-grit sandpaper will knock down any rough edges for a flawless fit.
Navigating corners is made easy with elbow connectors. These small pieces snap right over the ends of two raceway channels, creating a seamless and professional-looking turn around any corner. They hide any minor imperfections in your cuts and provide a continuous, enclosed path for your cables.
You can find more practical solutions for hiding cords, especially for common setups like TVs, in our detailed guide on using a TV cable and cord cover.
Bundling and Placing Cables
With the raceway channels mounted, the last step is to lay your cables inside. It’s tempting to just cram them in there, but a little organization at this stage goes a long way.
Use small, reusable velcro ties to bundle the cables together every foot or so. This stops them from rattling around inside the channel and makes it much easier to trace a single cord if you need to make changes down the road.
Lay the bundled cables neatly into the open channel, then snap the cover on. You should hear a satisfying click as it locks into place. It's easiest to work in sections—lay the cables, then secure the cover as you go. This keeps everything manageable and ensures a tight fit along the entire run.
Taking Your Setup From Good to Great
So, you've installed the raceways and wrangled that cable chaos. Things are already looking a whole lot better. But we're not just aiming for organized—we're aiming for invisible. Let's get into the finishing touches that take your raceway cable management from a functional fix to a seamless part of your room's design. This is what separates a decent job from a truly professional one.
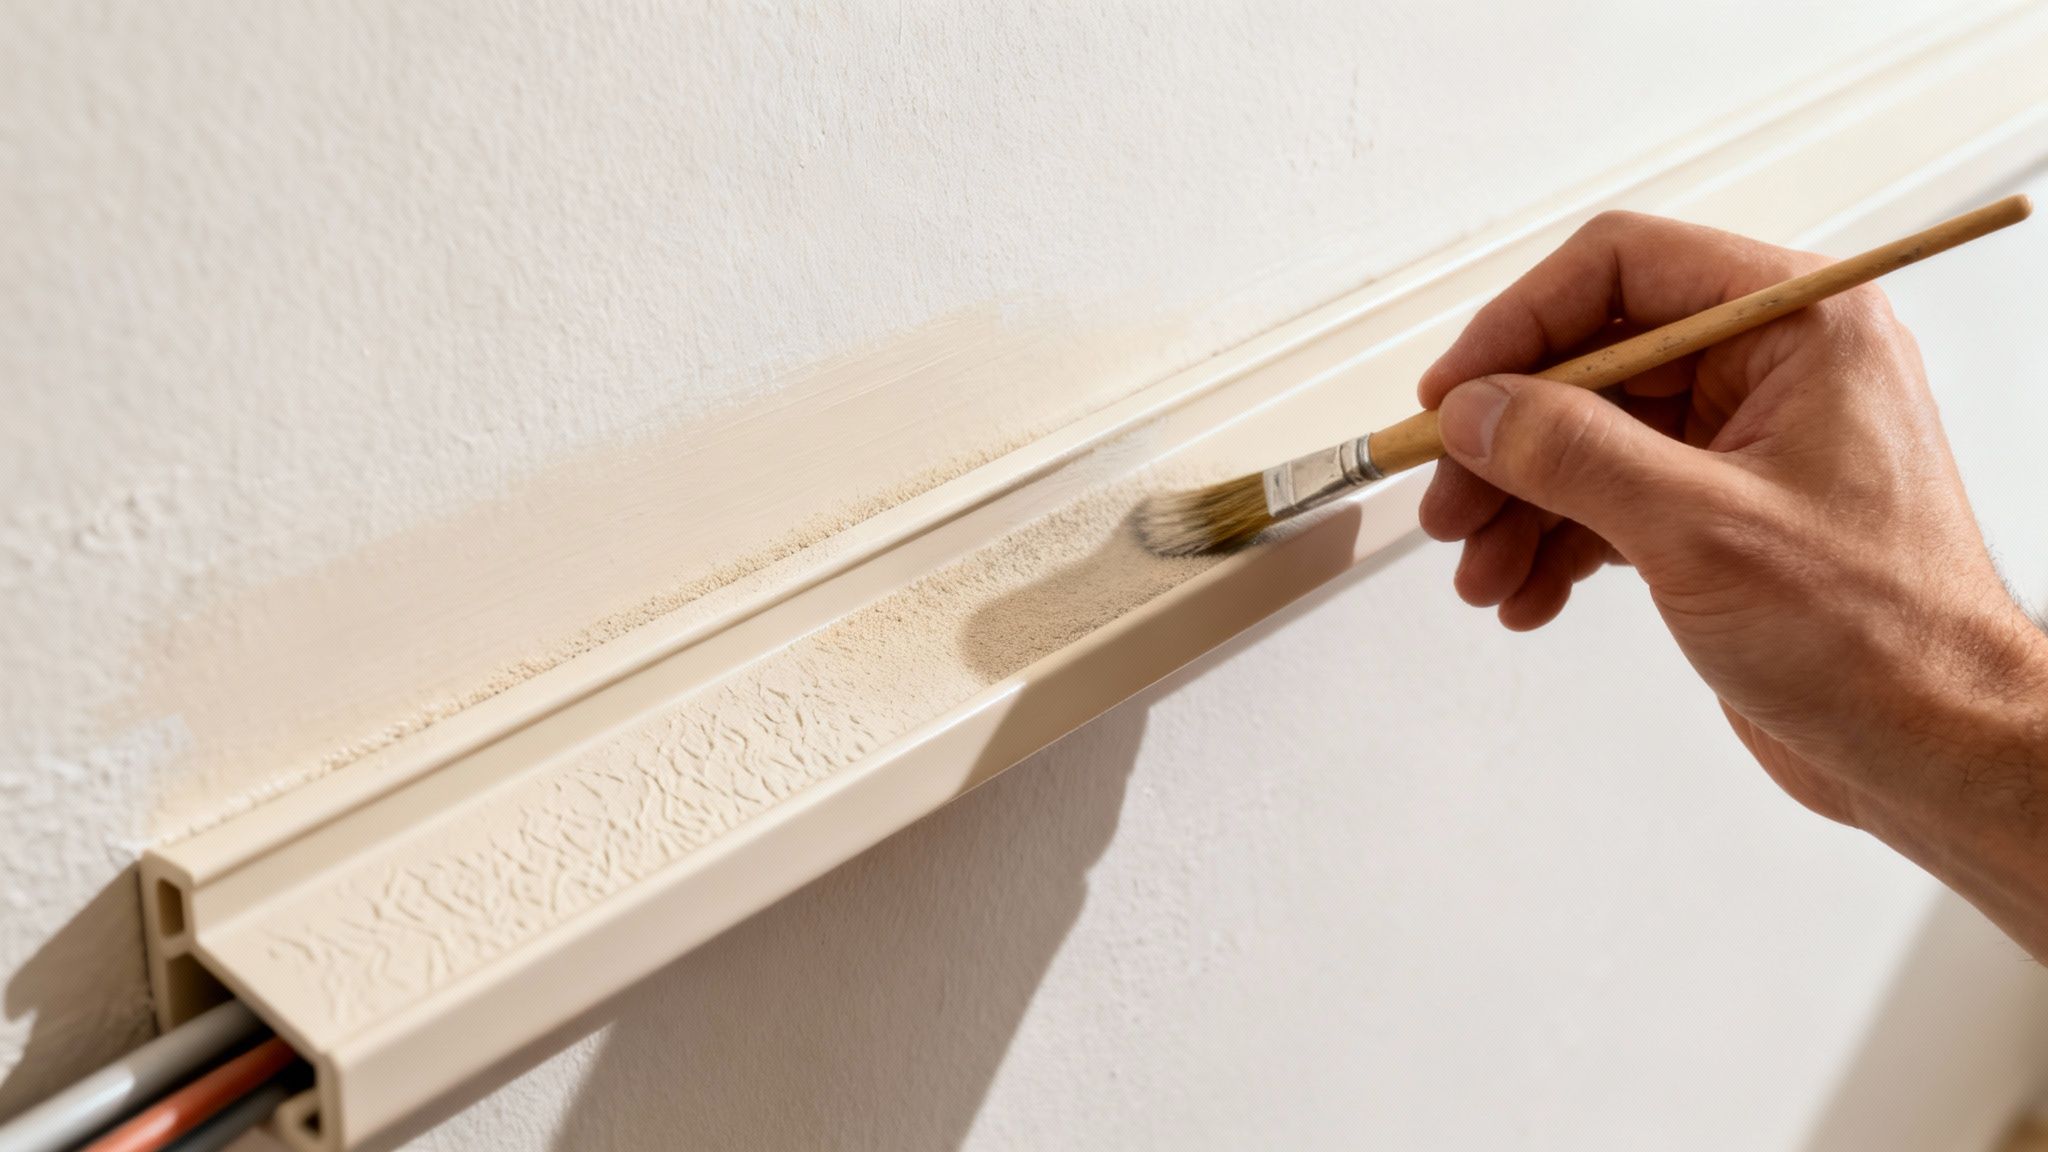
The single best trick in the book? Paint. Matching your raceways to your wall color makes them practically disappear. It’s a simple move, but the payoff is huge, giving you that polished, high-end finish.
Prepping and Painting for a Perfect Match
You can’t just throw a coat of wall paint on a plastic raceway and call it a day—it'll chip and peel before you know it. The smooth surface needs a little prep work to give the paint something to grab onto. Don't worry, it's a quick and easy process.
- Give It a Light Sand: Grab some fine-grit sandpaper (220-grit is perfect) and gently scuff up the entire surface of the raceway cover. This creates a slightly rough texture that helps the paint adhere properly.
- Wipe It Clean: After sanding, use a damp cloth to wipe away all the dust. Let it dry completely before you even think about opening a can of paint.
- Pick the Right Paint: Your best bet here is a latex-based paint. It's flexible enough to handle the minor expansion and contraction of the plastic. For an even tougher finish, go for a paint-and-primer-in-one product.
Use a small brush or a mini foam roller to apply a thin, even coat. Let it dry, and if you can still see the original color peeking through, add a second coat. The result is a custom piece that just melts right into your wall.
Honestly, taking 20 minutes to paint your raceways is the best investment you can make in the whole project. It keeps the focus on your clean, organized space, not on the hardware you used to get there.
Tackling Tricky Scenarios
Not every cable run is a straight shot along the baseboard. Complex home theater or multi-monitor desk setups often require some creative thinking to keep things looking clean and intentional.
For a home theater with surround sound, plan your routes to follow the room's natural lines. Run raceways along the top of baseboards, up the corners of walls, or right where the wall meets the ceiling. This makes the installation feel deliberate, not like an afterthought.
Got built-in bookshelves or custom cabinets in the way? Use a miter box to cut angled pieces. This allows the raceway to hug the furniture's contours perfectly, turning a potential eyesore into a sharp design detail.
If you're mounting a projector on the ceiling, the goal is to make the power and HDMI cables disappear. Run a painted raceway from the projector straight along the ceiling to the nearest corner, then drop it vertically down the corner to your outlets. It keeps the whole run tight and out of sight.
Integrating Raceways With Your Tech Gear
True mastery is about making your raceways work with your other equipment to create a setup that looks effortlessly wireless.
A perfect example is pairing raceways with monitor arms. To get that clean, "floating monitor" look, you can run a slim raceway channel right behind the arm or even along the arm itself. This hides the display and power cables on their journey from the monitor to the desk, completing the illusion. You can dive deeper into creating that ideal look in our guide to the best monitor arms for dual monitors.
This idea of smart integration is why raceway systems have become so popular worldwide. In 2023, the Asia-Pacific region alone made up about 35% of the global cable raceway market, proving just how adaptable they are for everything from industrial sites to home offices. For us, that means more creative ways to solve cable messes everywhere.
Taking Cable Management on the Road
The same principles apply in your car. You can use smaller, more flexible raceways to clean up the wiring for your dash cam, phone charger, or GPS.
Stick a thin, self-adhesive raceway along the edge of your dashboard, down the side of the center console, or tuck it under the floor mat. This stops cables from tangling around your gear shift or getting caught under your feet, which is not just messy—it's a safety hazard. It’s a five-minute job that brings that same clean, organized feeling from your desk to your drive.
Keeping Your Setup Clean and Ready for the Future
A great cable management setup isn't a one-and-done project. It's about creating a system you can actually live with. The goal is a clean, organized look that’s flexible enough to adapt as your tech collection grows, not a permanent prison for your wires.
Let's be real—your needs are going to change. You'll get a new gaming console, add a second monitor, or upgrade your sound system. The last thing you want is to rip a perfectly painted raceway off the wall, taking chunks of drywall with it, just to add one more cable.
Making Changes Without the Mess
Thankfully, most raceway systems are designed with this in mind. The covers are meant to snap on and off, giving you easy access to the channel inside.
When you need to add or remove a cable, a little finesse goes a long way:
- Use the right tool. A small, flat-head screwdriver or a plastic pry tool (the kind used for car interiors) works wonders for gently lifting one end of the raceway cover.
- Work in sections. Don't try to pull the whole cover off at once. Pop it open a foot or two, make your adjustments, and then snap it shut as you go.
- Keep those bundles neat. This is where using those Velcro ties inside the channel really pays off. Instead of digging through a tangled nest of wires, you can easily access the specific cable you need.
This simple approach keeps your walls looking pristine and turns a potentially frustrating chore into a quick, five-minute fix.
Troubleshooting Common Headaches
Even with the best planning, things can go sideways. By far the most common issue is adhesive failure. You did all the prep work, but a few weeks later, a section of the raceway is peeling away from the wall.
This often happens on slightly textured walls or in rooms with a lot of humidity. It can also be a sign that the cable bundle is just a bit too heavy for the adhesive alone. Don't worry, this is an easy fix.
Pro Tip: For textured walls or heavy cable runs, don't rely on the adhesive tape alone. A few small 1-inch finishing nails or screws driven through the back of the channel will create a rock-solid mechanical bond that isn't going anywhere.
The Smartest Move You Can Make
If there’s one piece of advice to take away, it's this: always choose a raceway with a little extra room. It’s so tempting to buy the slimmest, most discreet option that just fits the cables you have now, but that’s a classic short-term win that leads to long-term pain.
Think of it like buying a backpack. You don't get one that can only fit today's books; you leave a little extra room for what you might need tomorrow. When you pick a raceway that's about 25% larger than your immediate needs, you’re basically future-proofing your setup. That extra space means adding a new HDMI cable is a simple, stress-free task, not a total do-over.
Never Play the “Which Cable Is It?” Game Again
The final touch for a truly maintainable setup is labeling. It might seem like a small detail, but you'll be grateful you did it when you're on your hands and knees trying to figure out which of the three identical black cords belongs to the monitor you need to unplug.
A simple labeling system is your best friend here:
- Color-Coded Tags: Small, colored Velcro ties are perfect. Assign a color to each device (e.g., blue for the monitor, red for the PC) and attach a tag at both ends of the cable.
- Label Maker: For more complex setups with lots of similar cables, a basic label maker is a fantastic investment. Print clear labels like "MONITOR 1 - PWR" or "ROUTER - ETH" and wrap them around the cord near the plug.
This tiny step transforms troubleshooting from a frustrating guessing game into a quick, efficient process. It's the final detail that ensures your beautifully managed cables are just as functional as they are attractive.
Common Questions About Raceway Cable Management
Even the best-laid plans can hit a snag. When you're in the middle of a raceway cable management project, a few specific questions always seem to pop up. Getting ahead of these common hurdles will make your installation that much smoother.
Let’s tackle some of the most frequent questions we hear.
Can I Install Raceways on Textured or Brick Walls?
You absolutely can, but you'll need to ditch the adhesive tape. The self-adhesive backing that comes with most raceway kits is fantastic for smooth, flat surfaces like painted drywall, but it just can't get a proper grip on anything bumpy.
For textured plaster, brick, or concrete, your best friends are screws and wall anchors. Most raceway channels come with pre-drilled holes for exactly this reason. If you're going into brick or masonry, use a masonry bit to drill a pilot hole, pop in a wall anchor, and then drive the screw home. It creates a rock-solid mount that’s not going anywhere.
How Do I Cut Raceways for a Custom Fit?
A clean, precise cut is the secret to a professional-looking finish, especially when you need a piece to fit perfectly between a corner and a doorframe.
- For Straight Cuts: A fine-toothed hacksaw is your go-to tool. Pair it with a miter box to hold the raceway steady and guide the blade for a perfectly square cut every time.
- For Angled Cuts: When standard corner fittings won't do, a miter box is essential for creating custom 45-degree angles.
- A Quicker Option: If you do this often, miter shears—which look like beefy garden shears with an angle guide—can snip cleanly through most plastic raceways in seconds.
After any cut, take a moment to smooth the edge with a bit of fine-grit sandpaper. This tiny step ensures the raceway cover and any fittings snap on perfectly without a struggle.
Every DIY-er knows the golden rule: measure twice, cut once. Taking that extra second to double-check your measurement will save you from wasting a good piece of raceway.
What Is the Best Way to Hide Cables for a Standing Desk?
Standing desks are fantastic, but they create a unique cable management puzzle since they’re always on the move. A rigid raceway on the wall just won’t cut it for the cables that need to travel up and down with your desk.
The solution is a two-part strategy. First, mount a power strip directly to the underside of the desk. This is a total game-changer. It consolidates all your monitor, computer, and charger plugs into a single hub that moves with the desk. Now, you only have one power cord running from the desk to the wall.
Second, wrangle that single cord with a flexible solution. A braided cable sleeve or a vertical cable spine are both perfect for this. They bundle the cord neatly while providing the slack and flexibility needed to move with the desk, preventing snags or accidental unplugging. This approach keeps your setup looking incredibly clean and functional, whether you're sitting or standing.
At EVEO, we believe a clean and organized space is a more productive and enjoyable one. Our cable management solutions are designed to be simple, effective, and aesthetically pleasing, helping you conquer cable chaos for good. Explore our full range of products to create your perfect setup.
Your Ultimate Guide to TV Cable Cord Cover Installation
Your Guide to Choosing the Perfect Desk Mount VESA