Let's face it, that rat's nest of cables behind your entertainment center or home office desk is more than just ugly. It's a source of low-grade, constant stress and even a safety risk. Installing a cable raceway wall system is the single best way to fix it, transforming that chaotic jumble into a clean, professional-looking space. This is how you finally get that polished, finished look you've been after.
From Cluttered Chaos to Clean Serenity
This guide is about more than just hiding wires; it’s about reclaiming your environment. When you properly manage your cables, the impact on your daily life is surprisingly significant. It can boost your focus in a home office, protect your expensive electronics from getting snagged and damaged, and get rid of tripping hazards that are a real worry for families with kids and pets.
Why Cable Management Is No Longer Optional
The big shift to remote work has put a spotlight on our home office setups, and frankly, many of them are a mess. We've seen a 60% spike in home office setups since 2020, and with that comes a huge demand for solutions like wall raceways to keep workspaces functional and sane.
Think about it: disorganized wiring doesn't just look bad; it can increase the time you spend troubleshooting a tech problem by as much as 50%. That’s why in the commercial world, 70% of new builds now require raceways to meet safety and building codes—a smart practice we can easily bring into our own homes. If you're curious about the numbers, you can dive into more cable management market insights on skyquestt.com to see just how big this trend has become.
Let's quickly break down the most significant advantages you'll see right away.
Immediate Benefits of a Cable Raceway System
A quick look at the major advantages you'll gain by organizing your cables with a wall-mounted system.
| Benefit | Impact on Your Space | Key Product Feature |
|---|---|---|
| Enhanced Aesthetics | Replaces distracting visual clutter with a clean, minimalist look. | Paintable surfaces allow the raceway to blend seamlessly with your wall color. |
| Improved Safety | Protects cords from pets, kids, and vacuum cleaners while eliminating tripping hazards. | The durable, enclosed channel keeps wires completely out of harm's way. |
| Simplified Maintenance | Makes accessing, adding, or removing cables a quick and painless task. | Easy-to-open latching or snap-on covers provide instant access when needed. |
These benefits aren't just minor improvements; they fundamentally change how you interact with your space.
Key Takeaway: A cable raceway system is far more than a cosmetic fix. It’s a practical upgrade that protects your expensive gear, improves home safety, and brings a welcome sense of order to your most important rooms.
Brands like EVEO have really leaned into making this process straightforward, turning what seems like a complex job into a simple weekend project. We're going to show you how their user-friendly kits—which come with everything from strong adhesive tape to a variety of connectors—give you the power to get a pro-level result without the pro-level price tag. By the time you finish this guide, you'll have all the knowledge and confidence you need to create that perfectly clean setup.
Choosing the Right Cable Raceway for Your Project
Picking the perfect cable raceway isn’t a one-size-fits-all deal. It's really about matching the product to your specific setup, and making the right choice upfront will save you a ton of headaches later. The best-looking, most professional results always start with a little bit of planning before you even think about buying anything.
First, take a hard look at what you’re trying to hide. Are you just trying to neaten up a single, thin speaker wire running along the baseboard? Or are you wrangling that thick, messy bundle of HDMI, power, and ethernet cables dropping down from your wall-mounted TV? The number and thickness of your cables are the biggest factors in figuring out what size raceway you’ll need.
I’ve seen it a hundred times: people underestimate how much space their cables actually take up. Always, and I mean always, get a raceway with a bit more room than you think you need. That little bit of extra space makes feeding the cables in so much easier and gives you breathing room to add another wire later without tearing everything off the wall.
Figuring Out What You Really Need
Before you click "add to cart," take a second to actually measure the cables you plan on hiding. An old pro-tip is to bundle them all together with a zip tie or a velcro strap, then just measure the thickest point of the bundle. That simple measurement tells you exactly what kind of internal capacity you should be looking for in a cable raceway wall kit.
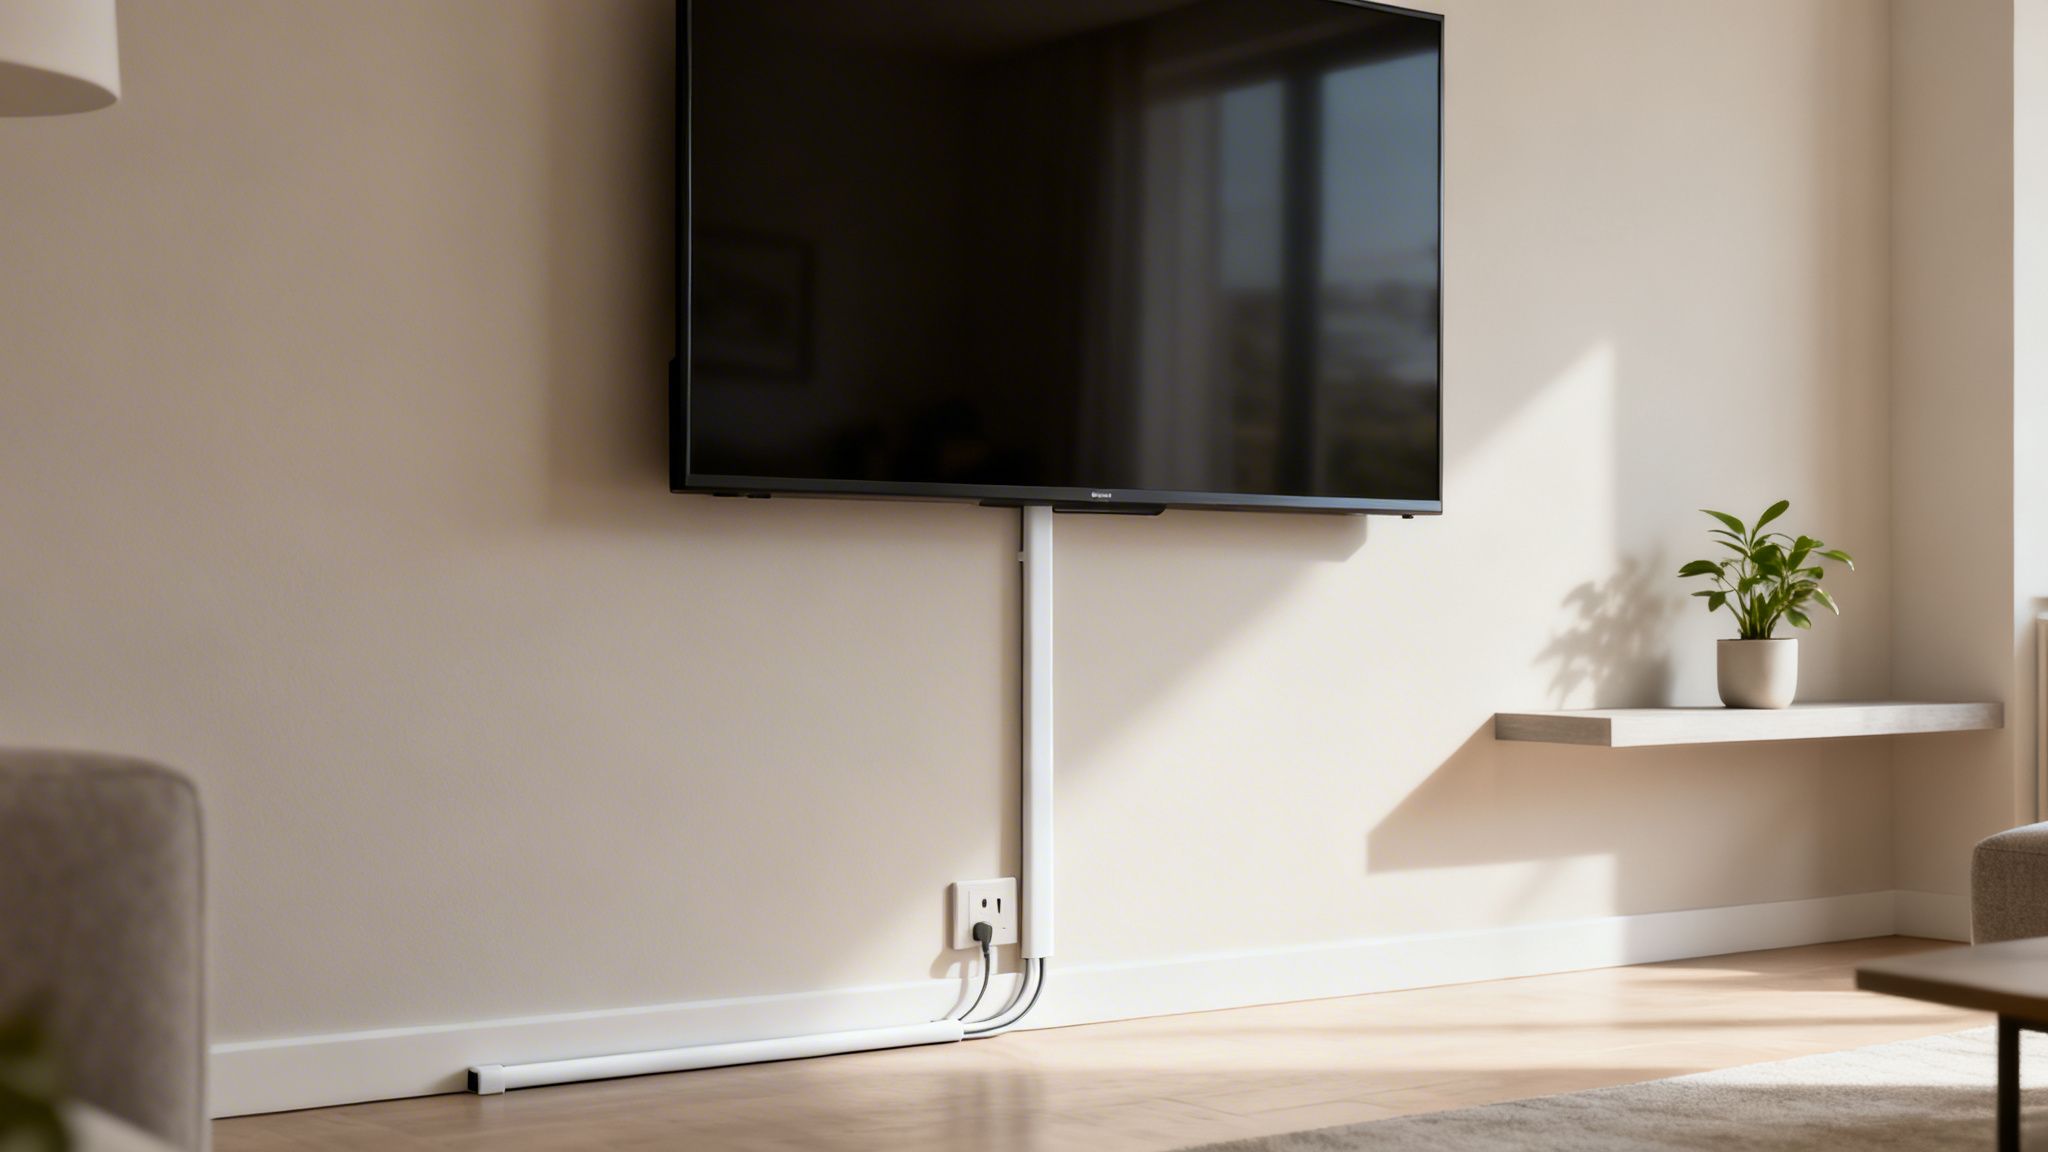
The room and setup matter just as much. For a home office with one of those cool sit-stand desks, a J-channel raceway you can mount right under the desktop is a game-changer. Its open-top design is perfect for quickly adding or removing cables for new gadgets. But for a more permanent installation, like an entertainment center, a latching raceway like the EVEO Cord Hider Kit is the way to go. It offers complete, secure concealment, and you can even paint it to disappear into your wall.
And this isn't just about making things look tidy; it's a serious safety issue. In commercial buildings, messy, disorganized cables are a factor in a shocking 40% of electrical fires. Raceways help bring that risk way down by keeping wires protected and organized. It's a major reason why the global cable management market is booming, expected to jump from $19.65 billion in 2022 to over $31.57 billion by 2031. For a deeper dive into this trend, you can explore detailed cable management market reports on mordorintelligence.com.
Matching the Raceway Type to the Job
Different projects demand different raceway styles. Getting to know the main types is key to achieving that clean, intentional, and polished look you're after.
Which Raceway Type Is Best for Your Setup?
To help you decide which raceway is the right tool for your specific project, here’s a practical comparison of the most common options available.
| Raceway Type | Best For | Key Feature | Common Use Case |
|---|---|---|---|
| Latching Raceway | Wall-mounted TVs, home office setups. | Hinged cover for easy access to add or remove cables. | Hiding multiple AV cables from a TV to a media console. |
| J-Channel | Underneath desks, behind furniture. | Open-top 'J' shape for quick cable drops and changes. | Perfect for adjustable sit-stand desks. |
| Corner Duct | Running cables vertically or along ceilings. | Triangular profile fits snugly and discreetly into corners. | Ideal for surround sound speaker wires. |
| Quarter Round | Hiding cables along baseboards and flooring. | Blends seamlessly with existing floor molding for a hidden look. | Great for home theater systems and lamp cords. |
Each of these has its place, and choosing the right one will make your installation look like it was done by a professional.
One last thing—don't forget about local regulations. It's always a good idea to make sure your raceway and installation methods are up to code. For safety and peace of mind, familiarize yourself with standards like the Australian electrical wiring standards or whatever is applicable in your region. It’s a small step that ensures your project isn't just clean, but completely safe and compliant.
Installing Your Wall Raceway Like a Professional
Alright, this is where the magic happens. Turning that plan into a clean, professional-looking installation is incredibly satisfying, and I'll share a few tips I've picked up over the years to help you nail it on the first go. It really just comes down to good prep work and using the right technique for your wall.
First things first, let's get our tools together. You don't need a pro-grade workshop for this. Just grab a tape measure, a pencil, a level (seriously, don't skip the level), and something to cut the raceway. A fine-toothed handsaw and a little miter box are your best friends here.
Now, for a step most people rush through: prepping the wall. Before you even think about peeling off an adhesive backing, wipe down the entire path where the raceway will go. A clean, dry cloth gets rid of dust. If you're working in a kitchen or notice any greasy spots, a quick wipe with some isopropyl alcohol on a rag makes a world of difference. A clean surface is absolutely critical for a bond that lasts.
To Stick or to Screw? Choosing Your Mounting Method
Modern raceway kits give you two main options for installation. The best one for you really depends on your walls and how permanent you want this setup to be.
- Self-Adhesive Tape: This is the quick-and-easy route, and it's perfect for smooth, painted drywall. It's surprisingly strong and completely tool-free, but you'll want to be pretty sure about your placement before you commit.
- Screws and Anchors: If you're dealing with textured walls (think "orange peel" or plaster), brick, or concrete, screws are the only way to go. It’s a bit more work upfront, but you get a rock-solid mount that will never, ever budge.
Here’s a little hybrid approach I often recommend for renters or anyone with lightly textured walls: use the adhesive tape to get everything positioned perfectly, then pop a single screw into an anchor at the very end of each raceway piece. It adds a ton of security without turning your wall into Swiss cheese.
My Go-To Tip: When using the adhesive backing, don't just stick it on and move on. Once a section is on the wall, press down firmly along its entire length for at least 30 seconds. This simple action forces the adhesive to make full contact, creating a much stronger initial bond that's less likely to fail later.
Nailing the Installation Details
With the wall prepped and your mounting method decided, it's time to map it out. Use your level and a pencil to draw a very light, straight line where the raceway will sit. This guideline is the secret weapon against a crooked, sloppy-looking job.
When you get to a point where you need to cut a piece to size or go around a corner, always remember the old rule: measure twice, cut once. A miter box is fantastic for getting perfect 45-degree angles that make your corners look seamless. For a simple straight cut, that fine-toothed handsaw will give you a clean edge without cracking the plastic.
Once your raceway tracks are mounted, it's time to run the cables. The key here is not to overstuff the channel. A raceway that's packed too tightly will make the cover bulge or pop right off. Lay your cables in neatly, then start at one end and begin snapping the cover into place. You’ll hear a nice, satisfying click as it locks in.
This simple visual breaks down the selection process, which is the foundation for a great install.
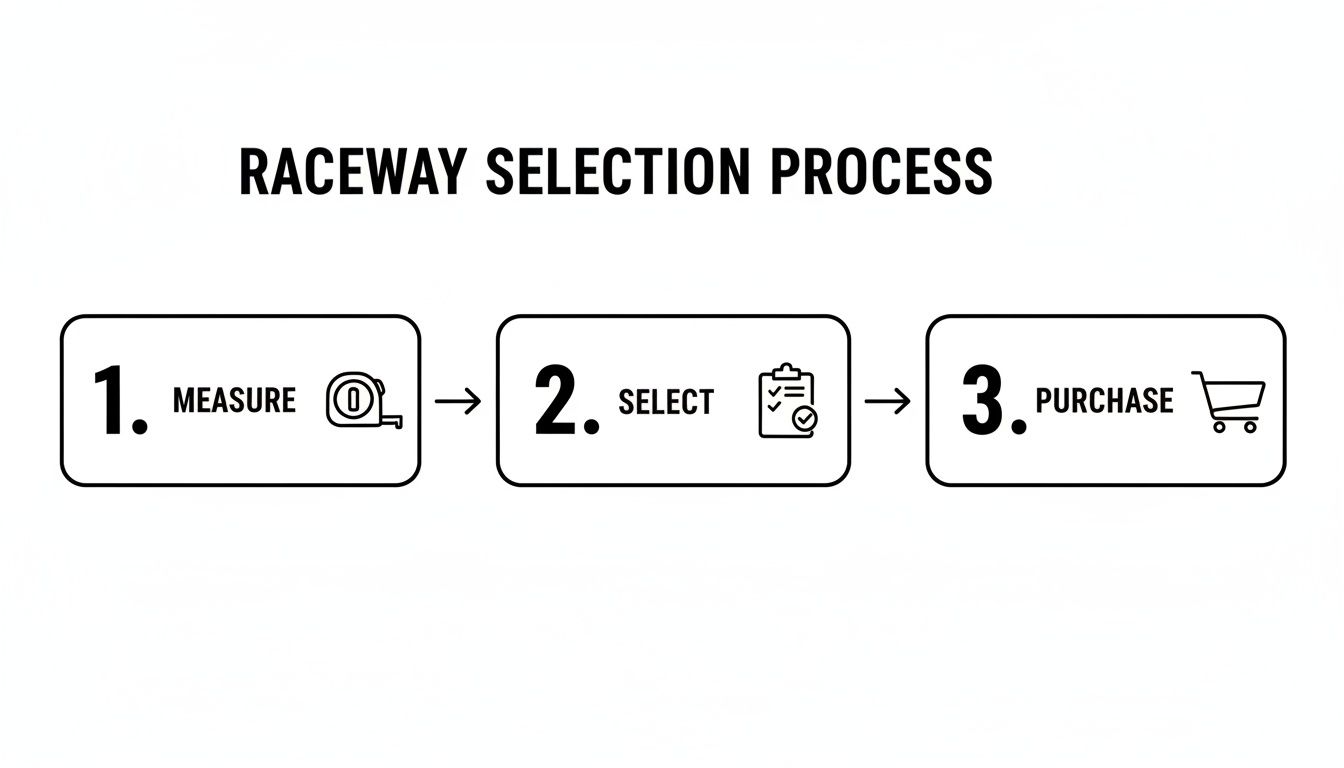
As the graphic shows, a successful project starts long before you stick anything to the wall. For a deeper dive into the hands-on techniques of securing and routing, this electrical conduit installation guide has some great professional tips that translate perfectly to setting up a wall raceway. For another take, you can also check out our own guide on finding the right cable organizer for your wall. Follow these steps, and you'll end up with a setup that not only looks fantastic but is secure and functional for years.
Advanced Techniques for a Flawless Finish
Sure, a standard installation gets the wires out of sight. But a great installation makes the raceway itself disappear right into the wall. This is where we go beyond the basics and get into the finishing touches that take your project from a quick DIY fix to something that looks professionally done.
The biggest game-changer is paint. Most raceways come in a basic white, but they’re almost always designed to be painted. This is your ticket to matching your wall color perfectly, turning that plastic channel into what looks like a piece of custom architectural trim.
Painting Your Raceway for a Seamless Look
To get a finish that lasts, you can't just slap wall paint directly onto the plastic. Trust me, it won't stick well and will end up chipping off down the road. A little prep work makes all the difference.
Here’s how to do it right:
- Scuff the Surface: Grab some fine-grit sandpaper—220-grit is ideal—and give the raceway cover a light sanding. You're not trying to grind it down, just roughing up the surface so the primer has something to bite into.
- Prime It First: This is the most critical step. Use a spray primer made specifically for plastics. One light, even coat is all you need to create a surface your paint will actually bond to.
- Apply Your Wall Paint: After the primer has dried completely, go ahead and paint. Two thin coats will always look better and provide more even coverage than one thick, globby one.
It’s a small bit of extra effort, but the payoff is huge. The raceway just melts into the wall, becoming practically invisible.
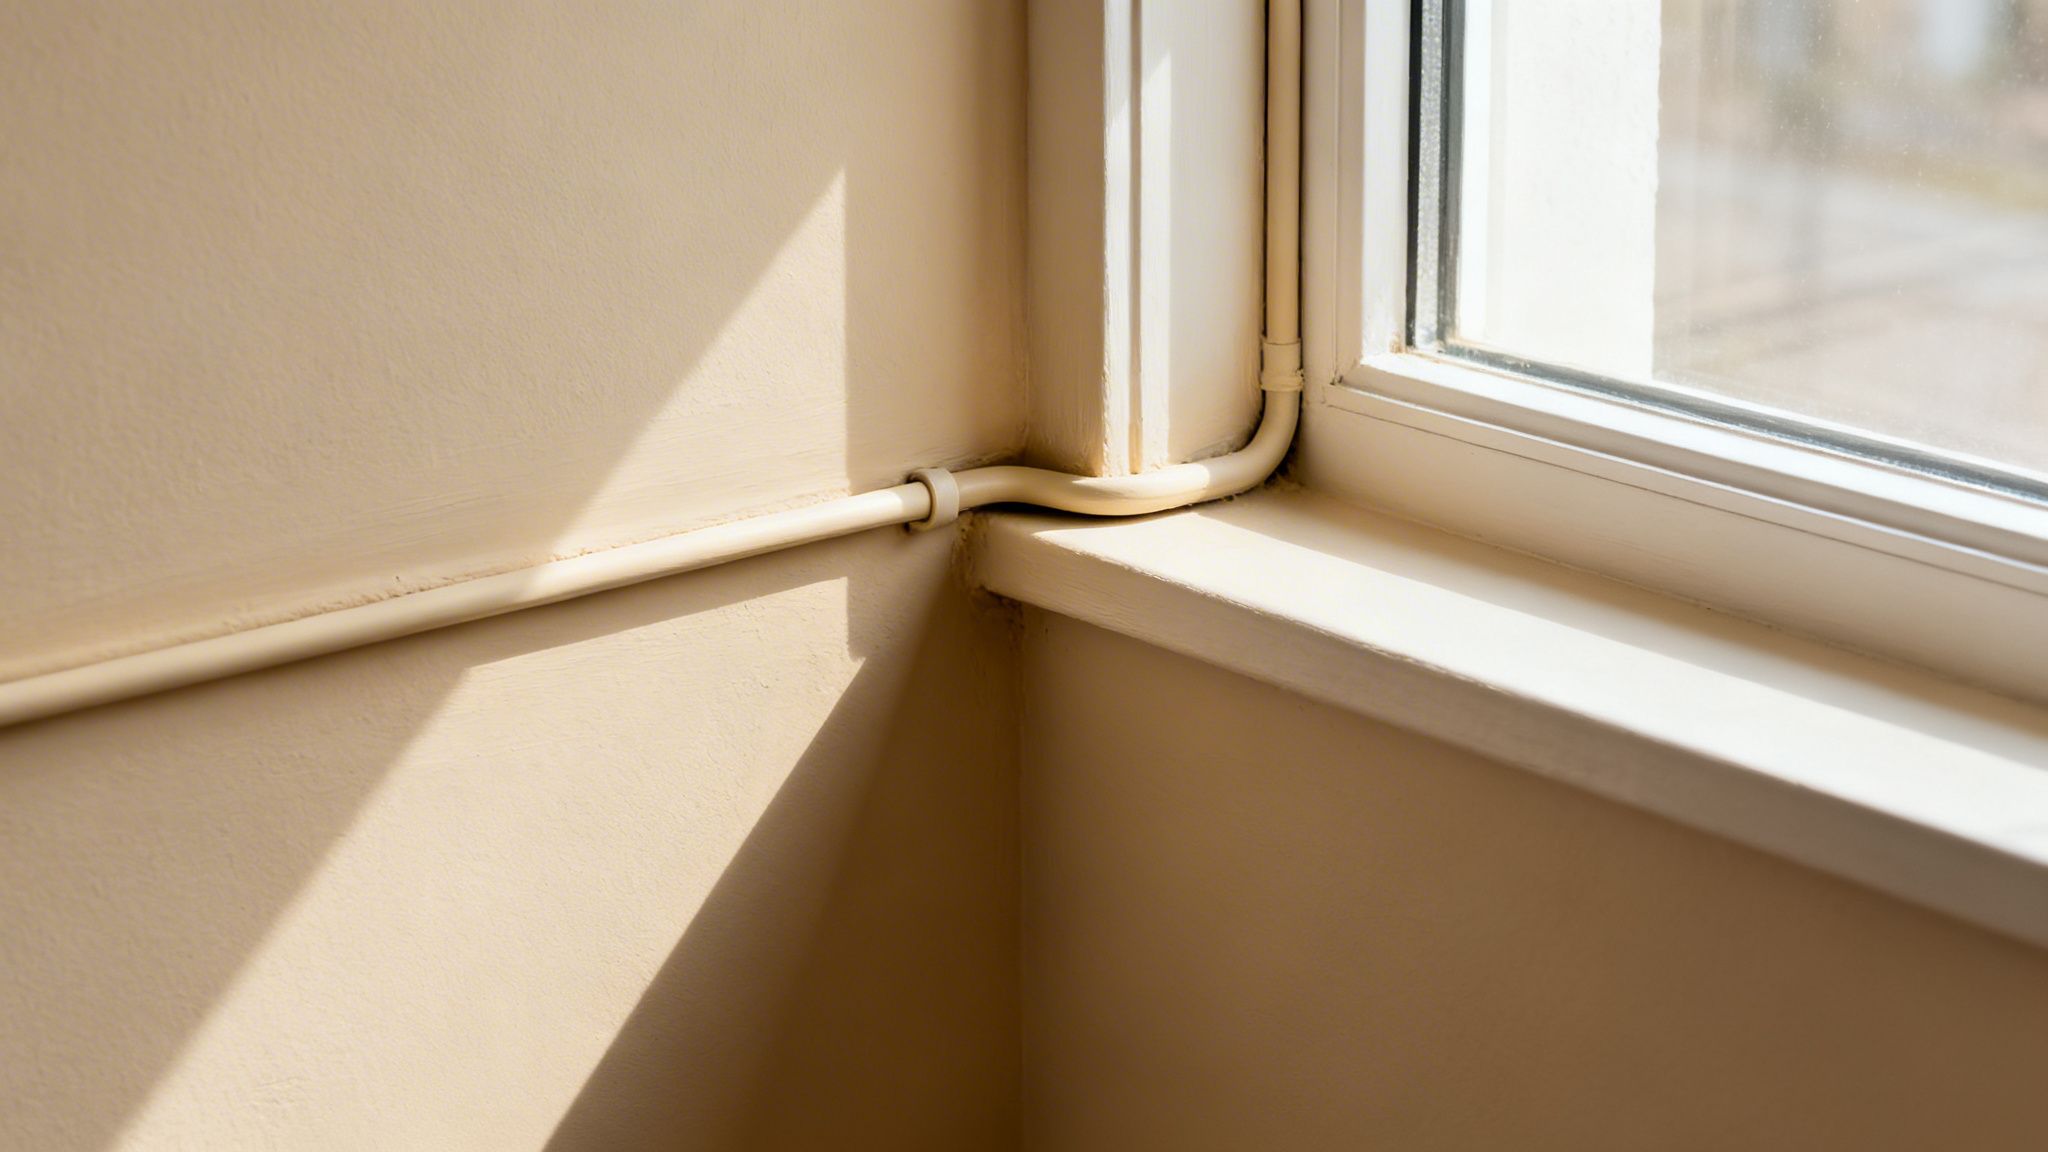
Mastering Obstacles and Seams
A pro-level installation looks like one continuous piece, flowing smoothly around corners and obstacles. The secret is using the specialized connectors that come in comprehensive kits, like the ones from EVEO. It's no surprise that the market for things like cable raceway inside corners is expected to reach $2.17 billion by 2030—everyone wants that clean, seamless look. You can read more about the growth of these components on einpresswire.com.
My Favorite Pro Tip: To make the raceway look truly built-in, run a thin bead of paintable caulk along the top edge where it meets the wall. Smooth it with a wet finger and wipe away the excess. Once you paint over that, the seam completely vanishes. It's a simple trick that eliminates any gaps or shadows, making the raceway look like a permanent part of the room.
When you combine a perfect paint job with the smart use of connectors and a little bit of caulk, your cable management stops being just a functional fix and becomes a thoughtful design element. For more inspiration on getting that polished look, check out our guide to choosing the perfect TV cable cord cover.
Common Installation Mistakes to Avoid
Even with a project as straightforward as installing a cable raceway wall system, a few common slip-ups can turn a clean, professional-looking job into a frustrating mess. I've seen it happen time and again. The good news is that knowing what to watch out for ahead of time is half the battle.
The number one mistake I see is overloading the raceway. It's so tempting to try and jam "just one more cable" in there, but this is a recipe for disaster. When you overstuff the channel, the cover simply won't snap on securely. This either leaves you with unsightly gaps or a cover that pops right off the wall a few hours later. Always pick a raceway that gives your cables a little breathing room.
Another classic error is skipping the prep work. That adhesive tape on the back of most kits is impressively strong, but it's not magic—it needs a clean, dust-free surface to grab onto. Simply wiping the wall down with a dry cloth or a little isopropyl alcohol takes less than 60 seconds, but it makes all the difference for a bond that lasts. Neglecting this is the main reason I hear about raceways peeling off the wall.
Rushing the Planning and Measurement
People get so excited to hide the wires that they just start cutting and sticking pieces to the wall without a real plan. This almost always leads to crooked lines, mismatched corners, and a lot of wasted raceway. Before you even think about cutting, grab a level and a pencil and map out the entire route.
Planning ahead lets you see where you'll hit obstacles or need specific connectors for turns. And please, remember the old carpenter's adage: measure twice, cut once. It’s especially critical when you're trying to get those clean 45-degree angles needed for a seamless corner.
Key Takeaway: A lack of planning is the source of most installation headaches. Spending just ten minutes to measure, mark your path with a level, and lay out the pieces before you stick them down will save you from a crooked, amateur-looking finish.
Here are a few other common missteps I've seen over the years:
- Ignoring Wall Texture: Relying solely on adhesive for heavily textured walls is a big gamble. The tape can't get a solid grip, which almost guarantees it will eventually fail. If your wall has anything more than a light "orange peel" texture, you really need to use the included screws and anchors for a secure, permanent mount.
- Applying Uneven Pressure: When you're using the adhesive backing, don't just give the raceway a quick tap. You need to apply firm, steady pressure along the entire length of the piece for at least 30 seconds. This is what activates the adhesive and ensures it bonds properly with the wall surface.
- Forgetting About the Future: Think beyond today's cable clutter. If there's even a small chance you might add a new gaming console or a soundbar down the road, run that extra HDMI or Ethernet cable now while the raceway is open. It’s a thousand times easier than having to pull everything apart in six months.
Got Questions About Wall Raceways? We've Got Answers.
Even the best-laid plans can hit a snag. When you're in the middle of a project, questions always come up. Here are some of the most common things people ask when they're installing a cable raceway on a wall for the first time. Let’s clear up those last-minute details.
Can I Install a Cable Raceway on a Textured Wall?
Absolutely, but you have to choose your mounting method wisely. If you're working with a heavily textured surface—think plaster, stucco, or knockdown drywall—go straight for the screws and anchors.
The adhesive backing needs a smooth, flat surface to get a really solid grip. On a textured wall, there just isn't enough surface contact for the adhesive to bond properly, and it could fail over time. Screws, on the other hand, provide a solid mechanical anchor that isn't going anywhere.
How Do I Add or Remove a Cable Later On?
This is one of the best features of modern raceway kits. They're built for changes. Most designs have a simple snap-on cover that you can gently pry off the base channel, even after it's firmly mounted to the wall.
This gives you easy access to add that new speaker wire, pull out an old ethernet cable, or just reorganize everything. When you're done, the cover just clicks right back into place. Your setup can evolve right along with your tech.
Pro Tip: When you first run your cables, leave a little extra slack inside the raceway near the ends. That bit of wiggle room is a lifesaver when you need to unplug something or shift a device without having to pull the entire cable taut.
Will the Adhesive Wreck My Walls If I Need to Remove It?
A little bit of heat is your best friend here. If you need to take down the raceway, grab a hairdryer and set it to low or medium. Gently warm up the entire length of the plastic track.
This softens the adhesive, making it much easier to slowly peel the raceway off the wall without taking the paint with it. If any sticky stuff gets left behind, you can usually roll it off with your thumb or use a paint-safe adhesive remover to clean it up.
What’s the Best Tool for Cutting PVC Raceways?
For professional-looking results, nothing beats a fine-toothed handsaw and a miter box. This setup is the secret to getting those perfect 45-degree angles you need for clean corners that line up seamlessly.
If you're just making straight cuts, you have a few good choices:
- A fine-toothed handsaw will always give you a clean, straight edge.
- Heavy-duty utility shears can work in a pinch for a quick snip.
- Dedicated PVC cutters (like the kind plumbers use) deliver a perfect, crush-free cut every time.
Whatever tool you pick, just remember the old carpenter's rule: measure twice, cut once.
Ready to finally hide those wires? The EVEO Cord Hider Kit comes with everything you need—from all the right connectors to both adhesive and screw mounting options—to get that clean, polished look. Explore our cable management solutions at eveo.store and start your project today.
How to Organize Computer Cables for a Clutter-Free Workspace
How to Organize Desk Cables for a Clean and Productive Workspace