
A wall cable organizer is a simple but brilliant system—usually a channel or raceway—that you mount right on your wall to hide and route all those messy wires. It’s the secret to turning that chaotic "wire spaghetti" behind your desk or TV into a clean, safe, and professional-looking setup. No more trip hazards, no more visual clutter.
The Real Benefits of Wall Cable Management
Let's be honest, tangled cords are more than just ugly. They're a quiet drain on your focus, a safety risk, and they can even shorten the lifespan of your electronics. A good wall-mounted cable organizer does so much more than just make things look pretty; it genuinely improves your daily life. It’s all about creating an environment where you can actually work and relax without the constant, nagging visual noise of clutter.
This guide is your roadmap to getting that pro-level, organized space. It's easier than you think with the right tools and a few smart techniques.
Boosting Productivity and Focus
Visual distractions are a killer for concentration. When your workspace is free from a web of tangled wires, it creates a calmer, more orderly vibe that directly helps you focus better. A clean setup leads to a clear mind, letting you dive into your work without the low-grade stress of a messy desk.
The demand for these solutions is booming for a reason. The global cable management market is expected to jump from USD 19.65 billion to USD 31.57 billion by 2031. Why? Because people are realizing it works. Ergonomic studies even suggest that a clean desk can boost productivity by as much as 20%—a pretty compelling reason to finally tackle that cord chaos.
Enhancing Safety and Protecting Your Gear
Loose cables snaking across the floor are a huge trip hazard, especially for family, pets, or anyone walking through your office. Securing them inside a wall-mounted channel gets rid of that risk completely, making your space instantly safer for everyone.
A tidy charging station isn’t just about looks. Proper cable management offers several practical benefits, from preventing tripping hazards to protecting the cables and connectors themselves from damage over time.
Beyond safety, consider your equipment. Tangled cords get strained, bent at sharp angles, and can even build up excess heat. All that leads to premature wear and tear or, worse, electrical failures. By routing them properly, you’re not just cleaning up; you’re protecting your expensive gear and making sure your chargers and power cords last longer. To really get it, it helps to understand all the cable management benefits that come with a tidy setup.
How to Map Out Your Perfect Cable Layout
A sloppy installation almost always starts with no plan. Before you even think about drilling a hole or peeling off an adhesive backing, taking 15 minutes to map out your cable routes will save you hours of frustration later. Trust me, this little bit of prep work is the secret to getting that clean, professional look you're after.
First thing's first: take a complete inventory of every single device you need to connect. It’s easy to remember the big stuff, but the smaller peripherals are what really create the clutter.
- Primary Devices: TV, computer monitors, desktop tower, gaming consoles.
- Audio/Video: Speakers, soundbar, microphone, webcam.
- Peripherals: Docking station, external hard drives, USB hubs.
- Power & Charging: Power strips, phone chargers, laptop adapters.
Once you have your list, you'll know exactly how many cables you’re trying to hide. No guesswork needed.
Sketching Your Cable Path
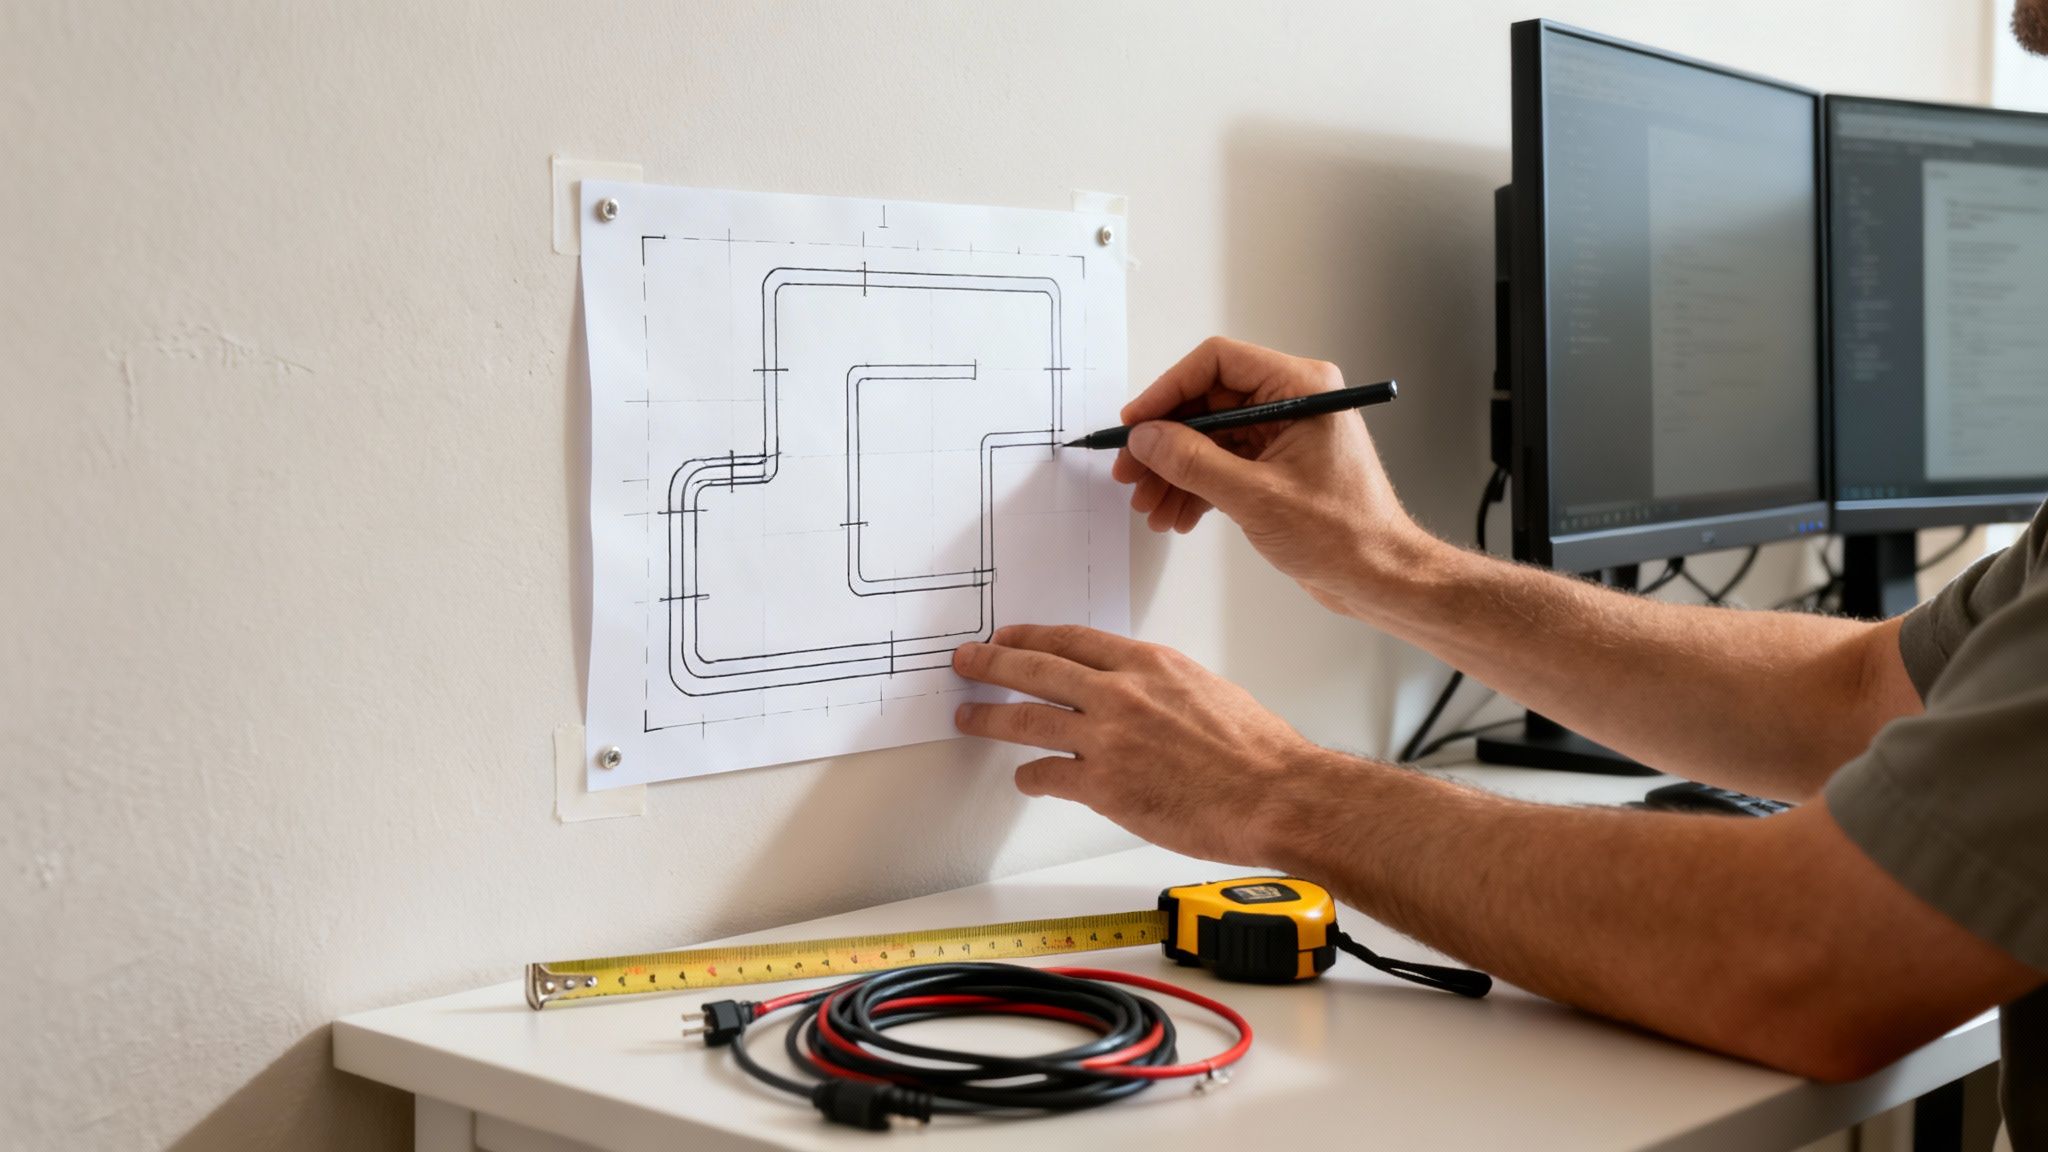
Okay, now it's time to visualize the journey each cable will take from the outlet to its device. The goal here is to find the shortest, most discreet path possible. Grab a pencil and some painter's tape and literally mark out a rough sketch on the wall.
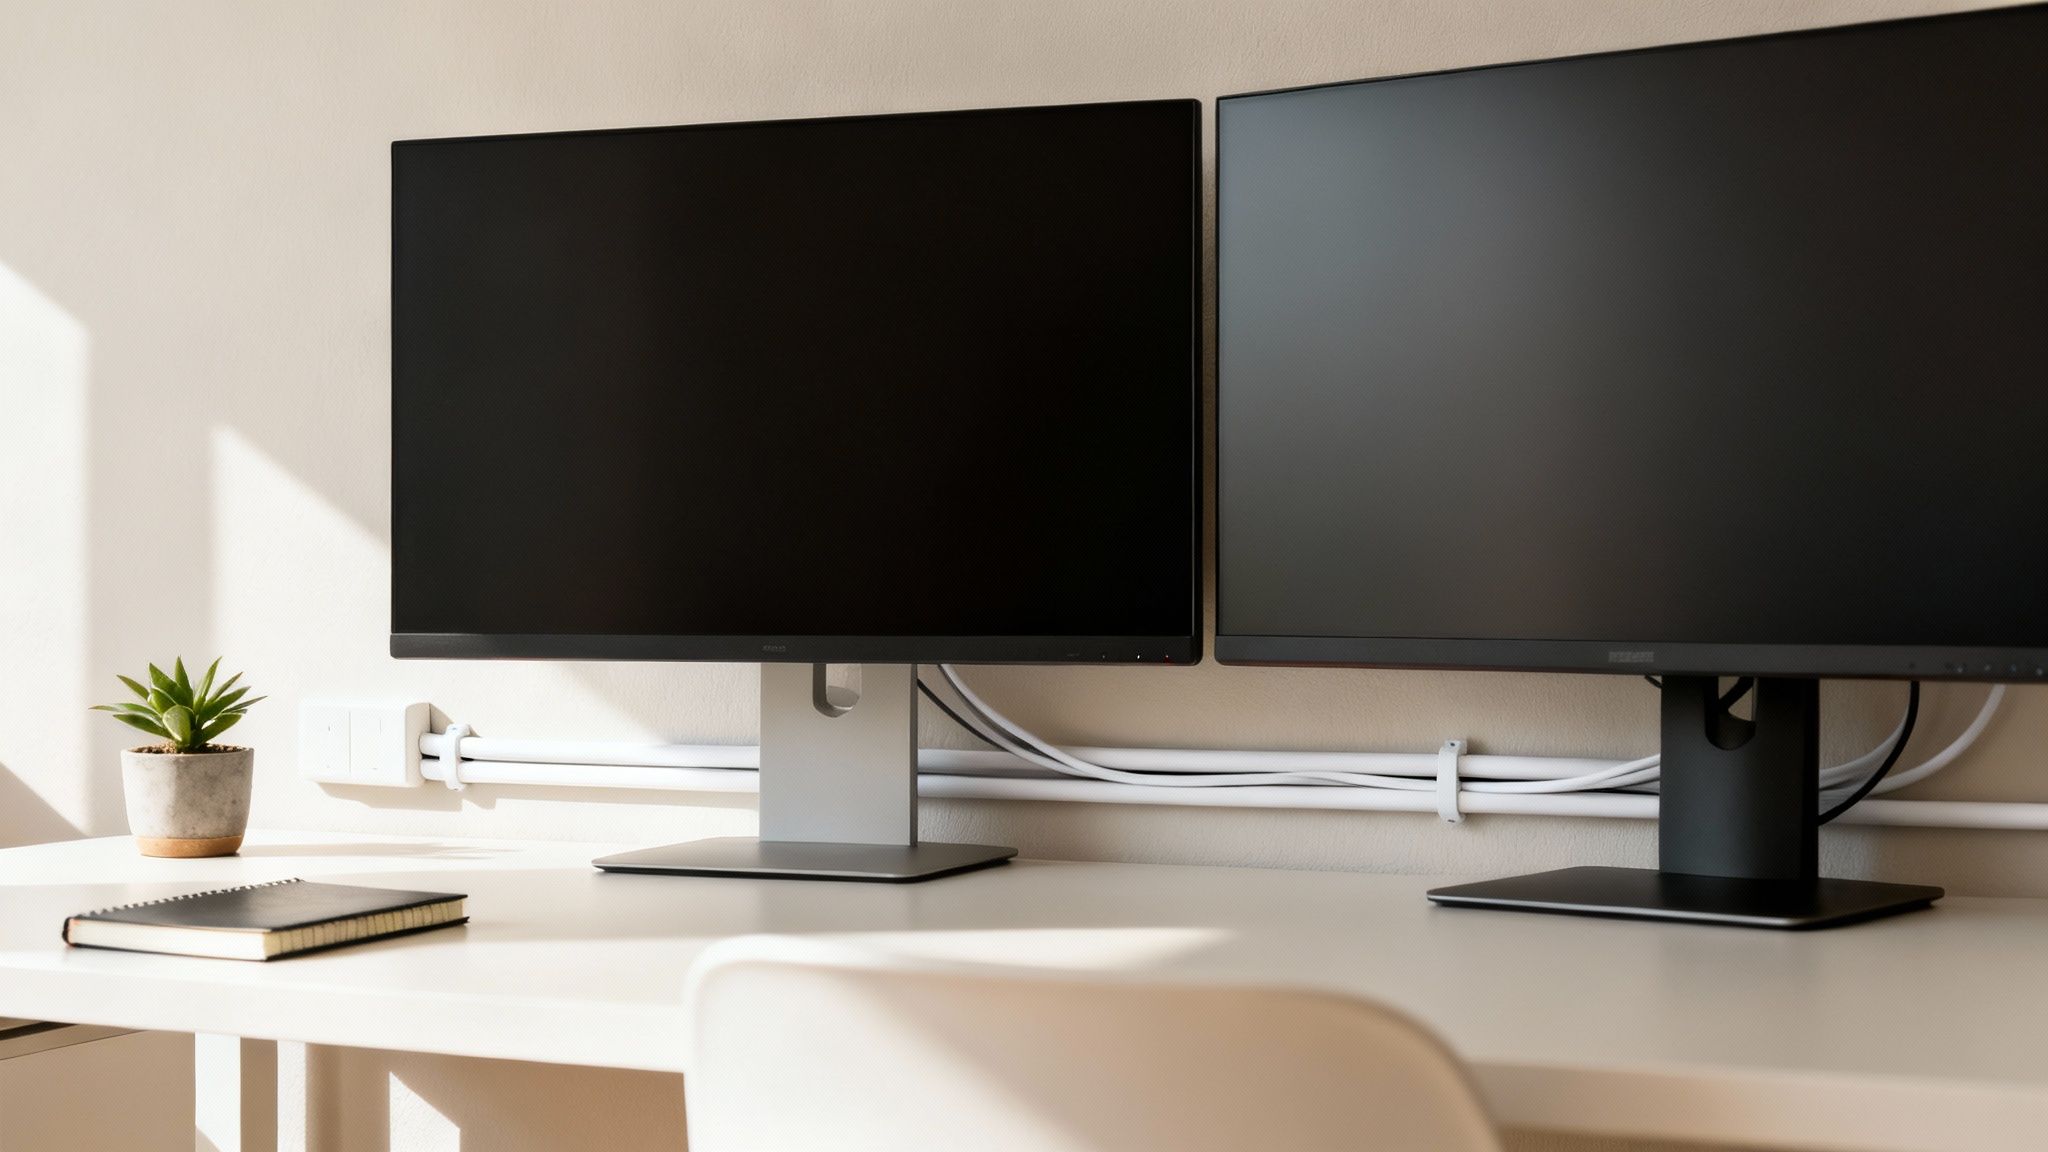
This simple step helps you spot potential problems early on, like realizing your path crosses a wall stud or ends up in a weird, visible spot. For a dual-monitor setup, you might run one central raceway up from the power strip, then branch it into two smaller channels leading to each monitor. While this guide is all about wall setups, you can get a great foundation from this helpful guide to organizing desk cables.
Pro Tip: When you're measuring for raceways or channels, always add an extra 10-15% to your measurement. This gives you a little wiggle room for cutting and ensures you have enough length to navigate around corners without coming up short.
Measuring for Success
With your path all mapped out, it’s time to get precise. Use a flexible tape measure to get the exact length needed for each section of your raceway. But here’s the part people often forget: you also need to measure the bundle diameter of the cables that will go inside.
Gather the specific cords for one channel, hold them together like you're making a bouquet of wires, and measure their combined thickness. This number is critical for picking a raceway that’s actually big enough. A classic rookie mistake is buying a channel that’s too slim, forcing you to cram wires in—which looks terrible and can damage your cables. Always choose a size that gives your cables a little breathing room. This foresight is what separates a frustrating project from a flawless one.
Picking the Right Organizer and Mounting Method
Choosing the perfect cable organizer for your wall isn't a one-size-fits-all deal. You have to think about your specific setup. A clean, minimalist TV display has totally different needs than a home office battle station with multiple monitors and a dozen peripherals. The choice you make here—especially on how you mount it—is going to define how secure and long-lasting your whole project is.
Think of it like picking the right tool for the job. If you've just got a few thin cables running from a wall-mounted TV, a simple, slim single-channel raceway is perfect. It's discreet and does what you need it to. But for a desk setup with a PC tower, two monitors, speakers, and a mess of charging cables, a larger J-channel organizer gives you way more room and flexibility. You can add or pull cords out later without having to pry a cover off.
Organizer Types Explained
The two main solutions you'll run into are raceways and J-channels. Each one is built for a different purpose.
-
Single-Channel Raceways: These are the fully enclosed, two-piece channels—a base that sticks to the wall and a cover that snaps right on top. They hide everything completely, which is ideal for highly visible areas. The EVEO Cable Management Kit is a classic example, giving you a clean, contained path for your wires.
-
J-Channel Organizers: Just like the letter "J," these are open-topped channels. This design lets you easily drop wires in or take them out, making them perfect for desks where you're constantly swapping devices. They don't hide the cables quite as well, but they offer unbeatable flexibility.
If you want to get into the nitty-gritty of different styles, check out our guide on raceway cable management solutions. Knowing the little differences will help you make a much better choice.
Adhesive Tape vs. Screws
This is the big decision. The mounting method you pick really depends on your wall type, how heavy the cables are, and whether you're renting or you own the place. Getting this right is what makes an installation last.
Cable conduits and raceways are getting more popular for a reason—the market is set for a 5.5% CAGR, largely because of stricter safety rules in both homes and businesses. It's a serious issue. Badly managed cables are linked to 25% of electrical fires each year, which really drives home why a secure mounting method matters. The demand is especially high in places like healthcare, where good cable management can cut down on clutter by 40%, making spaces safer and more efficient. You can read more about these market trends on straitsresearch.com.
Choosing between adhesive and screws isn't just about what's easier. It's about matching the method to your wall's material and the load it will carry. That’s how you get a setup that's both clean and structurally sound.
To make things simpler, let's break down what each mounting method is good for.
Mounting Method Showdown: Adhesive vs. Screws
Deciding between adhesive tape and screws comes down to balancing ease of installation with long-term security. Here’s a quick comparison to help you figure out what's best for your walls and your cable load.
| Feature | Adhesive Tape Mounting | Screw Mounting |
|---|---|---|
| Best For | Smooth, painted drywall; wood; metal surfaces. Ideal for renters. | Drywall, plaster, brick, concrete. Best for long-term or heavy-duty use. |
| Weight Capacity | Lower. Best for lightweight cables like USB, HDMI, and speaker wires. | Higher. Can easily support thick power cords and large cable bundles. |
| Installation | Quick and easy peel-and-stick application. No tools required. | Requires a drill, screws, and potentially wall anchors. More effort involved. |
| Wall Damage | Minimal to none, but can sometimes peel paint upon removal if not done carefully. | Creates permanent holes in the wall that will need to be patched later. |
Ultimately, adhesive is fantastic for quick, damage-free projects with light cables. But if you're wrangling heavy power cords or want a permanent, rock-solid installation, you can't beat the reliability of screws.
Your Guide to a Flawless Installation
Alright, you've got your plan and you've picked out the perfect organizer. Now for the satisfying part: the actual installation. This is where the vision of a clean, clutter-free space finally comes to life. We'll walk through it so you can get a secure, professional-looking finish with total confidence.
The real key here is to be methodical. Rushing the installation is how you end up with crooked raceways or messy cuts. Just think of it as a rewarding weekend project, not a race against the clock.
Prepping Your Wall Surface
Before a single piece of adhesive or a screw touches your wall, proper prep is non-negotiable. A clean, smooth surface is absolutely essential for a strong bond, especially if you're using an adhesive-backed cable organizer wall solution. Any dust, grease, or grime will keep that tape from sticking, and it'll eventually fail on you.
Start by wiping down the entire path you marked out with a clean cloth and some isopropyl alcohol. The alcohol is perfect because it cuts right through any oils and evaporates quickly without leaving residue behind. Just give it a few minutes to dry completely before you do anything else.
Cutting and Fitting the Raceway
Unless you get incredibly lucky, the raceway channels aren't going to be the perfect length right out of the box. You'll need to cut them to size. The goal is to get a clean, straight edge that will sit perfectly flush against other pieces or end neatly.
- Grab the Right Tool: A fine-toothed hacksaw or a miter box saw is your best friend here—it'll give you the cleanest cut. A utility knife can work on thinner plastic, but it often leaves a rough, uneven edge that just doesn't look professional.
- Measure Twice, Cut Once: It's an old saying for a reason. Double-check your measurements against the lines you marked on the wall before you even think about cutting.
- Smooth the Edges: After a cut, you'll probably have some small plastic burrs. A small file or a piece of fine-grit sandpaper is all you need to gently smooth the edge for a perfect, seamless fit.
This simple flow chart really breaks down the process to get you to this point—it all comes down to planning, choosing, and then mounting.
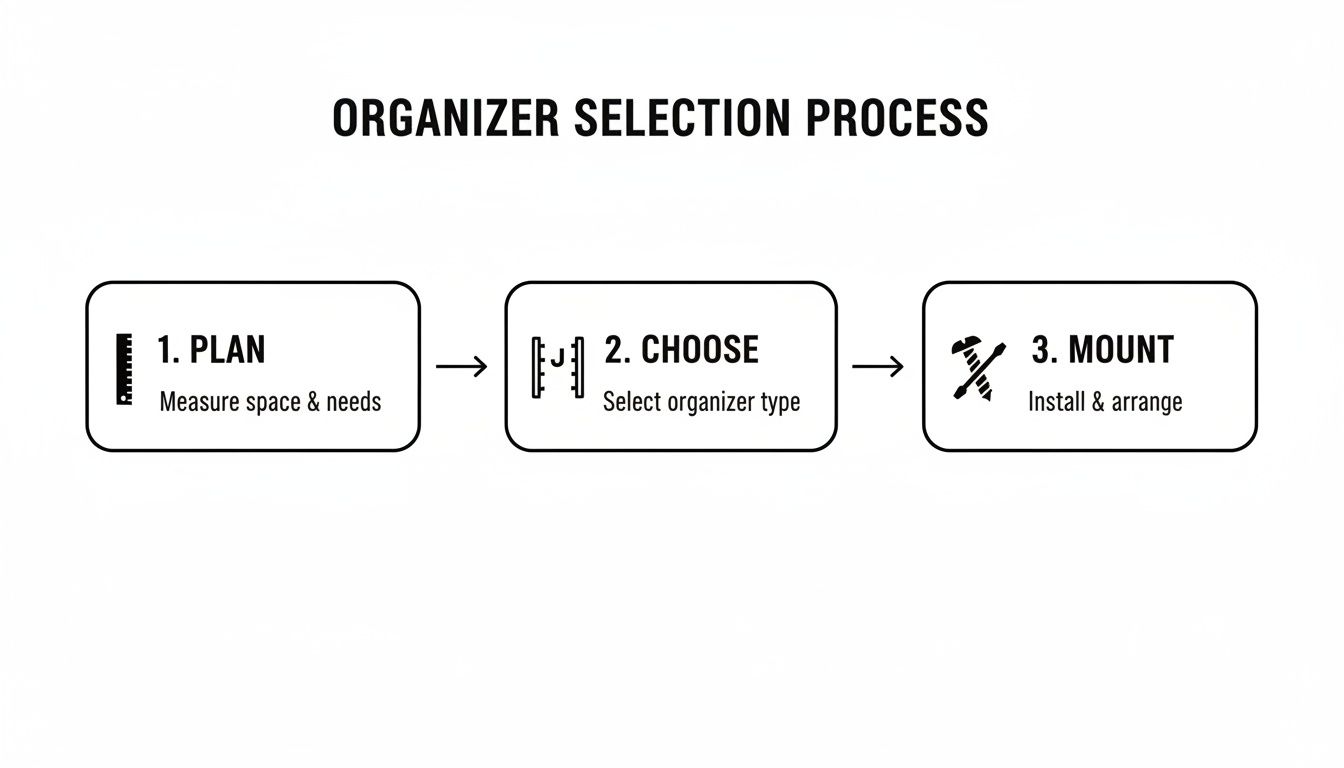
It’s a great reminder that a successful installation is always the result of good planning and picking the right gear for the job.
Mounting and Routing the Cables
It’s go-time. Let's get that raceway base on the wall. If you're using screws, grab a level to make sure the channel is perfectly straight before drilling your pilot holes. If you're going with adhesive, just peel back a small section of the backing, press it firmly against the wall, and then slowly peel the rest off while pressing down along the entire length.
Pro Tip: When you start feeding cables into the channel, put the thickest ones in first, like your power cords. Lay them flat on the bottom. Then, you can place the thinner data and audio cables on top. This keeps everything neat inside the channel and stops smaller wires from getting pinched or tangled.
Once the base is secure, carefully lay your cables inside. Feed them one by one to avoid creating a new knot of wires inside the raceway. Always leave a little slack at both ends—just enough so your devices can move slightly without yanking on the connectors. For TV setups, having that extra length is a must, and you can learn more in our deep-dive guide on how to handle a TV cable cord cover installation.
Finally, snap the cover onto the base. You should hear a satisfying click as it locks in. Now, step back and admire your handiwork—a perfectly clean, organized cable route that has completely transformed your space.
Adding the Professional Finishing Touches
Getting cables off the floor is one thing, but making your cable management system truly disappear is where the magic happens. A truly professional installation lives in the details. It's these final aesthetic touches that take your project from just "tidy" to seamlessly integrated with your room's decor.
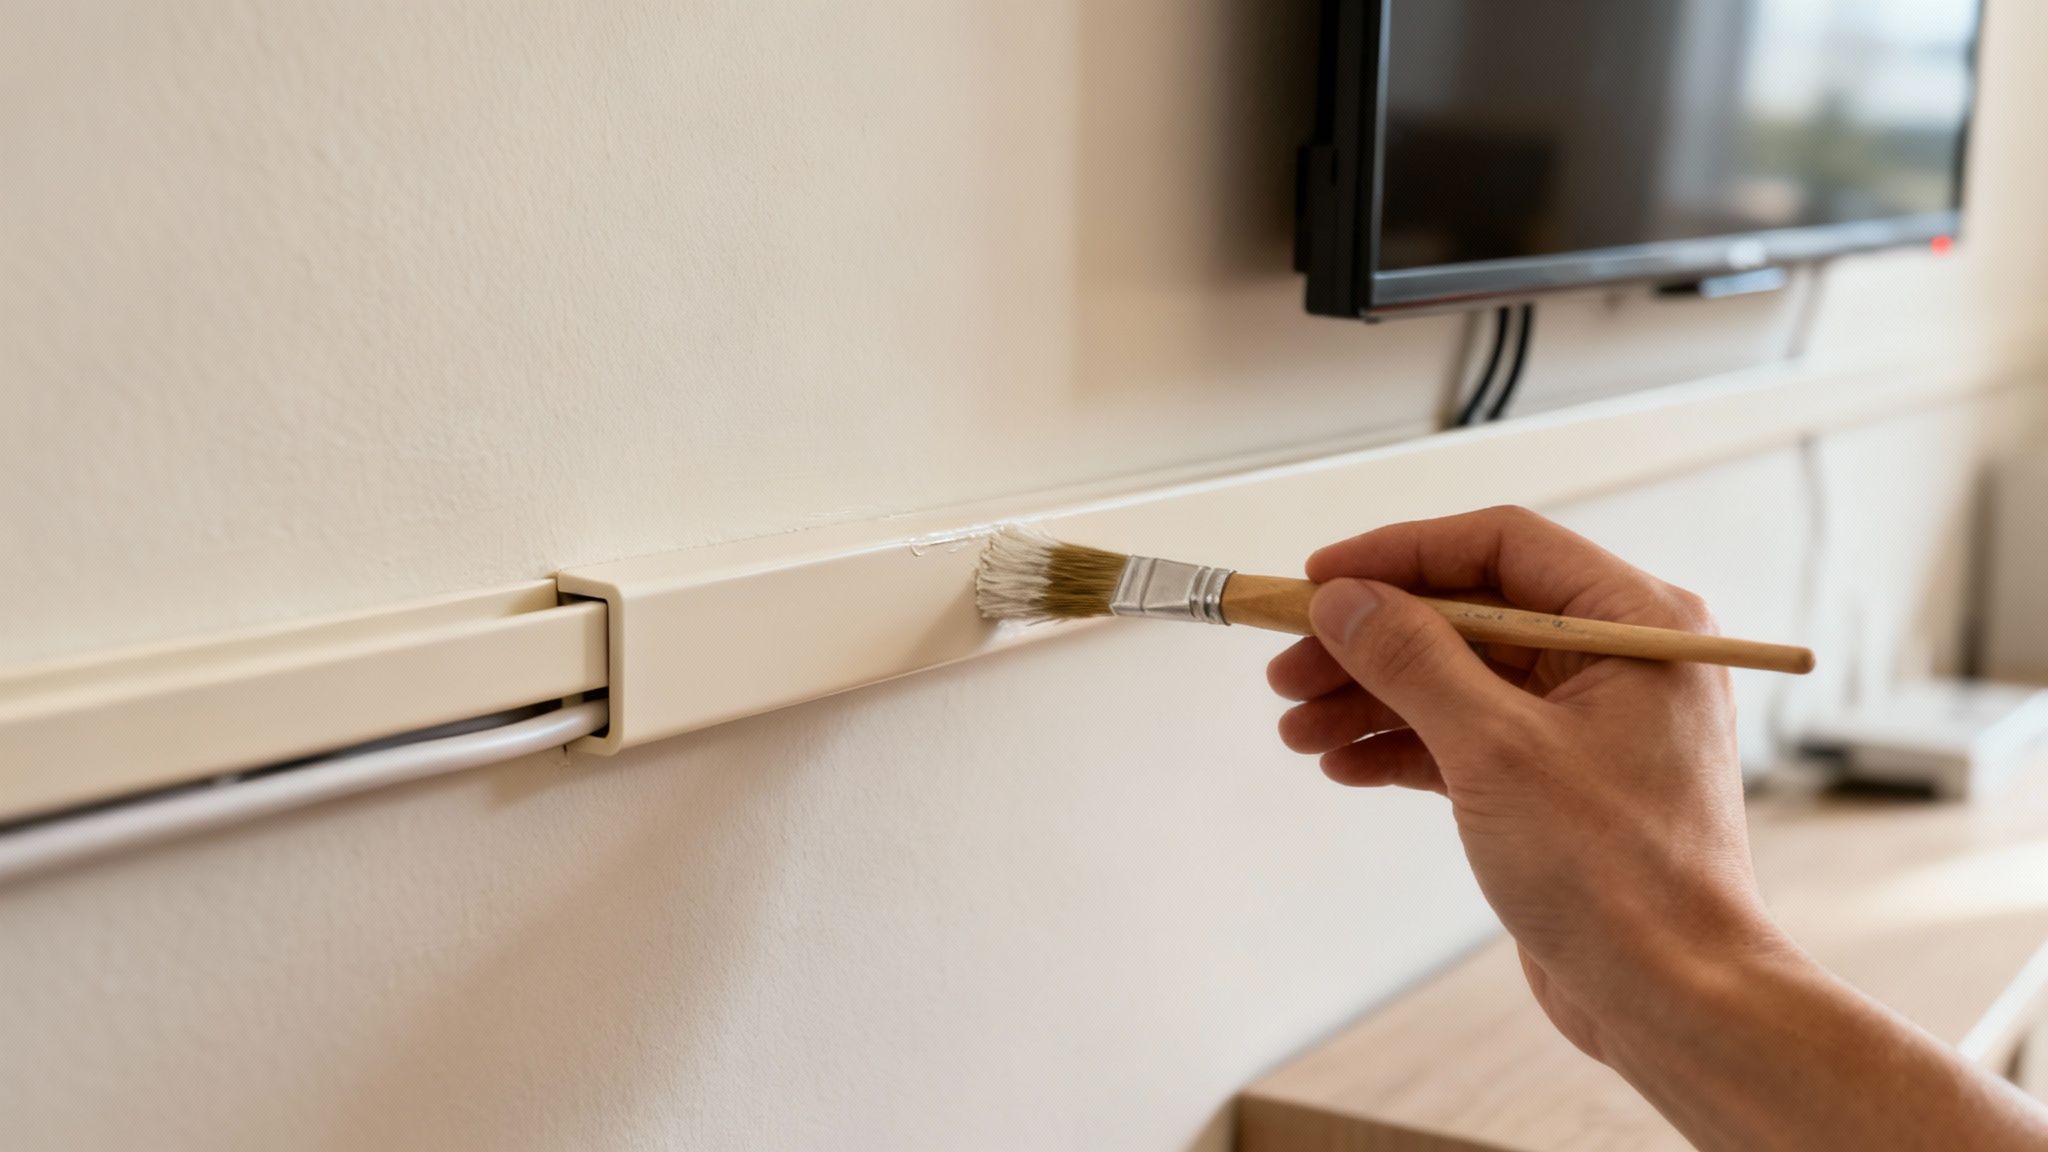
The ultimate goal is to make the cable raceway virtually invisible. Most wall organizer kits, including those from EVEO, come in a neutral white or black. But here’s the pro tip: they are specifically designed to be paintable. Don't skip this step—it makes a massive difference.
How to Paint Your Cable Raceway
To get that flawless, built-in look, a little prep work is key. You can't just slap a coat of wall paint on the plastic and call it a day. For a smooth finish that won't chip, follow these quick steps:
- Lightly Sand the Surface: Grab some fine-grit sandpaper (220-grit is perfect) and gently scuff the plastic cover. This gives the paint something to grip onto.
- Wipe it Clean: Use a damp cloth to wipe away all the dust from sanding, then let it dry completely.
- Apply a Primer: A thin coat of spray primer made for plastics is non-negotiable. It ensures your paint adheres evenly and lasts for the long haul.
- Paint with Your Wall Color: Once the primer is dry, apply two thin coats of your exact wall paint. This guarantees a perfect color match, making the raceway blend right into the wall.
This little bit of extra effort pays off big time, turning a functional accessory into a feature that looks like it was always meant to be there.
Managing That Extra Cable Slack
No matter how well you plan, you'll almost always have some extra cable length to deal with, especially near your power strip or behind devices. Just stuffing the slack into the raceway is a bad idea—it can create kinks and put strain on your cords.
The smarter solution? Manage it neatly outside the channel.
The real secret to a polished setup is managing what’s both inside and outside the raceway. A clean channel is great, but a neat bundle of slack near the outlet completes the professional look and prevents future tangles.
Use simple tools like reusable cable ties or a flexible cable sleeve to coil the extra length into a tidy loop. You can then tuck this bundle behind a desk leg, your TV stand, or even mount it under the desk. This keeps everything organized, accessible, and stops the dreaded "wire nest" from ever coming back. For more ideas, check out our complete guide on how to hide computer cables for any setup.
It's no surprise that the demand for these solutions is skyrocketing. The cable management market, currently at USD 27.89 billion, is projected to hit USD 52.83 billion by 2034. For both pros and home enthusiasts, organized setups are proven to boost productivity by 15% and cut down on accidents, making these finishing touches a smart investment, not just a cosmetic one. You can dive deeper into these market trends on fortunebusinessinsights.com.
Got Questions? We’ve Got Answers.
Even the best-laid plans run into a few snags. When you're in the middle of a project, questions are bound to pop up. Getting those sorted out is the final piece of the puzzle for a successful installation. Let's tackle some of the most common things people wonder about when setting up a cable organizer wall system.
One of the biggest fears? Damaging the walls. Nobody wants to peel off a chunk of paint when removing an adhesive mount. The good news is that high-quality adhesives, like the ones in EVEO kits, are designed to stick tight but come off clean. The trick is to grab a hairdryer and gently warm up the strip. This softens the adhesive, letting you peel the raceway away slowly without a fight.
Another classic question is about capacity. How many cables can you really squeeze in there? This all comes down to the size of the raceway and how thick your cables are. My advice? Always go one size bigger than you think you need. It gives your cables room to breathe, prevents heat from building up, and saves you from having to tear everything down just to add one more wire later.
Can I Install These on Textured Walls?
This is a fantastic and very practical question. While screws are always going to be your most secure bet for really uneven surfaces like plaster or brick, you can absolutely use adhesive-backed organizers on lightly textured walls.
The secret is all in the prep work. Once you’ve cleaned the wall, you need to press the adhesive strip on firmly. Make sure it gets a solid grip on the "peaks" of the texture. I like to hold it in place for a good 30-60 seconds to create a strong initial bond. But for anything more than a light "orange peel" texture, I'd strongly recommend using the included screws for a hold you can count on.
Remember, the goal isn't just to hide wires—it's to secure them safely. Choosing the right mount for your wall type is a non-negotiable for both looks and safety.
Is It Safe to Put Power Cords Inside a Raceway?
Absolutely, as long as you do it right. Modern raceways are built to handle low-voltage cables (like HDMI and Ethernet) right alongside standard power cords. The plastic is non-conductive and rated to handle the small amount of heat that electrical wires give off.
That said, there are a few common-sense rules to follow for total peace of mind:
- Don't Overstuff It: Never cram more cables into a raceway than it can hold comfortably. Overcrowding can trap heat and, over time, could damage the insulation on your cords.
- Inspect Your Cords: Before you tuck a power cord away, give it a quick once-over. Look for any frays, cracks, or damage. A damaged cord should never be hidden inside a wall.
- No Coiled Extension Cords: If you're using an extension cord, make sure it's the right length. Don't run a tightly coiled-up cord inside a raceway.
Follow these simple guidelines, and you'll have a setup that’s not just clean, but completely safe.
Ready to create a clean, safe, and professional-looking space? EVEO offers premium cable management solutions designed for easy installation and a flawless finish. Explore our collection of cable organizers and transform your workspace today!
How to Remove Static from Vinyl Records for a Pristine Sound
A Practical Guide to Using a Record Player Stylus Brush