A record player stylus brush is a tiny, unassuming tool, but it's one of the most important you can own. It's a small brush with incredibly fine bristles, designed specifically to gently clear away the dust and gunk that collects on your turntable’s needle. Honestly, using one is the simplest and most effective way to get crystal-clear sound and stop a dirty stylus from wrecking your records.
Why a Clean Stylus Is a Non-Negotiable for Your Vinyl Collection
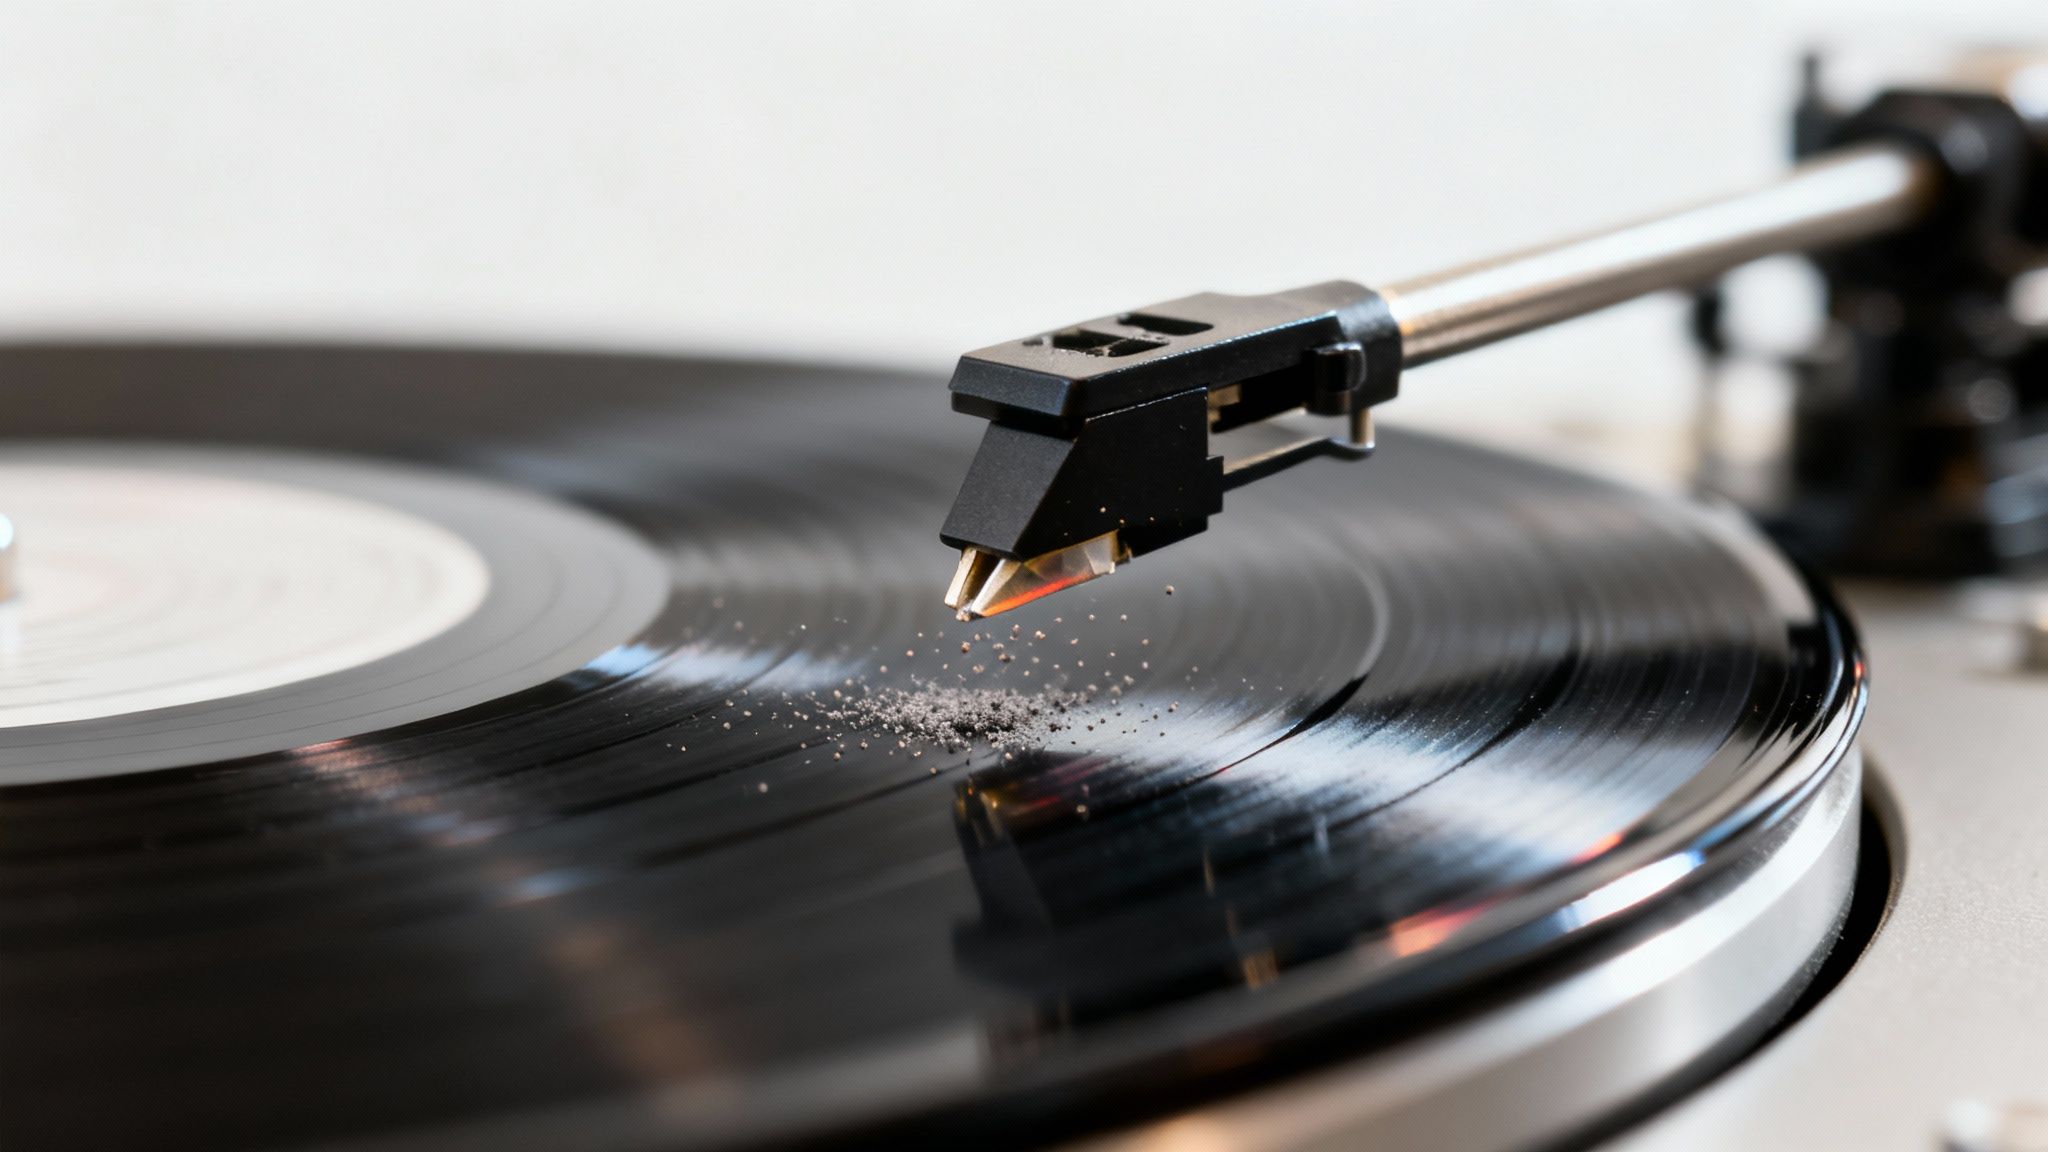
We've all been there. You drop the needle on a favorite album, expecting that warm, rich sound, but instead, you're hit with pops, crackles, or a frustratingly muddy mix. Nine times out of ten, a dirty stylus is the culprit.
That tiny diamond tip is where the magic starts—it's the first point of contact between your turntable and the music literally carved into the vinyl. It’s a precision instrument built to trace microscopic grooves, and even a nearly invisible speck of dust can throw the entire process off.
Think of it like trying to read a book while wearing smudged glasses. The words are there, but your ability to see them clearly is shot. In the same way, a stylus caked in grime can't accurately read the groove, which translates directly into distortion and a loss of all that beautiful audio detail.
The Hidden Dangers Lurking on a Dirty Stylus
The problem with neglecting your stylus goes way beyond just bad sound. A dirty needle can cause real, irreversible harm to both your record collection and your equipment. All that accumulated dust and debris essentially turns the stylus into a tiny, abrasive ball of gunk.
As it drags through the delicate vinyl grooves, this buildup can:
- Grind down the groove walls: This is what causes permanent wear, leaving you with lasting clicks and pops that no amount of cleaning will ever fix.
- Damage the stylus itself: Caked-on residue wears down the diamond tip way faster than it should, shortening its lifespan and forcing you to shell out for a replacement sooner.
- Bend the delicate cantilever: The cantilever is the tiny rod holding the stylus. Too much gunk or an improper cleaning attempt can damage it, and that often means replacing the entire cartridge.
A clean stylus isn’t just about getting better sound right now; it’s an investment in the long-term health of your entire vinyl setup. It's probably the single most important habit for preserving your records and your turntable.
A Growing Trend in Vinyl Care
The resurgence of vinyl isn't just about listening—it's created a much greater awareness around proper maintenance. It’s no surprise that the global market for vinyl cleaning accessories hit USD 64.2 million in 2024 and is projected to climb past USD 183 million by 2033. This isn't just a niche hobby anymore; collectors everywhere understand that quality care and superior sound go hand-in-hand.
Ultimately, a good record player stylus brush is your first line of defense. Keeping that needle clean is the foundation of a solid maintenance routine. To see how it fits into the bigger picture, you can learn more about how to clean, store, and protect your vinyl records in our full guide.
Choosing The Right Stylus Cleaning Tools
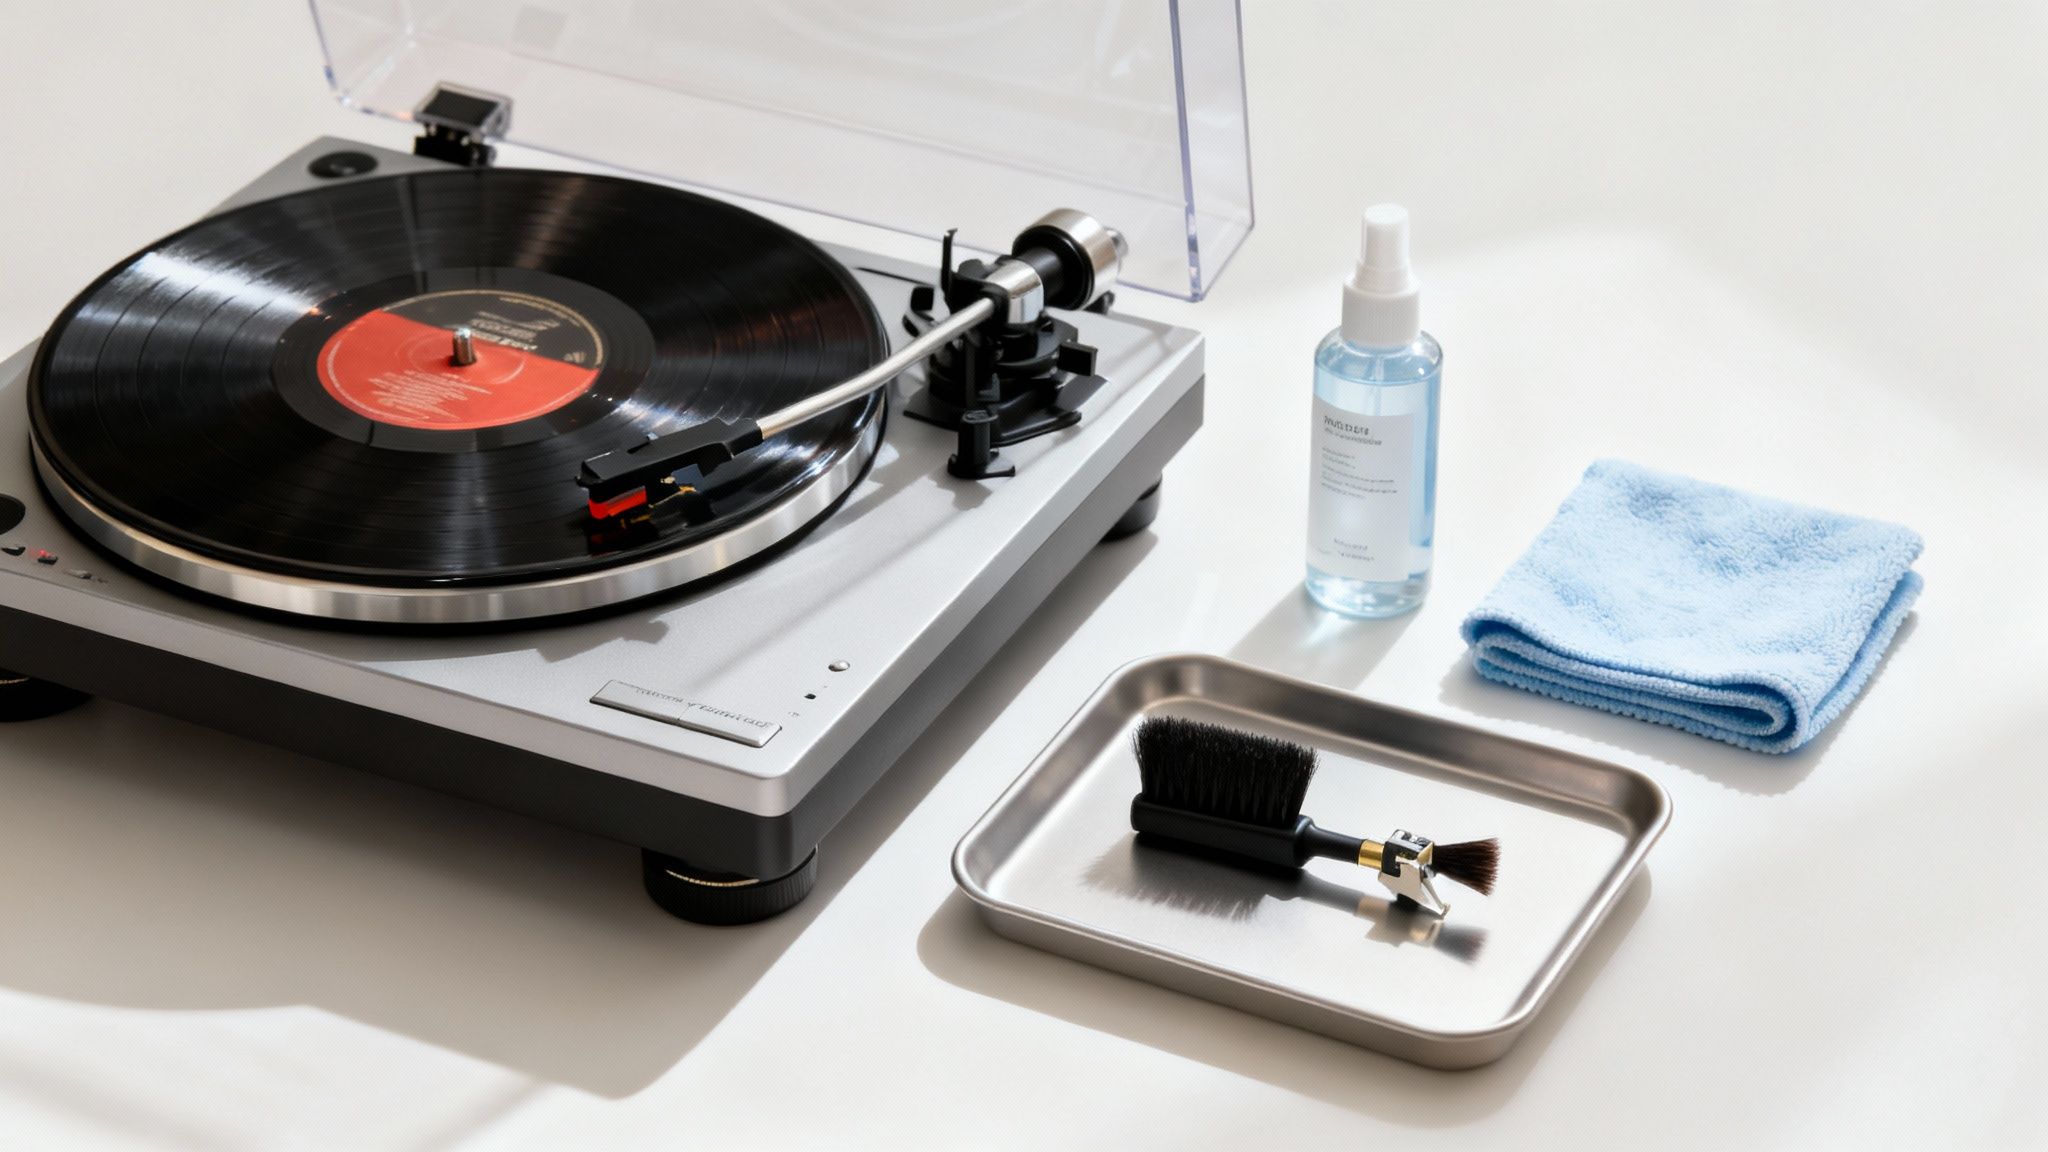
When it comes to keeping your stylus pristine, not all cleaning tools are created equal. The most essential item in your arsenal is a high-quality record player stylus brush, but the little details make all the difference. The gold standard is a brush with short, densely packed carbon fiber bristles.
Why carbon fiber? Simple. The bristles are incredibly fine—often thinner than a human hair—which allows them to get deep into the tiny spaces around the stylus tip. Just as important, they're naturally anti-static. This means they dissipate static charge on contact, stopping dust from immediately clinging right back onto the needle. The density is critical, too; a brush with tightly packed bristles gives you the gentle but firm action needed to dislodge stubborn grime without stressing the delicate cantilever.
Beyond The Basic Brush
While a good brush is non-negotiable, other tools can step in when you're dealing with more persistent gunk that a dry brush just can't handle alone.
- Stylus Cleaning Fluid: A specialized fluid can dissolve tougher residue like oils from fingerprints or other contaminants. Use it with extreme caution, though. Never apply fluid directly to the stylus. It can easily wick up the cantilever and destroy the adhesive holding the diamond tip in place. The only safe way is to apply a single, tiny drop to your brush first, then clean as you normally would.
- Gel Pads: These are tacky, polymer-based pads (like the popular Onzow Zerodust) that you simply lower the stylus onto. The gel gently pulls debris off the needle tip without any brushing motion. They're incredibly effective and safe, but they are best saved for periodic deep cleans, not for daily use.
The goal is to match the tool to the task. A dry carbon fiber brush is your go-to for daily, pre-play dusting. Fluids and gels are for those occasional, more intensive cleaning sessions when you notice the sound quality dipping despite regular brushing.
To help you decide what's best for your setup, here's a quick breakdown of your options.
Comparing Your Stylus Cleaning Options
This quick comparison of common stylus cleaning tools can help you decide which one fits your needs and maintenance routine.
| Tool Type | Primary Use | Best For | Frequency of Use |
|---|---|---|---|
| Carbon Fiber Brush | Removing loose dust and static | Daily, pre-play maintenance | Before every listening session |
| Stylus Cleaning Fluid | Dissolving stubborn, caked-on grime | Occasional deep cleaning | Once every few weeks, or as needed |
| Stylus Gel Pad | Safely lifting debris without friction | Periodic deep cleaning and delicate styli | Once or twice a month |
Ultimately, having a combination of tools on hand ensures you're ready for anything, from a quick dust-off to a more serious deep clean.
What Really Matters To Vinyl Lovers
At the end of the day, the best tools are the ones that are both effective and easy to use. You don't need to spend a fortune to get excellent results. In fact, consumer purchasing data shows a clear preference for cleaning accessories that offer proven performance at an accessible price. One popular vinyl record cleaning brush, for instance, became a top-seller by offering a high-quality experience for under $10, backed by a near-perfect 4.8-star rating from hundreds of users. This proves that quality care is within everyone's reach. You can dig into the market analysis of top-selling record cleaners on accio.com to see this trend for yourself.
Finding the right combination of tools is simple when you focus on quality materials and proper technique. An excellent starting point is a complete package like the EVEO Premium Vinyl Record Cleaner Kit, which gives you a high-quality brush alongside other essential maintenance tools. This way, you’re prepared for both daily upkeep and those much-needed deeper cleaning sessions.
The Correct Technique for Brushing Your Stylus
Cleaning your stylus safely is all about technique, and trust me, it’s far easier than it sounds. While it feels like you're performing delicate surgery on a microscopic scale, mastering the right motion is straightforward. All you need is a steady hand, good light, and one simple rule to protect your gear.
The whole point is to gently flick away dust without putting any stress on the cantilever—that tiny, fragile rod holding the diamond tip. Think of it like dusting a priceless antique; you’re just there to remove the debris, not scrub it clean. The most critical part of this process is the direction you move the brush. Get that right, and you’re golden.
Setting Up for a Safe Clean
Before your record player stylus brush even gets close to the needle, a little prep work makes all the difference. First things first, turn your turntable completely off. Make sure the platter is dead still. The last thing you want is an accidental spin while you’re working.
Next, and this is non-negotiable, lock the tonearm into its resting clip. This simple step prevents the arm from getting bumped and swinging wildly, which is a surefire way to wreck your stylus. Finally, get some good light on the situation. A desk lamp or even your phone's flashlight will help you see exactly what you’re doing, allowing for a much more precise and gentle clean.
The Back-to-Front Brushing Motion
Here’s the golden rule of stylus cleaning: always brush from back to front.
You’ll want to start the motion from behind the stylus (closer to the tonearm pivot) and gently pull the brush forward. This mimics the same direction a record spins. Never, ever brush side-to-side or front-to-back.
- Side-to-side brushing is a recipe for disaster. It can easily snap the cantilever or twist the stylus out of alignment.
- Front-to-back brushing just pushes all that dust and grime up into the cartridge body, where it can cause bigger problems down the line.
Just imagine you're sweeping dust off a tiny shelf. You wouldn't push it back against the wall, right? You'd sweep it forward and off the edge. Same idea here. One or two smooth, gentle passes are almost always enough to clear away any visible fluff.
The back-to-front motion is the only safe way to clean a stylus. It’s designed to work with the natural flex of the cantilever, ensuring you clean effectively without risking damage to the most sensitive part of your turntable.
This diagram helps visualize where a brush fits into your cleaning routine, from daily touch-ups to deeper cleans.
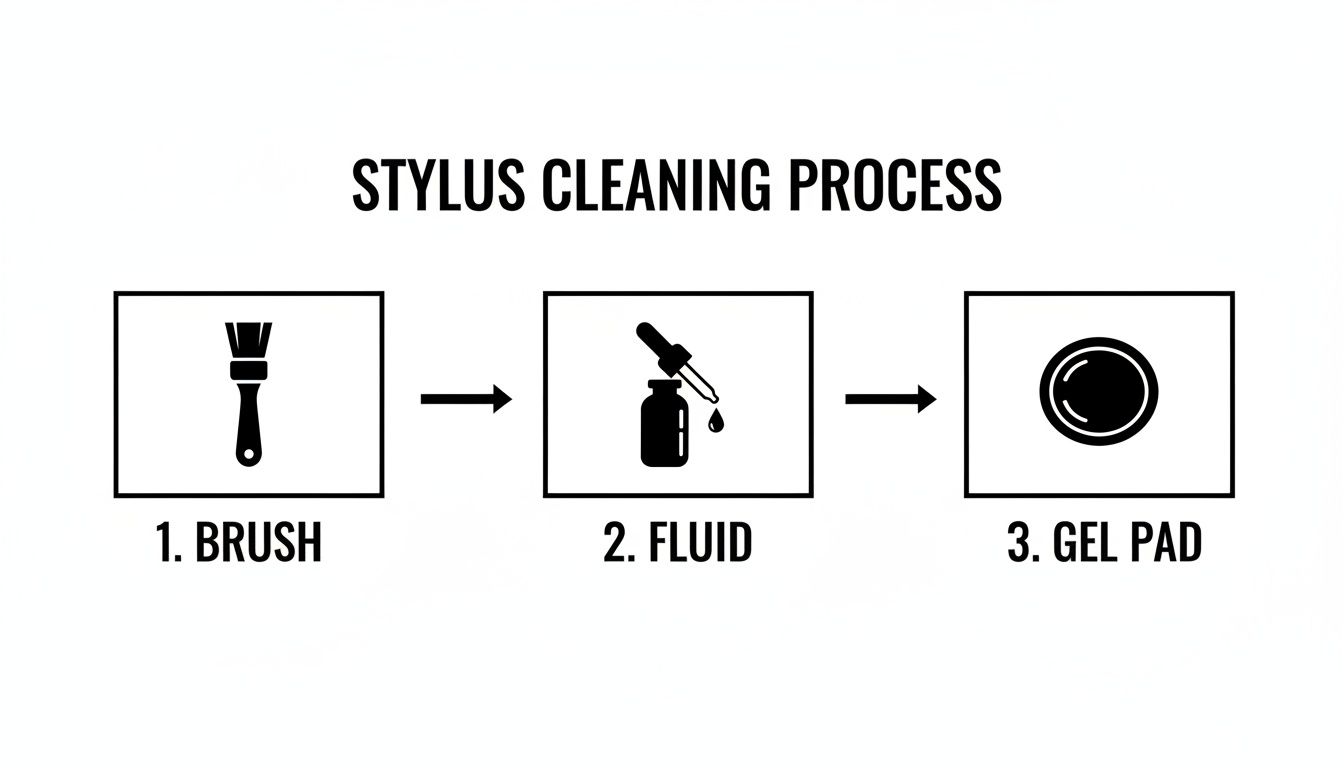
As you can see, a brush is your go-to for daily maintenance, while fluids and gels are there when you need a more intensive solution.
How Much Pressure to Apply
When it comes to pressure, think "less is more." You really only need the lightest touch imaginable. The dense carbon fiber bristles on a good brush are designed to do all the work for you. Just let the very tips of the bristles kiss the stylus and glide forward.
If you find yourself pressing down, you’re using way too much force. A great way to get a feel for it is to simply rest the brush on the stylus without applying any downward pressure at all, then just pull it forward. That minimal contact is all you need to dislodge debris and dissipate static. Fight the urge to scrub, and you'll protect your investment for years to come.
Costly Stylus Cleaning Mistakes to Avoid
Getting the right technique down is only half the battle. Just as critical is knowing what not to do, because one clumsy move can spell disaster for your delicate stylus or cantilever. Avoiding these common blunders is how you build good habits that protect your gear for the long haul.
The single biggest mistake? Brushing in the wrong direction. Ever.
Brushing side-to-side or, even worse, from front-to-back, puts a ridiculous amount of stress on the cantilever—that tiny rod holding the stylus. This can easily bend it out of alignment or just snap it off completely. Always remember the golden rule: back to front, every single time.
Another all-too-common error is using way too much force. The bristles on a quality carbon fiber record player stylus brush are designed to do the hard work for you with just the lightest touch. Pressing down hard doesn't get it any cleaner; it just risks wrecking the stylus suspension or jamming debris up into the cartridge body where you can't get it out.
Improper Tools and Contaminants
It’s tempting to reach for a quick fix when you spot a piece of fuzz on your needle, but this almost always does more harm than good. Using your fingers is a definite no. The natural oils on your skin will transfer right to the stylus, creating a sticky mess that attracts even more dust and gunk.
In the same vein, fight the urge to use the corner of your t-shirt or some random cloth. These materials are far too abrasive for such a delicate component and often leave behind more lint than they remove. You just end up making the problem worse.
Think of your stylus as a precision instrument, designed to trace microscopic grooves in vinyl. Treating it with anything other than a purpose-built tool is like trying to clean a camera lens with sandpaper—you're just guaranteeing damage.
Finally, be incredibly careful with cleaning fluids. Dousing the stylus directly with liquid is a fast track to ruin. The fluid can wick its way up the cantilever and dissolve the special adhesive holding the diamond tip in place. That’s a costly, irreversible mistake. If you absolutely have to use a fluid, apply a single tiny drop to the brush first, and never directly onto the stylus.
Common Cleaning Blunders at a Glance
To keep your stylus safe and sound, steer clear of these all-too-common habits:
- Brushing side-to-side or front-to-back: This is the fastest way to bend or break that fragile cantilever.
- Applying too much pressure: A gentle glide is all you need. Never scrub or push down.
- Using your fingers to pick off dust: You’re just transferring oils that act like a dust magnet.
- Wiping with a t-shirt or cloth: These are abrasive and will only leave behind lint and fibers.
- Applying cleaning fluid directly to the stylus: This can dissolve the adhesive holding the diamond tip.
By understanding what to avoid, you can use your stylus brush with confidence, knowing that every gentle swipe is preserving your sound quality and your equipment.
Integrating Stylus Care into a Full Vinyl Routine
A clean stylus is a great start, but it's only one piece of the puzzle. True vinyl care isn't about isolated tasks; it's about creating a simple, effective system where everything works together to protect your gear and deliver incredible sound.
Think of your record player stylus brush as a specialist tool. It's crucial, but its job is made infinitely easier when the rest of your routine is solid.
The single most important habit you can build? Clean your records before every single play. A quick pass with an anti-static carbon fiber brush lifts away the surface dust that would otherwise get dragged into the grooves and onto your needle.
This creates a fantastic feedback loop. Clean records mean a cleaner stylus. A cleaner stylus means you're performing fewer deep cleans on that delicate needle. This simple two-step dance—brush the record, then brush the stylus—is the absolute foundation of a great maintenance habit.
Creating a Sustainable Maintenance Schedule
The key here is consistency, not intensity. You don't need to block out hours every week for maintenance. A small, repeatable schedule is all it takes to keep your audio crisp for years to come.
- Before Each Play: Give the record a gentle sweep with a carbon fiber brush. Then, give the stylus a quick, careful pass with its dedicated brush. This whole process takes maybe 30 seconds.
- Monthly Check-in: Take a moment to inspect your stylus under a good light. See any stubborn gunk the dry brush isn't getting? That's when you might bring in a stylus gel pad for a slightly deeper clean.
- As Needed: If you pick up a dusty gem from a secondhand shop or have a record that's just seen better days, give it a proper wet clean with a quality solution and microfiber cloth before it gets anywhere near your turntable.
Adopting a complete care routine turns maintenance from a chore into a rewarding ritual. It ensures that every component, from the record groove to the stylus tip, is in optimal condition to deliver the sound the artist intended.
The Power of a Complete Cleaning Kit
This is where having a comprehensive solution like the EVEO 4-in-1 Vinyl Record Cleaner Kit really pays off. Instead of hunting down individual tools, a complete kit gives you everything you need in one place. It streamlines the entire process, making sure you always have the right tool for the job.
This holistic approach is part of a much bigger picture. The global market for stylus accessories, for example, was valued at USD 17.8 billion in 2024 and is projected to more than double by 2033. It shows a growing understanding of how important it is to maintain precision tools, whether they're for a tablet or a turntable.
Of course, great sound doesn't stop at cleaning. Knowing the best way to store vinyl records is just as vital for preventing warping and damage. And if you're battling pops and crackles, check out our guide on how to remove static from vinyl records for another key piece of the vinyl care puzzle.
Common Questions About Using a Stylus Brush
Even with the best tools in hand, a few questions always come up. Getting comfortable with your record player stylus brush is all about clearing up those little hesitations that can make you second-guess yourself. Let's walk through some of the most common ones so you can clean with confidence.
Answering these questions helps you build the kind of good habits that will protect your gear for years to come.
How Often Should I Clean My Stylus with a Brush?
A great rule of thumb is to give it a quick, gentle brush before each listening session or after spinning a couple of records. If you can see even a tiny bit of fuzz or dust clinging to the needle tip, it’s definitely time for a clean. This simple habit keeps gunk from building up into a bigger, sound-muddying problem.
If you're playing older or grittier records you found at a flea market, you might even find yourself cleaning it after just one side. Just remember, consistent, light cleaning is far better than waiting for a heavy clump of grime to form. That stuff is much harder to remove and can really drag down your playback quality.
Can I Use Cleaning Fluid with My Stylus Brush?
Yes, but you have to be extremely careful. The golden rule here is to never, ever apply cleaning fluid directly to the stylus itself. The liquid can easily wick its way up the cantilever and dissolve the delicate adhesive holding the diamond tip in place. If that happens, it's game over for your stylus.
The right way to do it is to put just one or two small drops of a specialized stylus cleaning fluid onto the brush's bristles first. Then, use that lightly dampened brush to clean the stylus with the proper back-to-front motion. This gives you a much deeper clean without putting your cartridge at risk.
What if you slip up and brush side-to-side or front-to-back? Don't panic. Stop immediately. Grab a good light and a magnifying glass and inspect the stylus and cantilever for any signs of bending. If it looks perfectly straight, test it on a record you know well and listen for any new distortion. If the audio sounds fine, you likely got away with it. But if you see any visible damage, it's time for a replacement.
Is a More Expensive Stylus Brush Worth It?
Honestly? Not really. The single most important part of a stylus brush is the quality of its bristles. You want them to be dense, soft, and ideally made from a material like carbon fiber that helps dissipate static electricity. A fancy, expensive handle doesn't make it clean any better.
Instead of focusing on the price tag, look at user reviews and the materials. A well-made, affordable brush from a brand you trust will do the job just as well as a high-priced one, making sure you get great performance without overspending.
For a complete solution that includes a high-quality stylus brush and everything else you need for vinyl care, EVEO has you covered. Check out our 4-in-1 Vinyl Record Cleaning Kit to keep your entire collection sounding pristine.
A Guide to Installing a Cable Organizer Wall
Vinyl Record Cleaning Fluid: Restore Sound Quality in Minutes