Before we dive into how to fix that frustrating crackle and pop, you need to understand what’s causing it. That noise isn’t a flaw in the record itself. It’s the sound of static electricity turning your favorite vinyl into a dust magnet, pulling debris deep into the grooves and ruining the listening experience.
Why Your Records Crackle and Pop

The very material your records are made from, polyvinyl chloride (PVC), is a natural collector of electrical charges. Simple, everyday actions are all it takes to build up a charge through friction, turning a perfectly clean listening session into a noisy mess.
The Science of Static Buildup
Think about it—every time you slide a record out of its sleeve, you're generating static. Even the simple act of your stylus tracing the grooves can add to the buildup. If the air in your room is dry, which is common in winter or with the AC running, the problem gets a whole lot worse.
Once a record is charged, it basically becomes a homing beacon for any airborne particles. We’re talking dust, pet dander, and all sorts of microscopic stuff floating around your listening space. These particles get pulled right into the delicate grooves where the music is stored.
This isn’t just a small annoyance. A charged record can attract up to 80% more dust than one without a charge, sometimes carrying a surface charge between 2.0 and 4.0 kilovolts (kV). If you live in a dry climate, you’re fighting an even bigger battle.
Understanding what causes this static is the first step. Below is a quick breakdown of the usual suspects.
Common Causes of Static and Their Impact
| Static Source | How It Happens | Impact on Sound |
|---|---|---|
| Friction from Sleeves | Sliding the record in and out of paper or plastic sleeves generates a strong charge. | Attracts dust immediately, causing pops and crackles right out of the sleeve. |
| Low Humidity | Dry air allows static to build up easily and makes it harder for it to dissipate naturally. | A persistent, low-level crackle or hiss that gets worse over time. |
| Turntable Mat | Felt or rubber mats can create friction against the vinyl as it spins. | Increases surface noise and can cause the record to cling to the mat. |
| Stylus Drag | The stylus moving through the grooves creates its own friction and electrical charge. | Can contribute to ongoing static buildup during playback. |
Each of these sources adds another layer to the problem, making your records noisier and harder to enjoy.
From Silent Charge to Audible Noise
So, how does an invisible charge create such an audible problem? As your turntable's stylus moves through the groove, it's not just reading the music. It's also physically bumping into every single piece of dust and debris held captive by that static charge.
Each tiny collision between the stylus and a particle gets amplified into an unwanted sound—a sharp pop, a click, or a constant crackle. This is exactly why even a brand-new, unplayed record can sound noisy right out of the shrink-wrap if it picked up a static charge during shipping.
For a deeper dive into keeping your whole collection in top shape, check out our full guide on how to clean, store, and protect your vinyl records.
Your First Line of Defense Against Static
If you're after an immediate, noticeable improvement in sound quality, your journey starts with a few essential tools. These simple habits are the bedrock of any solid record care routine and are your most effective weapons in the fight against static.
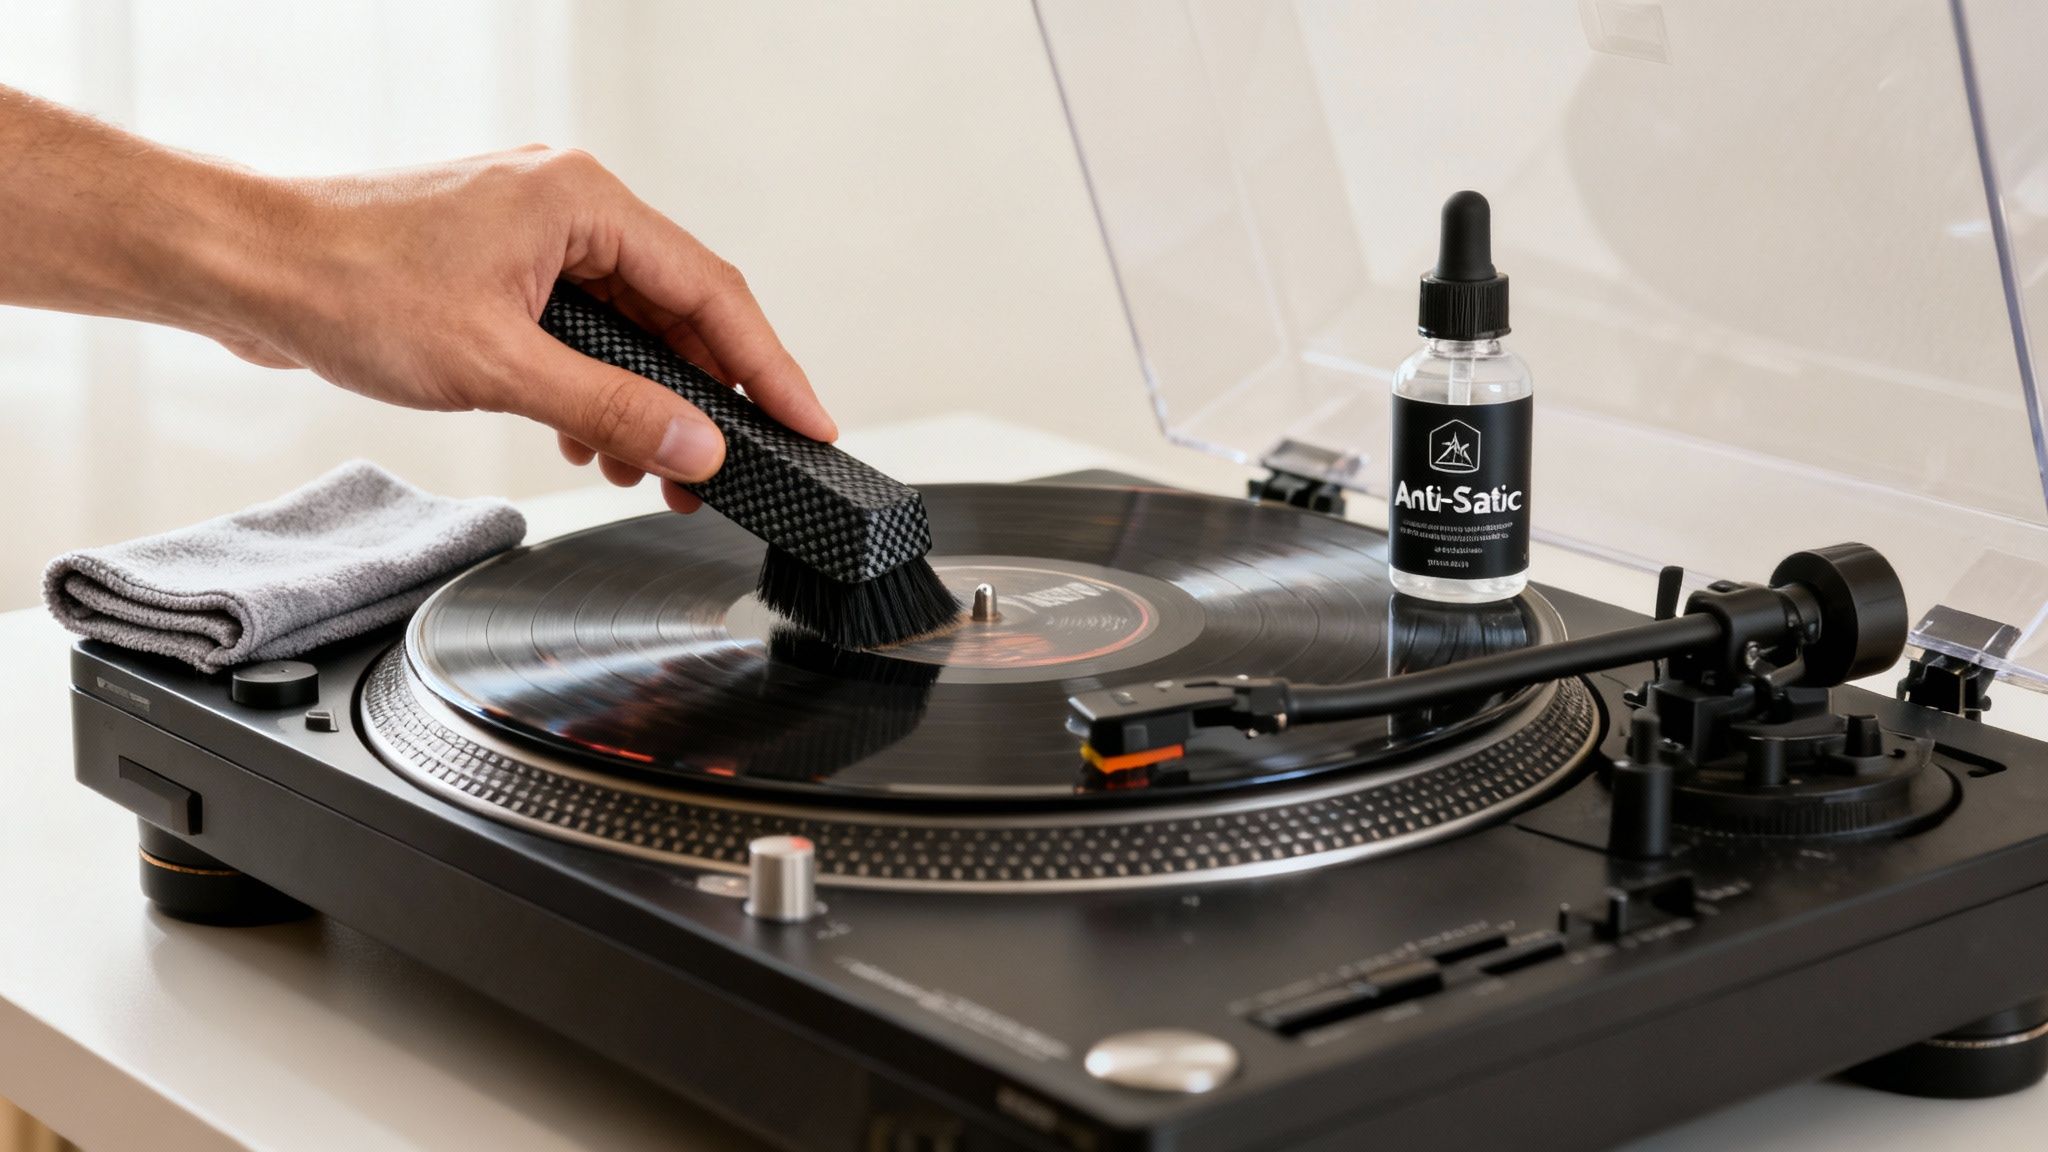
The single most important tool in your arsenal is the carbon fiber anti-static brush. This isn't just a duster; it’s an engineered solution designed to tackle static head-on. The magic is in its thousands of ultra-fine, conductive bristles that both neutralize the electrical charge and gently lift loose dust from the grooves.
Mastering the Carbon Fiber Brush
Using the brush correctly is everything. This isn't about scrubbing or applying heavy pressure—it's a gentle, deliberate sweep that lets the bristles do the work without pushing debris deeper into the grooves.
Here's the right way to do it:
- Place the record on your platter and get the turntable spinning.
- Hold the brush by its handle, making sure you touch the metal part. This grounds the static charge right through your body.
- Gently lower the bristles onto the spinning record. Let them rest on the surface for two or three full rotations. No pressure needed.
- Slowly pivot the brush toward the center of the record, gathering all the dust into a neat line.
- Finally, lift the brush straight up, taking the collected dust and the static charge with it.
This simple pre-play ritual works wonders. A good carbon fiber brush can reduce static by an average of 85-95% per sweep. This daily habit cuts the audible noise floor dramatically, with many users reporting 90% satisfaction in zapping those annoying pops.
Using Anti-Static Sprays and Cloths
For a slightly deeper clean that handles stubborn static and grime, an anti-static cleaning solution is your next move. Products like the EVEO 4-in-1 Kit are perfect for this, combining a specially formulated spray with a soft, lint-free microfiber cloth for a safe and effective clean.
Pro Tip: Never spray cleaning fluid directly onto the vinyl. This is a common mistake that can cause liquid to pool and seep under the label, causing permanent damage. Always apply the solution to the cloth first.
Start by lightly misting the microfiber cloth with one or two pumps of the solution—you want it damp, not soaked. Gently wipe the record in a circular motion, following the direction of the grooves. Avoid putting pressure on the record; let the cloth and solution do the work.
This method lifts away fingerprints, oils, and fine dust the brush might miss, while the anti-static agents in the fluid help stop new charges from building up. Proper cleaning is also the first step toward better preservation, which is why it's so important to invest in quality anti-static record sleeves. These simple, foundational steps will make a huge difference in your listening experience.
Advanced Methods For Deep Static Removal
Sometimes, a quick brush-off just doesn't cut it. For those records that crackle and pop no matter what, it's time to bring out the heavy hitters. If you're chasing that pure, archival-quality sound, these advanced methods go way beyond surface-level fixes to deliver a deep, lasting clean.
When a record seems hopelessly noisy even after a dry brushing, the static is often clinging to grime lodged deep within the grooves. This is where a proper wet cleaning is non-negotiable. It's not just a quick wipe; a true wet clean uses a specialized fluid to dissolve and lift away everything from fingerprints and mold release agents to deeply embedded dust that holds a stubborn static charge.
The Power of Wet Cleaning
A wet clean does more than just wash your vinyl—it neutralizes static right at the source. The cleaning solution acts as a conductive path, letting the static charge dissipate while the liquid gets to work breaking down contaminants. When the record is dry, the static (and the noise it creates) is gone for good.
You've got two main ways to go about it:
- Manual Cleaning: This involves getting hands-on with a quality cleaning solution, soft brushes, and microfiber cloths. It takes patience to work the fluid into the grooves and then remove it completely without soaking the label. If you're looking for the right gear, learning about the best record cleaner kits is a great place to start.
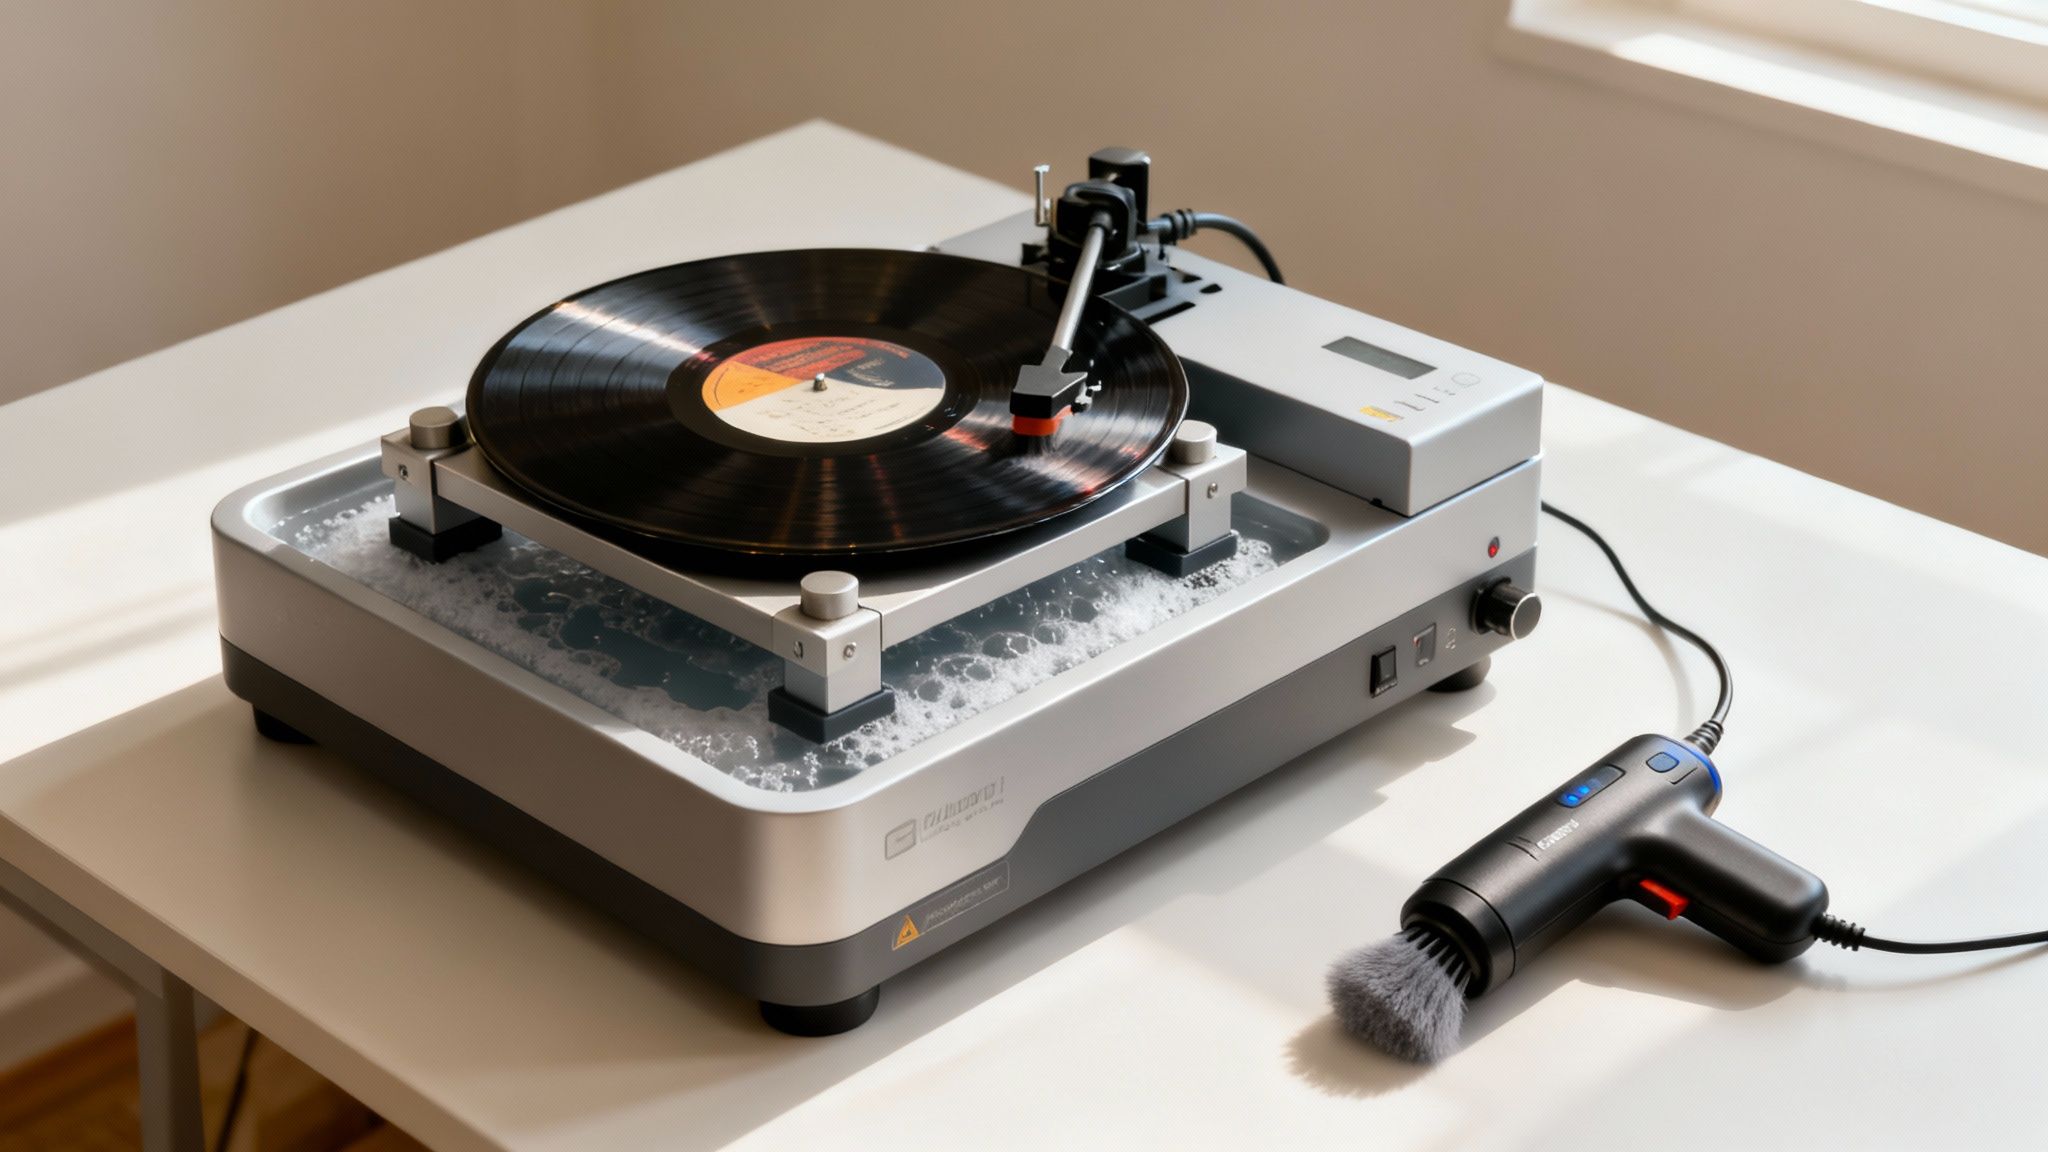
- Record Cleaning Machines: For the serious collector, these machines are an absolute game-changer. They automate the process with things like vacuum suction or ultrasonic waves, giving you a level of clean that’s nearly impossible to get by hand. They pull every last drop of fluid and loosened gunk out of the grooves.
Instant Neutralization With an Anti-Static Gun
Looking for a completely different—and frankly, pretty cool—approach? Meet the anti-static gun. These fascinating gadgets, like the classic Zerostat, never even touch your record. They work from a distance, using ionization to zap static buildup.
Pull the trigger, and the gun releases a stream of positive ions. As you slowly release it, a flow of negative ions follows. This one-two punch instantly balances the electrical charge on the record's surface, neutralizing any static in seconds.
The results are immediate. A record that was clinging to its sleeve or acting like a dust magnet will suddenly go inert. Firing an anti-static gun right before you drop the needle is a super-effective way to remove static from vinyl records without any physical contact, guaranteeing a silent backdrop for your music.
Sure, these tools are an investment. But for any audiophile chasing that perfect, noise-free listening experience, the sonic payoff is huge. They're the ultimate upgrade for turning a crackly old find into a pristine auditory gem.
Building a Static-Free Listening Environment
While the right tools are great for zapping static that's already there, the real win is stopping it from building up in the first place. This means shifting your mindset from constantly reacting to static pops to proactively creating a listening space where static barely has a chance to form.
Think of it as creating a permanent, static-resistant sanctuary for your entire collection. It all starts by tackling the biggest culprits in your setup.
Upgrade Your Inner Sleeves
Let's be honest: the cheap paper inner sleeves that come with most records are a static-generating nightmare. They create friction every single time you pull a record out, loading it up with a fresh charge. It's a battle you can't win.
The easiest, most effective fix is swapping them out for anti-static polyethylene or rice paper sleeves. These materials are incredibly smooth, letting your records slide in and out without building up that frustrating charge. This one small, affordable upgrade makes a night-and-day difference.
Research and real-world feedback confirm that smart, combined methods are key. For instance, just replacing paper inner sleeves with polyethylene ones can slash static buildup by a massive 75%. Other tools, like anti-static guns, can instantly neutralize a charge to 0 kV and get 98% positive feedback on audiophile forums. You can see more on these effective static reduction techniques on YouTube.
Without this foundational step, you're just putting a band-aid on a problem that will keep coming back every time you play a record.
Reconsider Your Turntable Mat
Next up is the surface your record sits on—the turntable mat. That standard-issue felt mat that comes with so many turntables? It's another static magnet, often causing the record to cling to it when you lift it off the platter.
Switching to a different material can solve this problem instantly.
- Cork Mats: A fantastic choice. They're great at dampening vibrations and are naturally resistant to static. Your records get a stable, non-stick surface to rest on.
- Acrylic Platters/Mats: An acrylic mat—or even better, a full acrylic platter—has properties very similar to vinyl itself. This helps static charges dissipate much more effectively than felt or rubber.
- Leather Mats: A classic favorite for a reason. Leather has excellent anti-static properties and grips the record firmly without clinging to it.
Making this one swap can cut down on platter-related static by up to 60% compared to a basic felt mat. It's a simple change that delivers a real improvement you can both see and hear.
Comparing Key Anti-Static Upgrades
When deciding where to invest your time and money, it helps to see how these common upgrades stack up. Here’s a quick comparison to help you prioritize what will make the biggest impact on your setup.
| Upgrade | Effectiveness | Relative Cost | Main Benefit |
|---|---|---|---|
| Anti-Static Sleeves | High | Low | Prevents static buildup every time you handle a record. |
| Upgraded Mat | Medium-High | Low-Medium | Reduces static generated during playback. |
| Humidifier | Medium | Low-Medium | Creates an environment where static can't easily form. |
Ultimately, combining these upgrades creates a layered defense that keeps static at bay from the moment you pull a record off the shelf to the second the needle drops.
Control Your Room's Environment
Finally, zoom out and look at the room itself. Static electricity absolutely loves dry air. That's why the crackles and pops always seem to get worse in the winter or in a heavily air-conditioned room.
You can fight this by simply managing the humidity.
Aim to keep the relative humidity in your listening room between 40% and 50%. In this range, static charges have a tough time forming and will dissipate much faster on their own. You don't have to guess, either—a cheap hygrometer will tell you the current level, and a small room humidifier can do the heavy lifting to keep it in that sweet spot.
This approach isn't just for vinyl; it's a core principle for archivists. Learning about proper storage and environmental control techniques for delicate collectibles shows that managing the environment is crucial. By controlling the air around your records, you’re making your entire space a natural defense against static.
Your Practical Anti-Static Maintenance Routine
Let's be real—the best way to fight static is to build simple, effective habits into your listening sessions. The goal here isn't to turn every listening experience into a deep-cleaning chore. It's about making static control a natural, almost subconscious, part of the ritual.
Think of it as layering small, smart actions that stop static before it even starts. By combining a few daily habits with occasional deep cleans and proper long-term storage, you’ll keep your collection sounding incredible for years to come.
Daily and Periodic Habits
Your routine can be broken down into quick pre-flight checks and less frequent, more intensive care.
- Before Every Single Play: This one is non-negotiable. Give your record a quick wipe with a carbon fiber brush while it spins for a few rotations. This simple move whisks away any fresh dust and zaps the minor static charge it likely picked up from the sleeve.
- For That Stubborn Crackle: If a record is still noisy after a brush-down, it’s time to bring out the big guns—an anti-static gun. A quick zap of ions before you drop the needle will neutralize the charge on the spot. No contact, no fuss, just immediate relief.
- The Occasional Deep Clean: When a record still sounds fuzzy after your daily care, or when you bring home a pre-loved gem from a record store, a wet clean is in order. This is your reset button, getting deep into the grooves to remove embedded grime and kill any lingering static.
Long-Term Best Practices
What you do between listening sessions is just as important. These are the passive habits that set the foundation for a static-free collection. The number one rule? Always handle records by their edges to keep the oils from your skin out of the grooves.
Key Takeaway: Consistency beats intensity every time. A quick brush before each play is far more effective at managing static than a rare, heavy-duty cleaning session. This tiny ritual protects both your records and your stylus from premature wear.
Proper storage is the other half of the battle. Make sure every record has a good home in an anti-static inner sleeve and is always stored vertically—never stacked flat. Stacking creates pressure and friction, which are basically invitations for static to build up over time.
This diagram breaks down the core elements of a truly static-free environment.
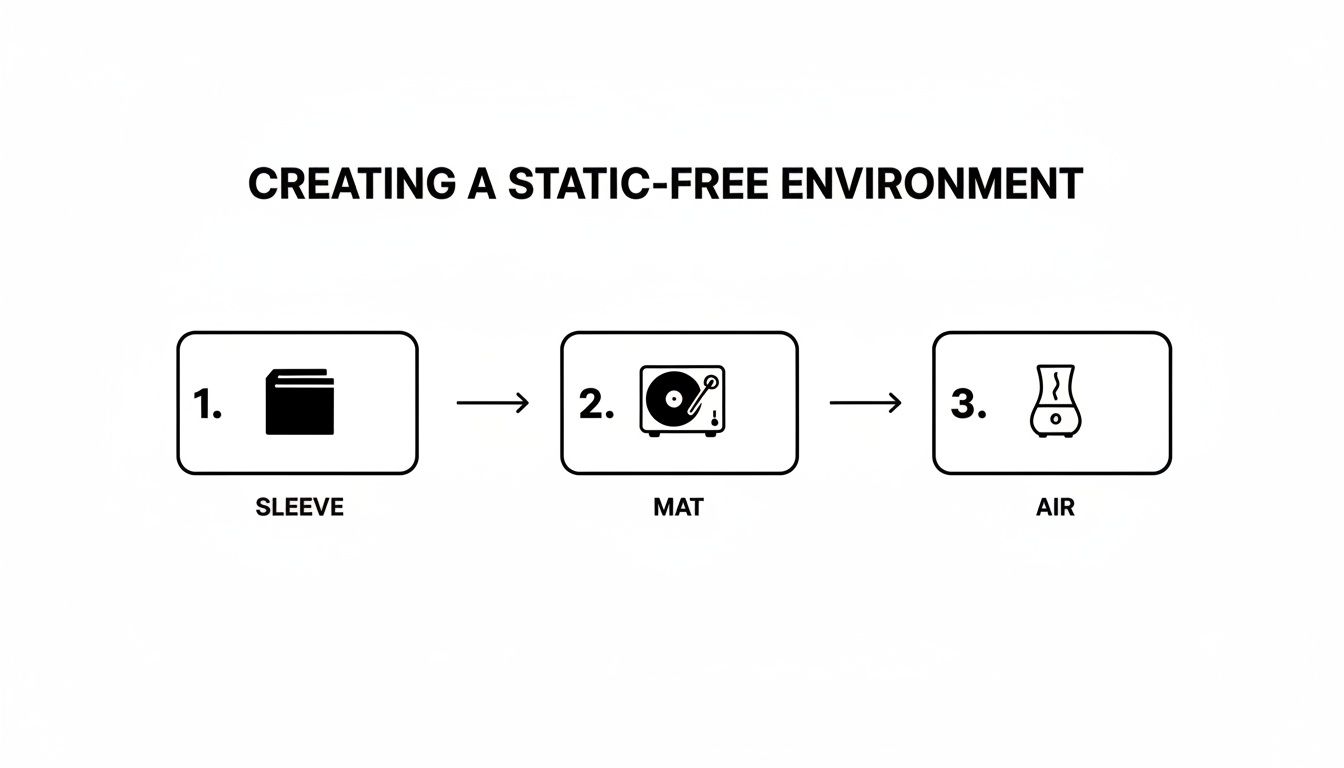
You can see how each piece—from the right sleeve to the right mat and even the air in the room—works together to create a protective shield for your collection.
Your Questions About Vinyl Static, Answered
Even with the best cleaning habits, static can feel like a stubborn, mysterious problem. It's one of the most common issues I hear about from fellow collectors. Let's clear the air and tackle some of the most frequent questions about getting rid of that annoying crackle for good.
Does a More Expensive Turntable Help Reduce Static?
It's a fair question—can you just buy your way out of the static problem? While it's true that high-end turntables often feature better grounding and use platter materials like acrylic that are less prone to static buildup, they aren't a silver bullet.
The real culprits—dry air and the friction from pulling a record out of its sleeve—are always going to be part of the equation, no matter how much you spend on your gear. A great turntable is a phenomenal investment in sound quality, but your day-to-day anti-static routine will have a far bigger impact on crackle and pop than your turntable's price tag.
Expert Insight: An audiophile's greatest tool isn't their most expensive component; it's their most consistent habit. A simple pre-play clean with a carbon fiber brush will do more to fight everyday static than a thousand-dollar turntable upgrade.
Can I Use Household Cleaners to Remove Static?
This is a hard no. I can't stress this enough: please, please do not use household cleaners, isopropyl alcohol, or even tap water on your precious records. These substances can cause permanent, irreversible damage to the vinyl.
Household chemicals often contain ammonia or abrasives that will literally eat away at the delicate grooves. And tap water? It's loaded with minerals that leave behind a permanent, sound-altering film once the water evaporates.
- Household Cleaners: Can permanently etch and damage the vinyl surface.
- Isopropyl Alcohol: While sometimes used in very specific, professional dilutions, straight alcohol can strip essential plasticizers from the vinyl, making it brittle over time.
- Tap Water: Leaves behind mineral deposits that create even more noise than the static you were trying to fix.
Always stick to cleaning solutions specifically formulated for vinyl records. They're designed to clean deeply, neutralize static, and then evaporate completely, leaving nothing behind but pure, unadulterated music.
How Often Should I Deep Clean My Records?
Finding the right deep-cleaning rhythm is all about listening to your records, not following a strict calendar.
As a general rule, I give every used record I bring home a thorough wet clean before its first spin. You just never know what kind of dust and grime it's collected over the years.
For new records or the ones you listen to regularly, a deep clean every few months or so is a good baseline. But the real indicator is the sound itself. If you start hearing that familiar surface noise creeping in despite your daily carbon fiber brush routine, it’s time for a proper wet cleaning session. For your day-to-day listening, that quick pre-play sweep is all you need to keep things sounding great.
Ready to build a simple, effective cleaning routine? The EVEO 4-in-1 Vinyl Record Cleaning Kit has everything you need to keep your collection sounding its best. Explore our collector-approved solutions at eveo.store and hear the difference for yourself.
A Guide to Cable Management for Home Office Setups
A Guide to Installing a Cable Organizer Wall