Let's be honest, that tangled mess of cables behind your desk is more than just an eyesore. It’s a productivity killer, a dust magnet, and a potential safety hazard. Getting it all under control is about creating a workspace that’s not just cleaner, but safer and far more efficient.
The basic game plan is simple: power everything down, figure out what goes where, route the cables smartly, and then bundle them up so they’re out of sight and out of mind. It’s a small investment of time that pays off every single time you need to unplug something or add a new piece of gear.
Why Taming Cable Spaghetti Matters
A chaotic jungle of wires isn't just ugly; it actively works against you. Jumbled cables are notorious for trapping dust, which can insulate your electronics and lead to overheating. They create a perfect tripping hazard, and let's face it, trying to trace one specific cable through that mess is an exercise in frustration.
Taking an afternoon to sort it all out is one of the best things you can do for your workspace. It creates a calmer, more focused environment and makes your entire setup feel more professional.
This isn’t just a niche obsession for tidy people, either. The global cable management market was valued at a staggering $27.6 billion in 2023 and is projected to hit nearly $65 billion by 2032. That growth is fueled by our increasing reliance on technology in both our homes and offices.
The good news? You don't need a massive budget to fix the problem. Simple tools like raceways or cable sleeves can prevent up to 80% of common tangles, keeping your desk organized and safe.
Tackling cable management isn't just about hiding wires. It's about taking control of your workspace, reducing digital clutter, and setting yourself up for a more focused and productive day. A clean setup directly translates to a clearer mind.
Your Essential Cable Management Toolkit
Before you dive in and start unplugging things, it pays to have the right tools ready to go. A little preparation makes the entire process faster and much less frustrating. You probably have some of these lying around the house, but a few specialized items can give you that truly polished, professional look.
Here's a quick rundown of what I recommend having on hand.
| Tool Category | Essential Items | Primary Use |
|---|---|---|
| Fastening & Tying | Velcro Ties, Zip Ties, Cable Clips | Bundling groups of wires together and securing them in place. |
| Concealment | Cable Sleeves, Raceways, Cord Hiders | Hiding bundles of cables from view along walls or desks. |
| Mounting | Under-Desk Tray, Adhesive Mounts | Getting power strips and adapters off the floor. |
| Labeling | Label Maker, Colored Tape | Identifying cables for easy future access and changes. |
With the right gear, you can transform that chaotic nest of wires into a clean, streamlined setup in just a few hours.
Think of it this way: organizing your cables is a foundational step. Once you've got that handled, you can really start optimizing your entire desk. For more ideas on taking your setup to the next level, check out this great guide on how to organize a desk for productivity and style.
Setting the Stage for a Clean Setup
Before you even think about tying down a single cable, a little prep work can turn this dreaded task into a genuinely satisfying project. The first, and most important, step is to get a completely clean slate. That means powering down absolutely everything—your computer, monitors, speakers, the works. Unplug it all from the power strip and from each other.
I know, it feels like a hassle. But trust me, working with a totally disconnected system is the only way to get this right. It takes all the guesswork out of the equation and saves you from the future pain of unplugging the wrong thing at the worst possible time.
Sort and Clean Your Workspace
With everything disconnected, start grouping your cables by what they do. This simple act of sorting immediately tames the chaos. You can just make separate piles on the floor or use a few bins.
- Power Cords: These are all your AC adapters and the standard power cables for your PC, monitors, and speakers.
- Data Cables: This pile is for your USB, Ethernet, HDMI, and DisplayPort cables.
- Audio/Peripheral Cables: Think speaker wires, mic connections, or any other specialized cords for your accessories.
Now that the area is clear, it’s the perfect time for a deep clean. Dust and grime aren't just ugly; they can get into cooling fans and cause your expensive gear to overheat, which can shorten its lifespan. A quick wipe-down and a pass with the vacuum will make a world of difference.
The Game-Changing Power of Labeling
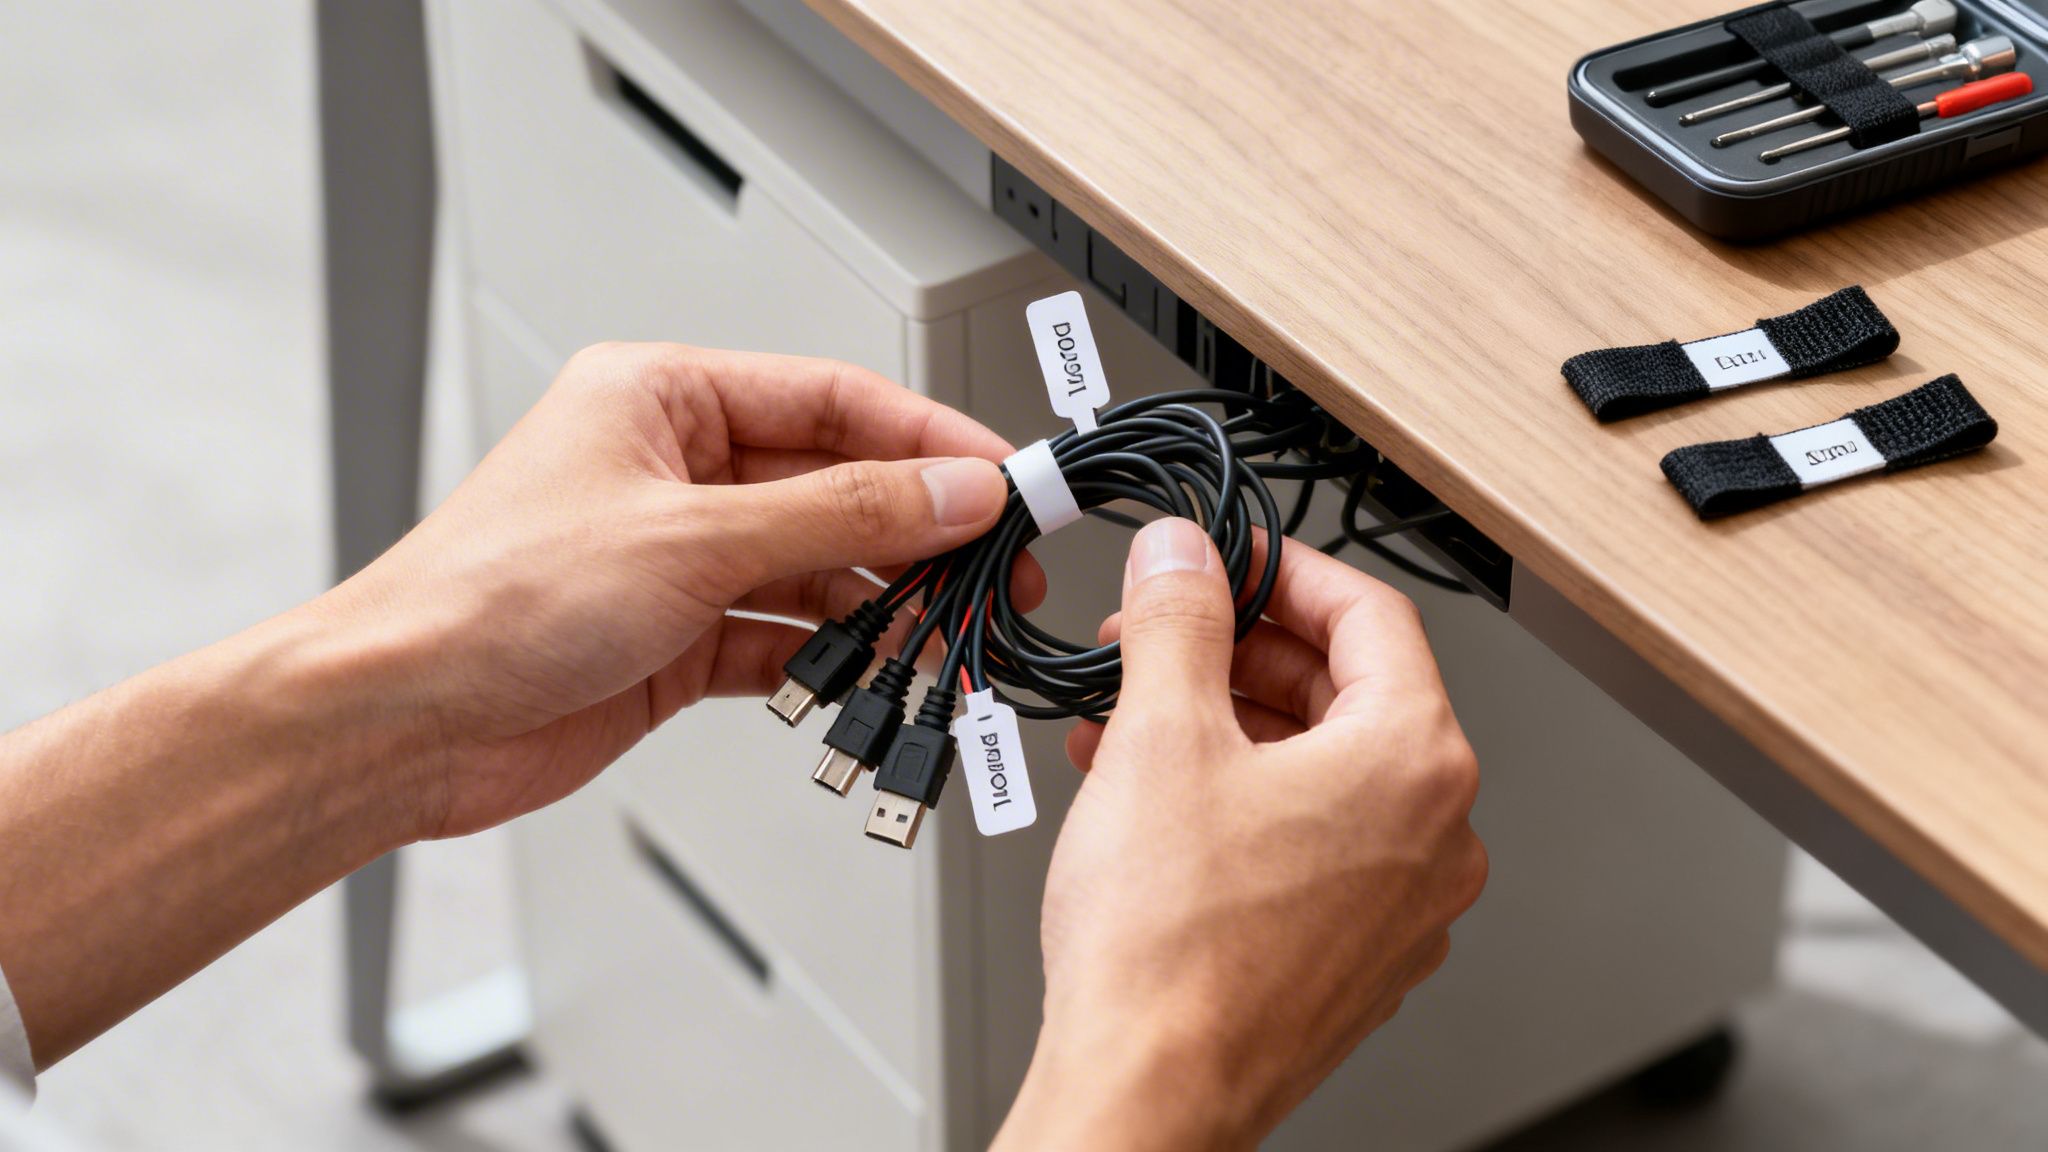
Okay, this next step is one that your future self will thank you for: labeling. It’s a tiny action that prevents one of the biggest headaches in tech management. By labeling both ends of every single cable, you eliminate any and all confusion when you need to troubleshoot, upgrade, or move your setup down the road.
Don’t skip this. Seriously. Spending ten minutes labeling your cables now will save you hours of frustrated wire-tracing later. It is the single most effective habit you can build for long-term organization.
You don't need to get fancy here. A basic label maker is great, but a small piece of masking tape and a permanent marker works just as well. For example, label one end of your display cable "Monitor 1" and the other end "PC GPU-1." This kind of detail makes reconnecting everything foolproof and is foundational to any good home office cable management strategy.
If you're looking for more ways to create a seriously efficient workspace, our guide on cable management for the home office has even more great ideas.
Smart Cable Routing and Bundling Strategies
Okay, you've sorted and labeled your cables. Now for the fun part: giving them a clean, intentional path from point A to point B. This is where we turn that tangled mess into something that actually looks planned.
Effective cable routing isn't about yanking wires taut. It's about guiding them along the natural lines of your furniture—think along the edge of a desk leg or tucked neatly against the underside of your desk. The idea is to create an organized flow that looks deliberate.
A good rule of thumb is to group cables that share a similar journey. All the wires running from your monitors, keyboard, and mouse back to your PC? They should travel together like a caravan. This simple act drastically reduces visual noise and, trust me, makes it a thousand times easier if you ever need to track down a faulty cable later.
This whole process—powering down, sorting, and labeling—is the foundation for a successful cable cleanup. Get these three things right, and the rest becomes so much simpler.
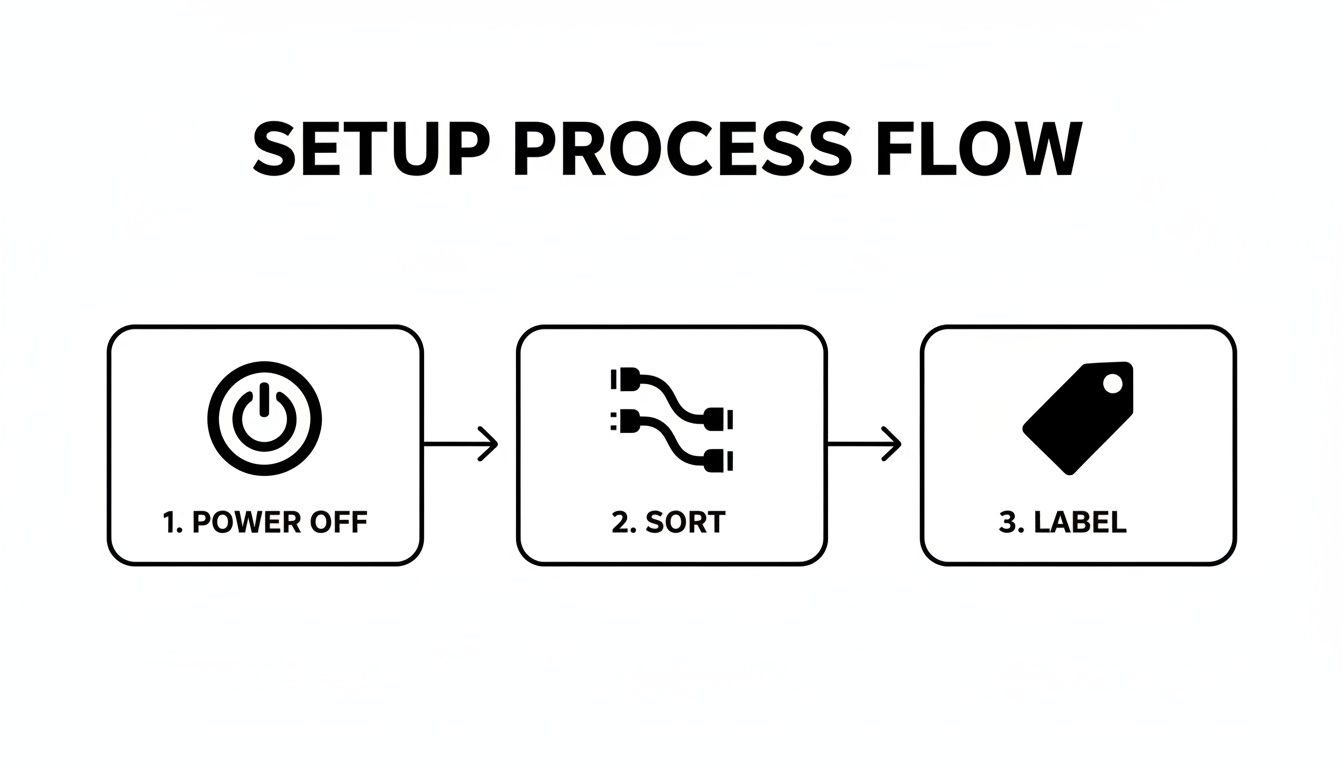
Starting here ensures a safe, logical workflow before you fasten a single wire into place.
Choosing the Right Fastening Tools
The fasteners you choose will make or break your setup's future flexibility. This is a classic rookie mistake: permanently zip-tying cables you know you’ll need to move later. You have to pick the right tool for the job.
- Reusable Velcro Ties: These are my go-to for just about everything. They’re perfect for cables you might adjust, like chargers or peripherals. Plus, they’re gentle on the wires and can be reused endlessly.
- Permanent Zip Ties: I save these for the "set it and forget it" connections. Think internal PC wiring or a server rack—cables that won’t be touched for years. Just be careful not to cinch them too tightly; you can easily damage delicate wires.
- Adhesive Cable Clips: These are fantastic for guiding a single cable along a precise path, like running a speaker wire along the back edge of a desk or up a monitor arm.
Pro-Tip: Always leave a "service loop." This just means coiling a little bit of excess wire near the connection point and securing it. It prevents strain on the port and gives you enough slack to unplug something without having to undo your entire beautiful setup.
To really get things off the floor, the first move is often mounting an under-desk power strip. Securing your main power hub under the desk clears up a ton of clutter instantly and serves as the central point for your whole system.
With hybrid work becoming standard, the demand for tidy, functional spaces is exploding; the cable management market is expected to grow at an 8.2% CAGR through 2030. It’s not just about looks. Unmanaged cables can lead to 30% more dust buildup and contribute to intermittent connectivity issues that frustrate up to 40% of users.
Once you have these bundling basics down, you can take your setup to the next level by making the wires disappear completely. For a truly professional look, check out our guide on using a raceway for professional-grade cable management to learn more.
Hiding Cords for a Professional Finish
You've bundled the wires, and things are already looking much better. But to take your setup from just "tidy" to truly professional-looking, you need to make those cables disappear completely. This is the final and most satisfying step, where you use concealment tools to create a clean, distraction-free space.
The real goal here isn't just about hiding a mess. It's about creating clean visual lines so your desk, your monitors, and your gear are the real focus. Think of it like a picture frame—the right one makes the art pop without drawing attention to itself. That’s what good cable concealment does for your workspace.
Find Your Perfect Concealment Method
The right tool for the job really depends on your specific setup and the problem you're trying to solve. Let's break down the most popular options and where they really shine.
-
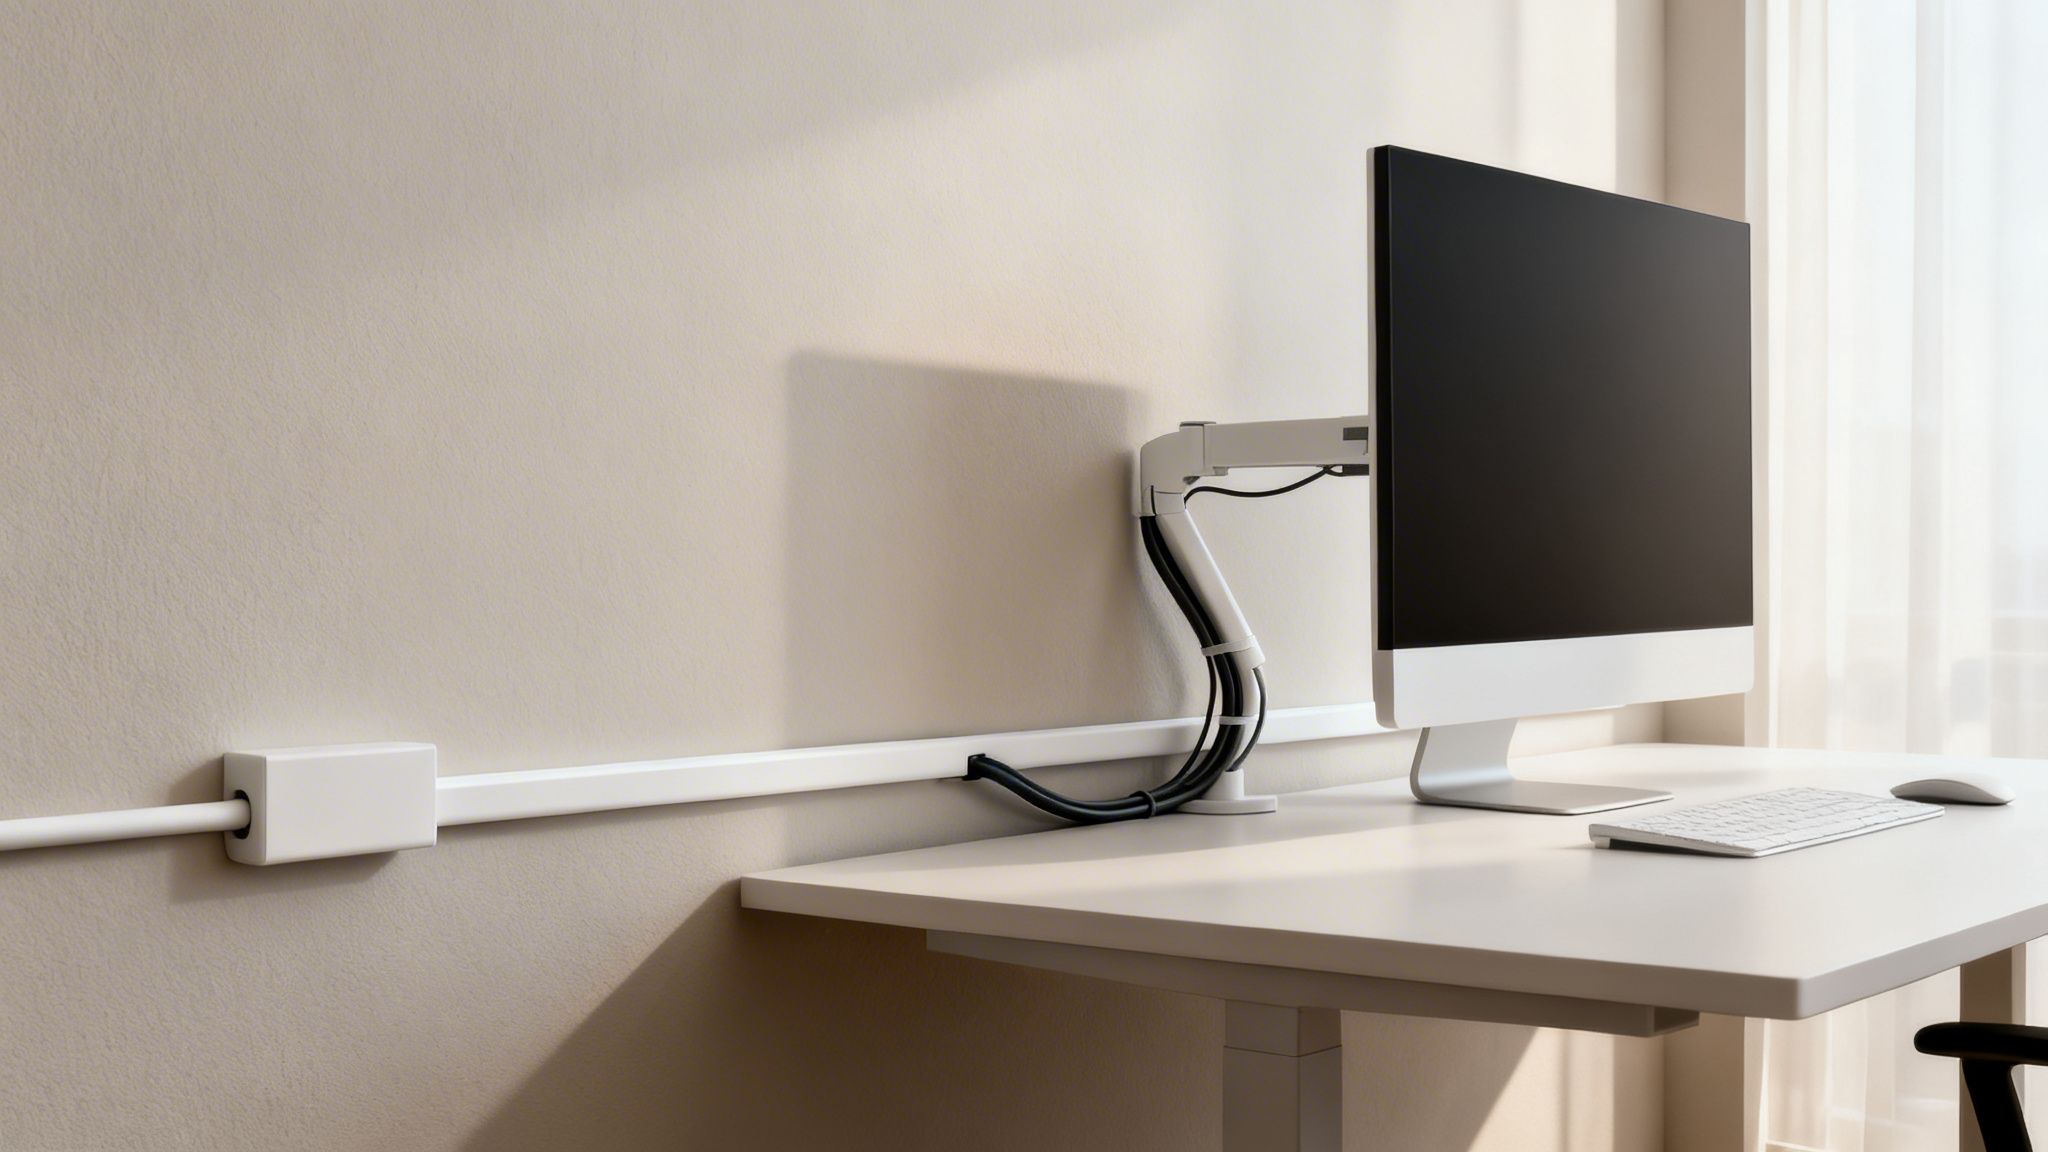
Cable Raceways: These are the rigid plastic channels you see running along walls or under desks. They attach with a strong adhesive and are hands-down the best way to run cables over a long, straight distance—like from a wall-mounted TV down to a power outlet. They give you a perfectly straight, paintable line.
-
Flexible Cable Sleeves: Think of a sleek fabric tube that wraps around a bundle of wires. These are brilliant for grouping cables that still need to move and flex, like the ones going from your PC to your monitor and peripherals. Most use a zipper or Velcro, so adding or removing a cable later on is a breeze.
-
Under-Desk Trays or Nets: These are the unsung heroes of cable management. A tray is a metal or plastic basket that screws into the underside of your desk, creating a hidden shelf for your power strip and all those bulky power bricks. No more kicking adapters around your feet!
The biggest mistake I see people make is trying to use a single solution for everything. The cleanest setups almost always use a combination of tools: a raceway along the baseboard, a flexible sleeve running from the desk to the PC, and a tray tucked underneath to hold the power strip.
To make the decision a little easier, I've put together a quick comparison of the most popular tools.
Choosing Your Ideal Cable Concealment Solution
This table breaks down the most popular cable hiding tools to help you figure out which one is best for your specific setup and needs.
| Solution | Best For | Flexibility | Aesthetic Impact |
|---|---|---|---|
| Cable Raceways/Conduits | Long, straight runs along walls, baseboards, or under the desk edge. | Low (Rigid) | High (Creates a clean, permanent-looking line) |
| Flexible Cable Sleeves | Bundling cables that need to bend and move, like from a PC to a monitor. | High (Fabric) | Medium (Tidies bundles but is still visible) |
| Under-Desk Trays/Nets | Hiding power strips, adapters, and excess cable length under the desk. | N/A (Static) | Very High (Completely out of sight) |
Ultimately, mixing and matching these options will give you the most polished and practical result.
Smart Installation Tips for a Lasting Fix
Before you start peeling the adhesive backing off anything, take a minute to plan your route. Lay the raceway or sleeve in place to make sure it’s exactly where you want it. Trust me, once that adhesive is on, it's a real pain to move without damaging your wall or desk.
For raceways, grab a small level to get your lines perfectly straight. It's a tiny detail, but a crooked raceway can be just as distracting as the messy cables it's supposed to hide. When you install a tray, mount it toward the back of your desk so it’s out of sight but you can still reach it when you need to.
The push for clean setups isn't just a trend; it's a productivity game-changer. The global cable management market is expected to hit an incredible $52.83 billion by 2034. It's easy to see why when you consider that 65% of workers say cable clutter is a major distraction that costs them up to 15 hours of efficiency a year.
That’s why solutions from EVEO, like our raceways and sleeves, are trusted by over 100,000 reviewers. They directly solve this problem, turning chaotic desks into polished, functional workspaces. You can see more data on this growing market over at fortunebusinessinsights.com.
Once you've hidden the main cable bundles, you’ll be stunned at the difference it makes. For a deeper dive into specific techniques, check out our complete guide on how to use a cable cord hider for that truly flawless finish.
Cable Management for Safety and Ergonomics
Let's be honest, good cable management is about more than just looks. A tidy setup is a direct investment in your safety and the health of your expensive electronics. That tangled nest of wires under your desk isn't just an eyesore; it's a real-world hazard.
Every time you roll your chair back or walk past your desk, you’re running the risk of snagging a cord. That one stray cable could be the one that sends your monitor crashing down or yanks a hard drive right off your desk. By properly routing your computer cables, you turn that chaotic space into something safe and functional, which is especially important if you have kids or pets running around.
Taming Cables in a Dynamic Workspace
Ergonomic gear like standing desks and adjustable monitor arms are fantastic, but they introduce a whole new challenge: movement. How do you keep things neat when your entire setup is in motion? The secret is to plan for that movement from the start.
You absolutely have to leave enough slack in your cables to accommodate the full range of motion. If a cable is too tight, it’s going to get stressed or unplugged the first time you raise your desk. A great trick is to run the monitor cables along the monitor arm itself, secured with a few simple Velcro ties. Just be sure to leave a gentle "S" bend at each joint to give it the flexibility it needs.
For standing desks, the golden rule is to mount your power strip directly to the underside of the desk. This makes your entire desktop a self-contained unit. Now, only one or two main cables have to be long enough to reach the wall, instead of a dozen.
Critical Safety and Performance Tips
Beyond just keeping things tidy, how you route your cables can have serious safety and performance consequences. Following a few best practices here will protect both you and your gear.
-
Never "Daisy-Chain" Power Strips: This is a big one. Plugging one power strip into another is a recipe for overloading the circuit and creating a serious fire hazard. If you need more outlets, invest in a single, high-quality surge protector with enough ports for everything.
-
Keep Power and Data Cables Separate: Whenever you can, avoid running power cords and data lines (like Ethernet, HDMI, or USB) bundled tightly together. Power cables can cause electromagnetic interference (EMI), which can mess with your data signal. This might show up as a spotty internet connection or a flickering monitor.
-
Boost Your PC's Airflow: Inside your computer case, a mess of cables can choke off airflow, trapping heat. By neatly routing internal cables, you allow your fans to do their job properly, keeping your components cool. Better airflow can genuinely extend the life of your processor and graphics card.
Got Questions? I’ve Got Answers.
Even the most straightforward cable cleanup project can throw you a curveball. You’re in the zone, everything is going great, and then you hit a snag. Let's tackle some of the most common questions that pop up when you're deep in the trenches of cable management.
How Do I Handle Cables for a Standing Desk?
This is a big one. The secret to a successful standing desk setup is making sure everything moves together. Your first move should always be to mount a power strip directly to the underside of your desk. Think of it as creating a self-contained power station for your entire desktop.
Once that's done, all your monitors, peripherals, and desk gadgets plug right into that strip. This means you only have one or two main cables running from the desk to the wall outlet. Wrap those primary cords in a flexible cable sleeve or, for a really slick solution, a vertical cable spine. This gives you the slack you need to move the desk up and down without yanking a plug out of the wall or damaging your gear.
The biggest mistake I see with standing desks? People leave the power strip on the floor. Every time the desk moves, it puts a strain on every single cord. Mounting the strip to the desk is non-negotiable for a reliable, safe setup.
What’s the Best Way to Label Cables Without Making a Mess?
If you want a clean, professional look, grab a label maker. My go-to method is to use clear or white tape. Instead of wrapping the label around the cord like a piece of tape (which is always a pain to read), print the label and fold it over the cable near the plug. This creates a neat little flag that’s super easy to read at a glance.
If you're more of a visual person, color-coding is fantastic. It's simple and incredibly effective.
- Color-Coded Velcro Ties: Assign a color to each type of cable. Maybe red for power, blue for data, green for audio. You get the idea.
- Colored Electrical Tape: A small, tidy band of colored tape near each plug works just as well.
This approach lets you spot the exact cable you need in a tangled bunch instantly, no bulky, hard-to-read handwritten tags required.
Is It Okay to Run Power and Data Cables Together?
It's tempting to bundle everything into one neat channel, I get it. But as a rule of thumb, it's best to keep power and data lines separate. Power cords can create electromagnetic interference (EMI), which can mess with the signal in your HDMI, Ethernet, or USB cables. That interference can show up as a flickering monitor, a spotty internet connection, or other annoying glitches.
If you absolutely have to run them in the same raceway, try to keep the power cords on one side and your data cables on the other. For a truly bulletproof setup, especially for gaming or video editing, use two separate channels or a raceway with a built-in divider. It’s the surest way to guarantee a clean signal.
Ready to get those power bricks and adapters off the floor for good? The EVEO Under-Desk Cable Management Tray is the perfect centerpiece for a clean, organized workspace. Shop our full collection of organization tools at EVEO.store and start building a safer, more productive setup today.
How to Clean Your Computer Screen Without Damaging It
Your Guide to a Perfect Cable Raceway Wall Installation