So, you’ve made the leap and bought a standing desk. But after a few days, instead of feeling energized, your shoulders are tight, your wrists are complaining, and you’re finding it harder to focus. What gives?
Nine times out of ten, the problem isn't the desk itself—it's the height. Getting your standing desk height dialed in perfectly is the secret to unlocking all those benefits you've heard about, from relieving back pain to sharpening your concentration.
Why Your Standing Desk Height Is a Game-Changer
When you get the height just right, your desk stops being a simple slab of wood or metal and becomes a genuine tool for your well-being. But if it’s off—even by an inch or two—it quietly forces your body into awkward, unnatural positions. This is what leads to that nagging muscle strain and poor posture, completely defeating the purpose of standing in the first place.
Think of it like getting a suit tailored. Off the rack, it might fit okay, but a few small adjustments make it feel like it was made just for you. A properly adjusted desk does the same for your posture, encouraging a neutral position where your joints are aligned and your muscles aren't fighting to keep you upright.
The Real Cost of Getting It Wrong
The consequences of a bad setup go way beyond a stiff neck. Over time, that constant misalignment can lead to chronic musculoskeletal pain, mess with your circulation, and absolutely drain your focus. It’s a reminder that we’re trying to escape the sitting epidemic, and that means we need to stand correctly, not just stand more.
The whole point is to create a workspace that fits your body like a glove. When you nail that personalized setup, abstract ergonomic theory turns into real-world comfort and focus that you can feel all day long.
This isn't just a trend; it's a movement backed by some serious numbers. The standing desk market has exploded for a reason. Research shows that setting your desk height to achieve that perfect 90-degree elbow angle can slash musculoskeletal strain by up to 54%.
This guide is your blueprint to get it right. Let’s make sure your desk is working for you, not against you.
How To Find Your Perfect Standing Desk Height in 3 Simple Steps
Forget the guesswork. Finding the right height for your standing desk isn't some complicated ergonomic puzzle; it's actually a pretty straightforward process that hinges on your own body. Think of it like adjusting the driver's seat in a new car—once you find that sweet spot, everything just feels right. The key to it all is the Elbow Height Rule, and we'll walk through it step-by-step.
This simple rule is the bedrock of a comfortable standing habit. When you align your desk to your body, you sidestep all the common traps that lead to strain, aches, and pains.
This is the exact cycle many people get stuck in—the pain from sitting too long leads them to stand, but if the setup isn't right, they just trade one set of problems for another.
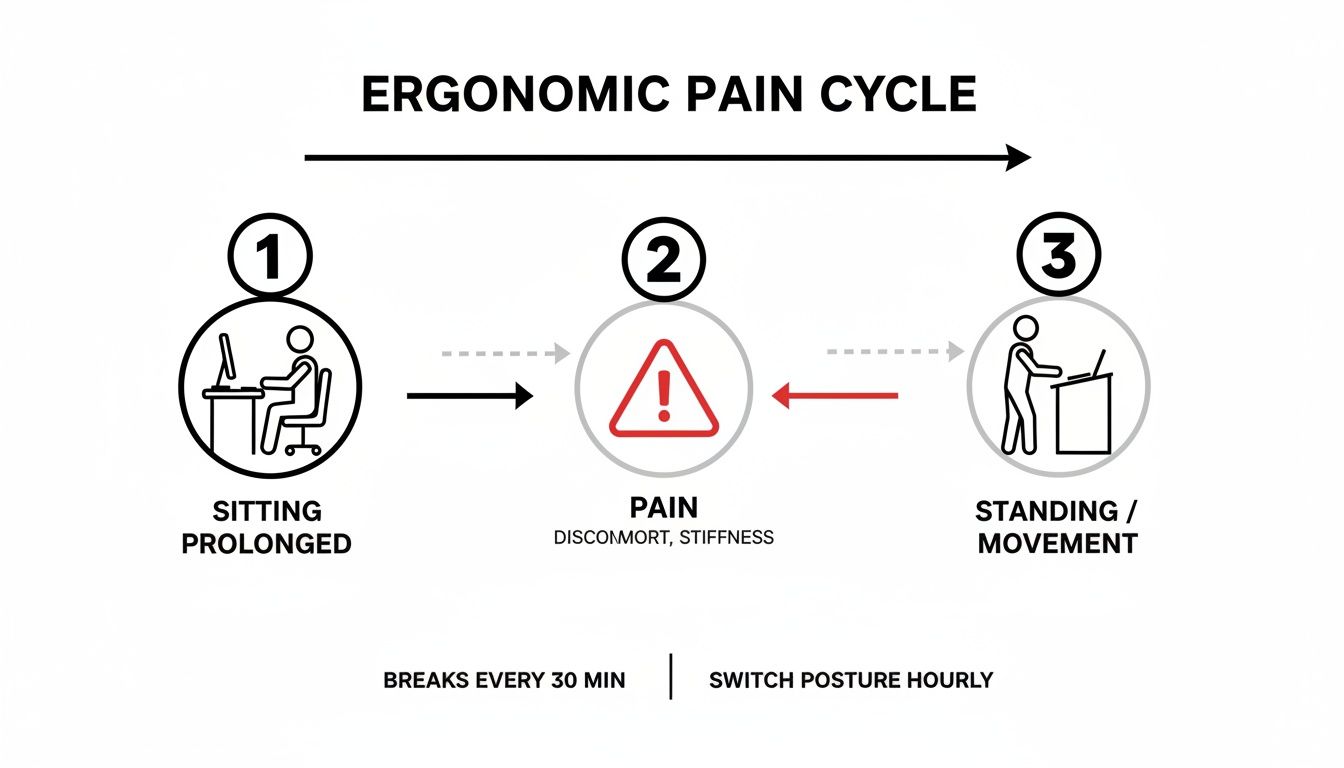
This visual drives home a critical point: just owning a standing desk isn’t the solution. Setting it to the correct height is what truly breaks the pain cycle and unlocks all the benefits.
Step 1: Get Your Stance Right
Before you even think about touching your desk controls, start with your foundation: your feet. Stand on whatever surface you'll normally be on, whether that's the bare floor, a comfy anti-fatigue mat, or even a balance board. This is a bigger deal than it sounds—a one-inch mat can completely throw off your ideal height.
Plant your feet about shoulder-width apart, making sure your weight is balanced evenly. Keep your shoulders relaxed and down (not hunched up by your ears) and look straight ahead. This natural, neutral stance is the baseline for getting everything else right.
Step 2: Find Your 90-Degree Angle
Okay, now let your arms hang loose at your sides. From there, bend your elbows to a 90-degree angle so your forearms are parallel to the floor. Your wrists should be perfectly straight, not bent up or down, almost like you’re about to start typing on a keyboard floating in mid-air.
This 90-degree bend is your ergonomic sweet spot. It’s the position where your wrists, elbows, and shoulders are under the least amount of stress. Everything we do from here on out is about maintaining this angle.
Your elbows are the real reference point here—not your hands or the desk itself. The goal is to bring the desk up to meet your arms in this relaxed, neutral position.
This kind of personalized fit is why standing desks have taken off globally. You see electric models standardizing their height ranges from about 25 to 52 inches to accommodate a huge variety of body types. And it works—studies have shown that a properly adjusted setup can slash neck strain by as much as 62%. For more on how ergonomics is changing our offices, check out the latest market reports from Future Market Insights.
Step 3: Adjust, Measure, and Set
With your arms still held in that perfect 90-degree position, it’s time to bring the desk into the picture. Start raising (or lowering) the surface until it just barely touches the bottom of your forearms and hands. You should be able to rest your fingers lightly on your keyboard without having to drop your wrists or shrug your shoulders.
Once it feels perfect, grab a measuring tape. Measure the distance from the floor right up to the top of your desk surface. Now, write that number down! That's your personalized standing desk height. For more tips on dialing in the rest of your space, see our guide on how to build a desk setup that works for you.
Having this measurement is a game-changer, especially if your desk has memory presets. You can save this height and get back to it with a single button press, guaranteeing a perfect posture every time you stand. It removes all the fiddling and helps you build a healthy, consistent routine.
Standing Desk Height Quick Reference Chart
While the 3-step method above is the most accurate way to find your perfect height, this chart is a fantastic starting point. It gives you a solid estimate based on your body height for both standing and sitting. Just find your height on the left to see the recommended desk heights.
| Your Height | Recommended Standing Desk Height | Recommended Sitting Desk Height |
|---|---|---|
| 5'0" (152 cm) | 37 - 38 inches (94 - 97 cm) | 22 - 23 inches (56 - 58 cm) |
| 5'3" (160 cm) | 39 - 40 inches (99 - 102 cm) | 23 - 24 inches (58 - 61 cm) |
| 5'6" (168 cm) | 41 - 42 inches (104 - 107 cm) | 24 - 25 inches (61 - 64 cm) |
| 5'9" (175 cm) | 43 - 44 inches (109 - 112 cm) | 25 - 26 inches (64 - 66 cm) |
| 6'0" (183 cm) | 45 - 46 inches (114 - 117 cm) | 27 - 28 inches (69 - 71 cm) |
| 6'3" (191 cm) | 47 - 48 inches (119 - 122 cm) | 28 - 29 inches (71 - 74 cm) |
Remember, these numbers are a guide. Use them to get in the right ballpark, then fine-tune the height using the 90-degree elbow rule to get it just right for your body and your specific setup.
Optimizing Your Monitor and Keyboard Placement
Getting your standing desk to the right height is a huge first step, but it's really only half the battle. Think of your workspace as a complete system, where every piece needs to work together. Your monitor and keyboard are the next critical parts of that ergonomic puzzle.
If your monitor is too low or your keyboard is at a weird angle, your body will compensate. You’ll find yourself craning your neck or bending your wrists, which is exactly the kind of strain you’re trying to prevent. Let's get the rest of your setup dialed in.
The Eye-Level Rule for Your Monitor
Your neck simply isn't built to be tilted for hours at a time. The most important rule for positioning your monitor is to place the top of the screen at or just below your eye level. This one change lets you look straight ahead, keeping your neck and spine in a comfortable, neutral line.
Finding that sweet spot is easy:
- Stand up straight, relax your shoulders, and look directly forward.
- Raise or lower your monitor until the top bezel lines up with your gaze.
- The screen itself should be about an arm's length away.
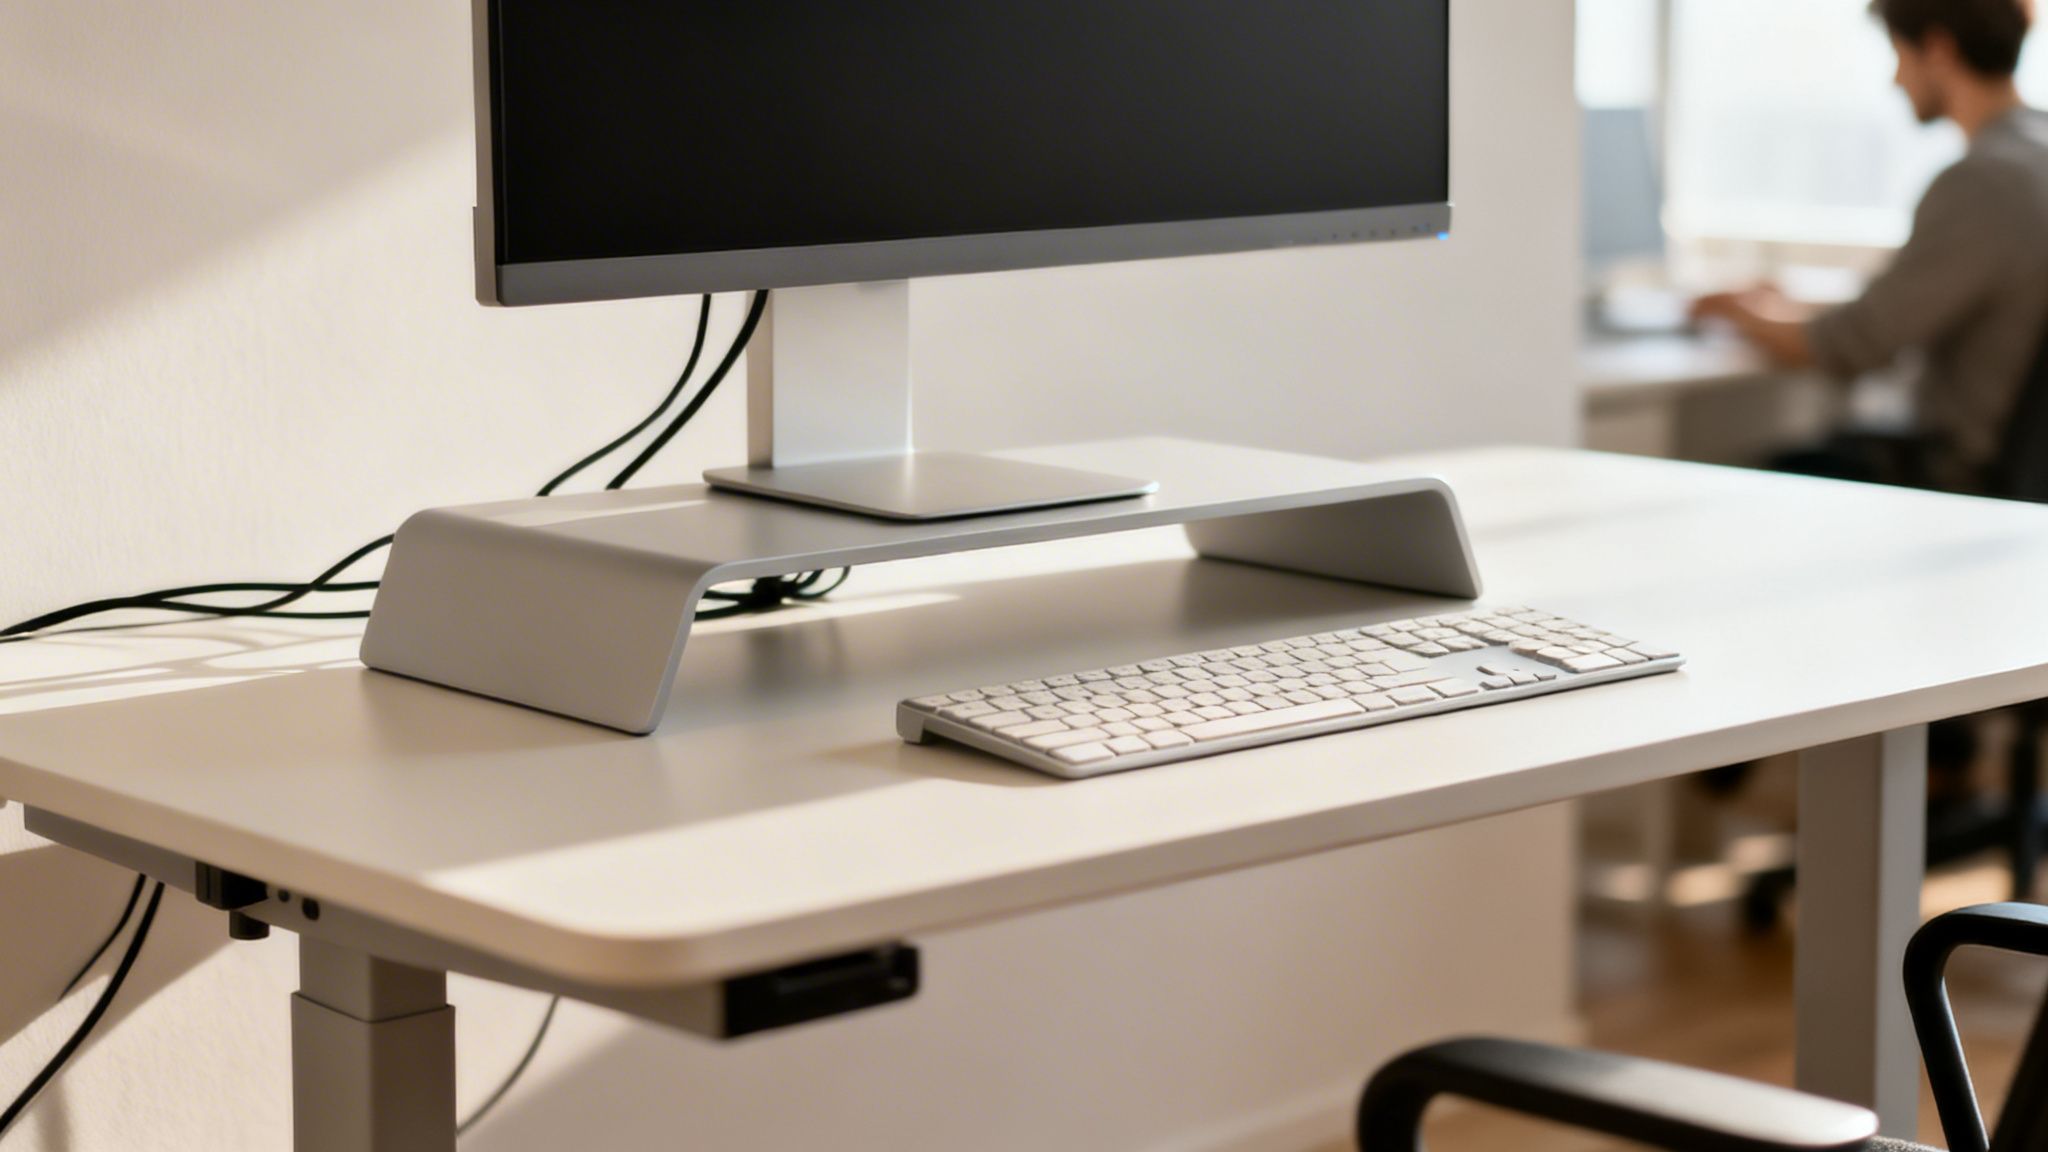
If your monitor’s built-in stand doesn’t adjust, a dedicated monitor riser or even a sturdy stack of books can do the trick. For ultimate control, though—especially if you're juggling two screens—nothing beats a good monitor arm. You can find more on picking the right one in our guide to the best monitor arms for dual monitors.
The whole point is to let your eyes do the moving, not your neck. Your gaze should land naturally in the middle of the screen without you having to dip your chin or tilt your head back.
Proper monitor placement is just one piece of the puzzle. To really get it right, it helps to understand how to improve posture at your desk from head to toe. This holistic approach ensures your entire workspace is supporting you.
Keeping Your Wrists Straight and Happy
Just like your monitor's height affects your neck, your keyboard's position has a direct impact on your wrists. The goal is a neutral wrist posture, which means keeping your wrists straight and aligned with your forearms while you type. Bending them up or down for hours is a recipe for aches and pains.
The easiest way to do this is to keep your keyboard flat on your desk. Resist the urge to pop out those little feet on the back—that positive tilt forces your wrists to bend upwards. An even better option is a keyboard tray that allows for a slight negative tilt, angling the keyboard away from you. This is one of the most natural positions for your hands.
Creating a Fully Ergonomic System
When your desk height, monitor, and keyboard are all working in harmony, you’ve built a true ergonomic system. This is where modern desk tech really proves its worth. Electric standing desks, with their broad adjustment ranges (often between 24.5 to 50.2 inches), are the perfect foundation.
When you pair an adjustable desk with smart accessories like monitor arms and cable organizers, you can totally transform your space. In fact, simply managing your cables can cut down on clutter by as much as 70%, creating a more calming and focused environment. It's this synergy between all the components that makes the biggest difference.
Mastering the Sit-Stand Transition for Maximum Benefit
The real magic of a standing desk isn't about standing for eight hours straight. Let's be honest, standing all day can be just as draining as sitting all day. The actual health and productivity payoff comes from consistent movement and frequently changing up your posture.
Think of your workday less like a marathon stuck in one position and more like a series of active intervals. By switching between sitting and standing, you keep your muscles firing, your blood flowing, and you sidestep the fatigue that creeps in when you stay put for too long. This dynamic approach is the secret to staying energized and focused.
Finding Your Sit-Stand Rhythm
If you're just starting out, the 30:30 rule is a fantastic place to begin. It's simple: alternate between 30 minutes of standing and 30 minutes of sitting. This gives you an easy-to-remember framework to build the habit of movement without it feeling like a chore.
But here’s the thing—there’s no magic ratio that works for everyone. The best rhythm is the one you’ll actually stick with.
- Listen to Your Body: If your feet start complaining after 20 minutes of standing, that’s your signal to sit down. Don’t try to tough it out to hit some arbitrary number.
- Match the Task to the Posture: You might find you prefer standing during high-energy tasks like brainstorming calls, then sitting for deep-focus work like writing or coding.
- Start Small: If you're new to this, maybe just stand for 15-20 minutes every hour. You can gradually work your way up as your body gets used to it.
The goal isn't to punish yourself; it's to build a sustainable habit of movement. The right sit-stand schedule is whatever keeps you feeling comfortable, productive, and engaged all day long.
Ultimately, finding this rhythm helps you maintain a healthier posture in the long run. If you want to brush up on the fundamentals, our guide on proper sitting posture at a computer covers essential tips that are just as relevant when you're standing.
Making Transitions Effortless with Presets
Having to manually crank your desk up and down every time you want to switch positions gets old, fast. It's a small hassle that makes it tempting to just stay seated. This is where memory presets on an electric standing desk are a game-changer.
By saving your ideal sitting and standing heights, you can switch between them with the single press of a button. It removes all the friction from the process, turning what was a conscious effort into a seamless, automatic habit. Think of it like the seat presets in your car—it guarantees a perfect ergonomic fit every time, no fiddling required.
Here’s how to put them to good use:
- Find Your Perfect Heights: Use the methods we've already covered to dial in your ideal desk heights for both sitting and standing.
- Save Your Presets: Program those two heights into your desk’s memory keypad. Most desks have room for 3-4 presets, so you could even add a third for an under-desk treadmill or a balance board.
- Use a Timer: Set a simple, recurring timer on your phone or computer to nudge you when it's time to change positions.
When the transition is this easy, you're so much more likely to stick with a healthy sit-stand routine. It’s a small feature that makes a massive difference in keeping you active and comfortable day in and day out.
Common Desk Height Mistakes and How to Fix Them
Even with the best intentions, it's easy to get your standing desk height just a little bit wrong. The good news is that your body is an excellent feedback machine—it'll tell you almost immediately when something is off. Think of this section as your personal troubleshooting guide for decoding those signals and fixing the most common setup blunders.
A twinge in your neck or a dull ache in your back isn't a failure; it's just your body asking for a quick adjustment. Learning to listen is the key to creating a workspace that actually works for you, day in and day out.
Mistake 1: The Desk Is Too High
This is, without a doubt, the most common pitfall I see. When your desk is even an inch too high, your body is forced to compensate. You'll find yourself subconsciously shrugging your shoulders to get your forearms up to the keyboard, creating a constant, low-grade tension that builds up in your neck and upper back.
Symptoms of a High Desk:
- Nagging pain or stiffness right where your neck meets your shoulders.
- A feeling that your shoulders are constantly creeping up toward your ears.
- Tension headaches that seem to radiate from the base of your skull.
The Fix: Lower your desk in small increments. You're aiming for the point where your elbows can rest comfortably at a 90-degree angle with your shoulders completely relaxed and down. Your forearms should feel like they are floating just above the desk, parallel to the floor, without any effort.
Mistake 2: The Desk Is Too Low
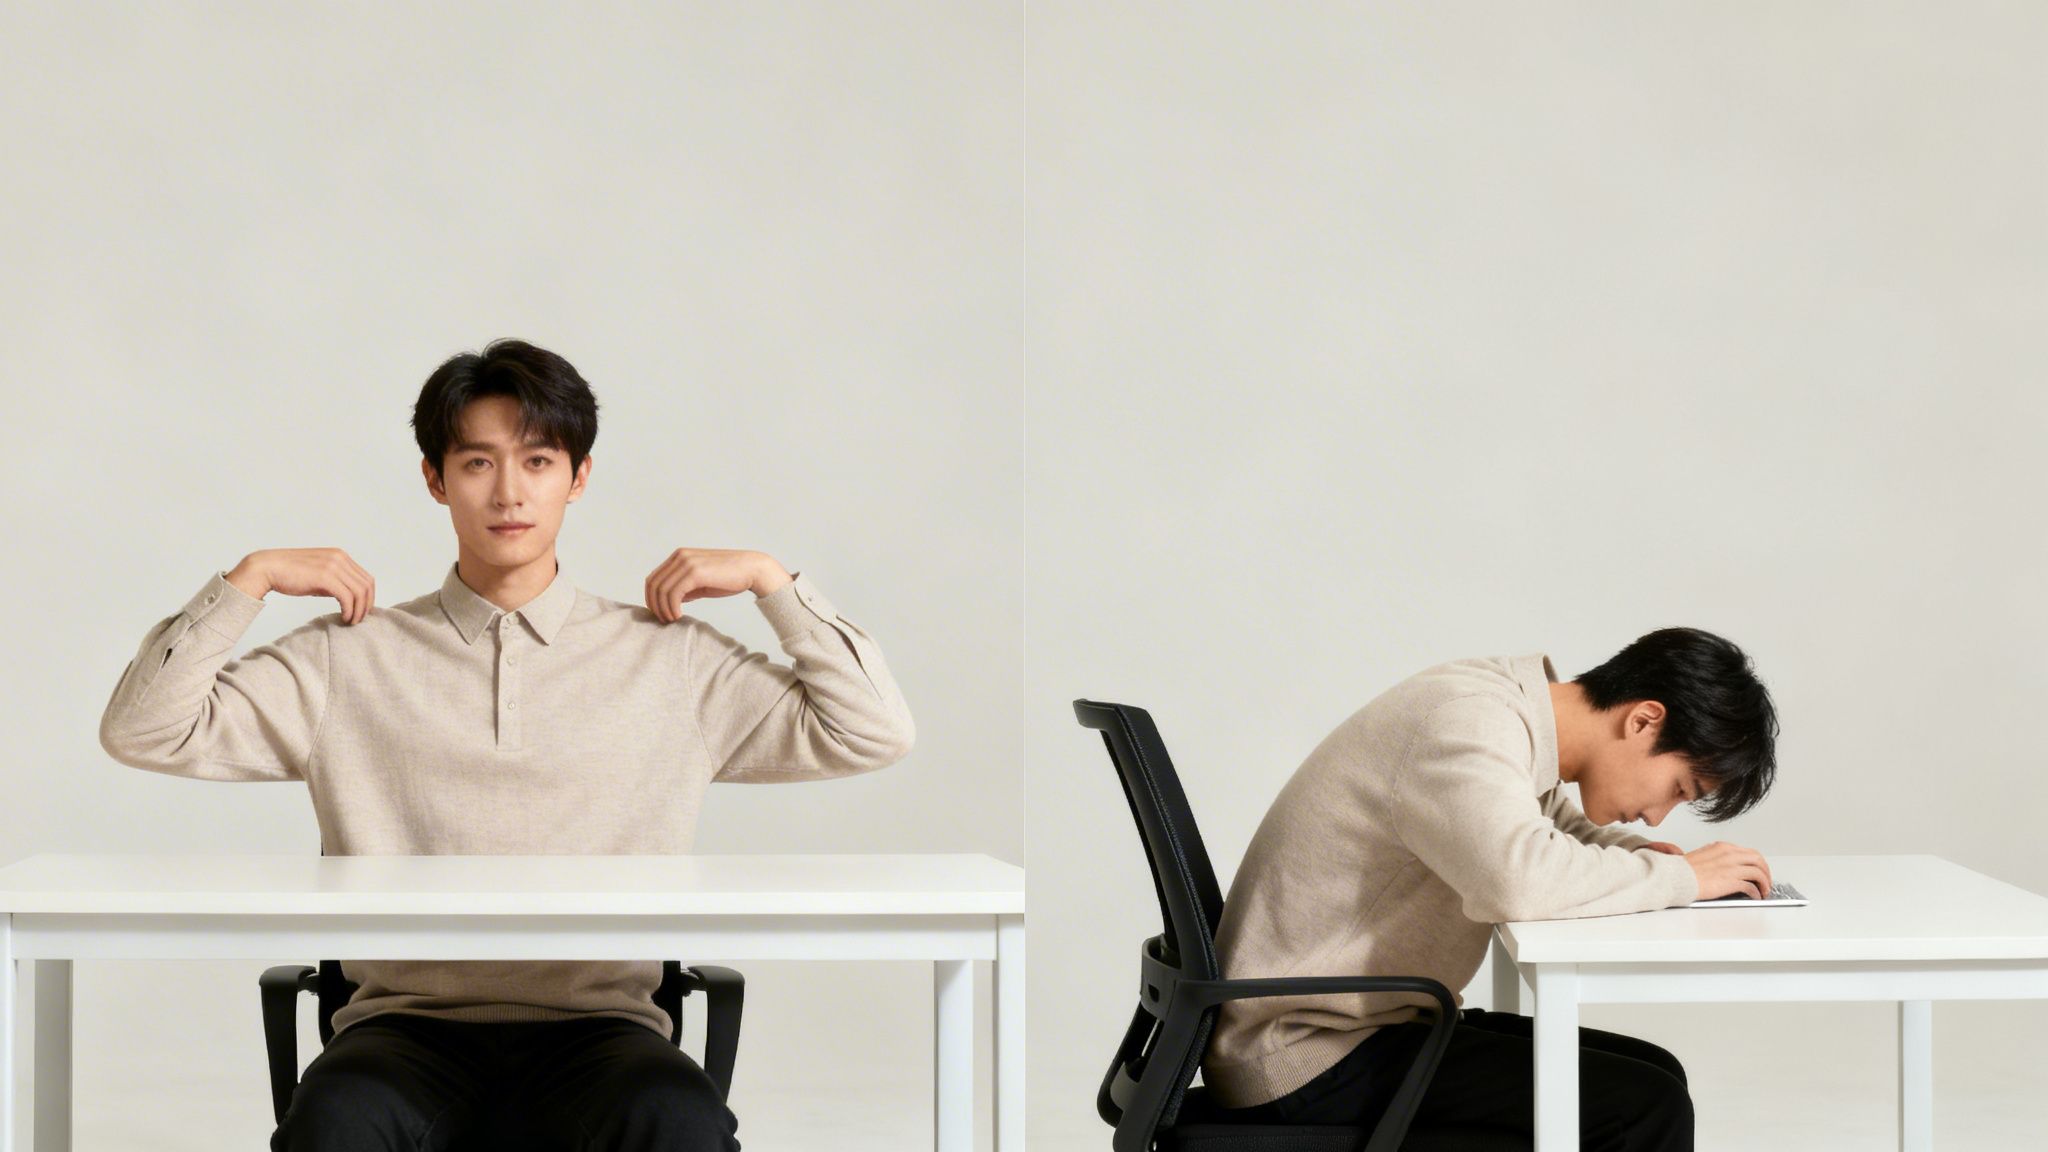
Setting your desk too low is just as bad, but it creates a different set of problems. To reach your keyboard and mouse, you have no choice but to hunch forward, rounding your spine and shoulders. This slouched posture compresses your vertebrae and puts a ton of strain on your lower back.
Symptoms of a Low Desk:
- A dull, aching sensation in your lower and mid-back after standing for a while.
- You find yourself leaning on the desk to support your upper body.
- Your wrists are bent upward at an awkward angle just to type.
The Fix: Raise your desk surface until it meets your forearms when they're held at that perfect 90-degree angle. This one change encourages you to stand up straight, engage your core, and maintain a healthy, neutral spine.
Mistake 3: Forgetting About Your Monitor
So many people nail the desk height but completely forget about the monitor. If your desk is perfect for your elbows but your screen is too low, you're still going to end up with that dreaded "tech neck," craning your head down to see what you're doing. This creates a direct line of strain from your neck all the way down your spine.
Symptoms of a Poorly Placed Monitor:
- A stiff, sore neck, especially after a couple of hours of focused work.
- Pain between your shoulder blades from constantly looking down.
- Eye strain from being too close, too far, or at the wrong angle.
The Fix: Treat your monitor as a separate piece of the ergonomic puzzle. Use a dedicated monitor stand, a sturdy stack of books, or an adjustable monitor arm to get the height right. The goal is to position the top of the screen at or just below your eye level. This allows you to look straight ahead with a relaxed neck and neutral posture.
Ergonomic Mistake Troubleshooting Guide
Sometimes you just know something feels wrong, but you can't quite put your finger on it. This quick guide connects common aches and pains directly to a likely cause and an easy solution.
| The Mistake | What It Feels Like (Symptom) | How to Fix It |
|---|---|---|
| Desk Too High | Shoulder/neck tension, feeling "scrunched up." | Lower desk until elbows are at a relaxed 90-degree angle. |
| Desk Too Low | Lower back pain, hunching forward, upward wrist bend. | Raise desk until forearms are parallel to the floor. |
| Monitor Too Low | Stiff neck, pain between shoulder blades, eye strain. | Raise monitor so the top of the screen is at or just below eye level. |
| Monitor Too High | Dry eyes, leaning back, neck strain from looking up. | Lower monitor so you can look straight ahead with a neutral neck. |
| Keyboard/Mouse Too Far | Reaching forward, rounded shoulders, upper back pain. | Bring keyboard and mouse closer so elbows stay by your sides. |
Remember, your body is the ultimate authority. The "perfect" height isn't a static number but a dynamic position where your joints are aligned and your muscles feel relaxed. If you feel any strain, it's simply a sign that it's time for a micro-adjustment.
Your Blueprint for a Healthier Workspace
Now that we’ve covered the mechanics of getting your standing desk height just right, let's pull it all together. Think of this as your personal cheat sheet for building a workspace that actually helps you feel good and stay focused. We're moving past the theory and into what you can do, right now, to make a real difference.
The goal here isn't just to stand more, but to stand smarter. When you get this right, your desk stops being a place you're stuck at and becomes your best tool for getting things done.
It all boils down to two core ideas we've touched on. If you can master these, you'll nail your setup and sidestep the common aches and pains that trip so many people up.
The Two Golden Rules of Desk Ergonomics
Your entire journey to a more comfortable workday really comes down to two simple, powerful rules. Once these click, you'll be able to instinctively adjust your setup on the fly, no matter where you're working.
- The Elbow Rule: This is your starting point for the desk surface itself. Whether you’re sitting or standing, your elbows should rest at a natural 90-degree angle, with your forearms running parallel to the floor. No shrugging, no reaching.
- The Eye-Level Rule: This one is all about your monitor. The very top of your screen should be at, or just a hair below, your eye level. This simple adjustment is what saves your neck from that constant, nagging strain of looking up or down.
Don't think of these as strict, unbreakable laws. See them as a starting framework. Your body is the real expert here; these rules just help you understand what it's trying to tell you.
Once you get a feel for these principles, you can adapt them to anything. It doesn't matter if you're trying out a balance board, wearing different shoes, or just working from a laptop on the go. They give you the power to find your perfect posture and keep it all day long.
Your move toward a better workspace starts with one simple action. Don't put it off. Right now, use the Elbow Rule to find your ideal standing desk height. It’s a small first step, but it’s the one that puts you on the path to feeling more comfortable, focused, and energized at work.
Got More Questions About Your Standing Desk Height?
Once you get the basics down, you start running into those real-world "what if" scenarios. What happens when you add a treadmill? Or what if you work on a laptop all day? Getting your setup just right often means a little extra fine-tuning.
This section tackles the most common questions we get from people dialing in their standing desks. Think of it as your go-to guide for handling those specific situations that pop up after you've nailed the fundamentals.
How Do I Set My Desk Height with a Treadmill or Balance Board?
Adding an under-desk treadmill or a balance board is a brilliant way to stay active, but it throws a wrench in your height calculation. The trick is simple: always measure from whatever surface you're standing on, not the floor itself.
Hop on your treadmill, balance board, or even a thick anti-fatigue mat. From there, just follow the same Elbow Height Rule we talked about earlier. Adjust the desk so your elbows rest at a natural 90-degree angle with your shoulders relaxed.
You’ll notice the desk ends up a few inches higher than it would be otherwise, which makes perfect sense. This is exactly why standing desks with memory presets are so handy.
You can save a specific height for each way you work. Maybe Preset 1 is for standing flat-footed, Preset 2 is for your treadmill, and Preset 3 is for sitting. A quick tap of a button and you're good to go.
This little bit of prep work means your posture stays perfect, no matter how you're moving. It takes the guesswork out of switching things up, so you can stay focused on your work instead of constantly fidgeting with your desk height.
What’s the Right Height If I’m Just Using a Laptop?
Working straight from a laptop creates a classic ergonomic Catch-22. If you set the desk for comfortable typing, you'll be hunched over looking down at the screen. If you raise the desk to get the screen at eye level, your arms and wrists will be in a terrible position.
The best answer is to stop treating your laptop as an all-in-one device. Instead, think of it as just a screen and add a separate keyboard and mouse.
- Get Your Wrists Right First: Set your desk height using the Elbow Height Rule, but for an external keyboard and mouse.
- Lift the Screen: Pop your laptop on a stand (or even a sturdy stack of books) to raise it until the top of the screen is at eye level.
If you're stuck without an external keyboard, you have to compromise. In that situation, always protect your wrists and arms. Set the desk height for that comfortable 90-degree typing angle and just tilt the laptop screen back as far as it can go. Just be sure to take lots of breaks to stretch your neck.
Do I Need to Change My Desk Height for Different Shoes?
Yes! It seems like a tiny detail, but it absolutely matters. Even a half-inch difference in your shoe's sole can throw off that perfect 90-degree elbow angle you worked so hard to find.
Whenever you switch from flats to sneakers, or from socks to shoes with a thicker heel, you should make a tiny adjustment to your desk height. It might only be a fraction of an inch, but it’s enough to stop you from subconsciously shrugging your shoulders or bending your wrists to compensate.
A good habit is to set your main standing height preset while wearing the shoes you work in most often. That way, your primary setting is always dialed in, and you only need to make small tweaks on the days you wear something different.
Ready to build an ergonomic workspace that supports you all day long? At EVEO, we create accessories designed for comfort and efficiency, from best-in-class monitor arms to sleek cable management solutions that eliminate clutter. Explore our collections and discover how to perfect your setup.
How to Organize Desk Cables for a Clean and Productive Workspace
How to Reduce Eye Strain from Screens for Lasting Relief