
Tackling that tangled mess of cables under your desk feels amazing, but jumping in without a plan is a recipe for frustration. A little prep work turns an overwhelming task into a straightforward afternoon project, giving you a clean, professional workspace that actually lasts.
Your Strategic Plan for a Clutter-Free Desk
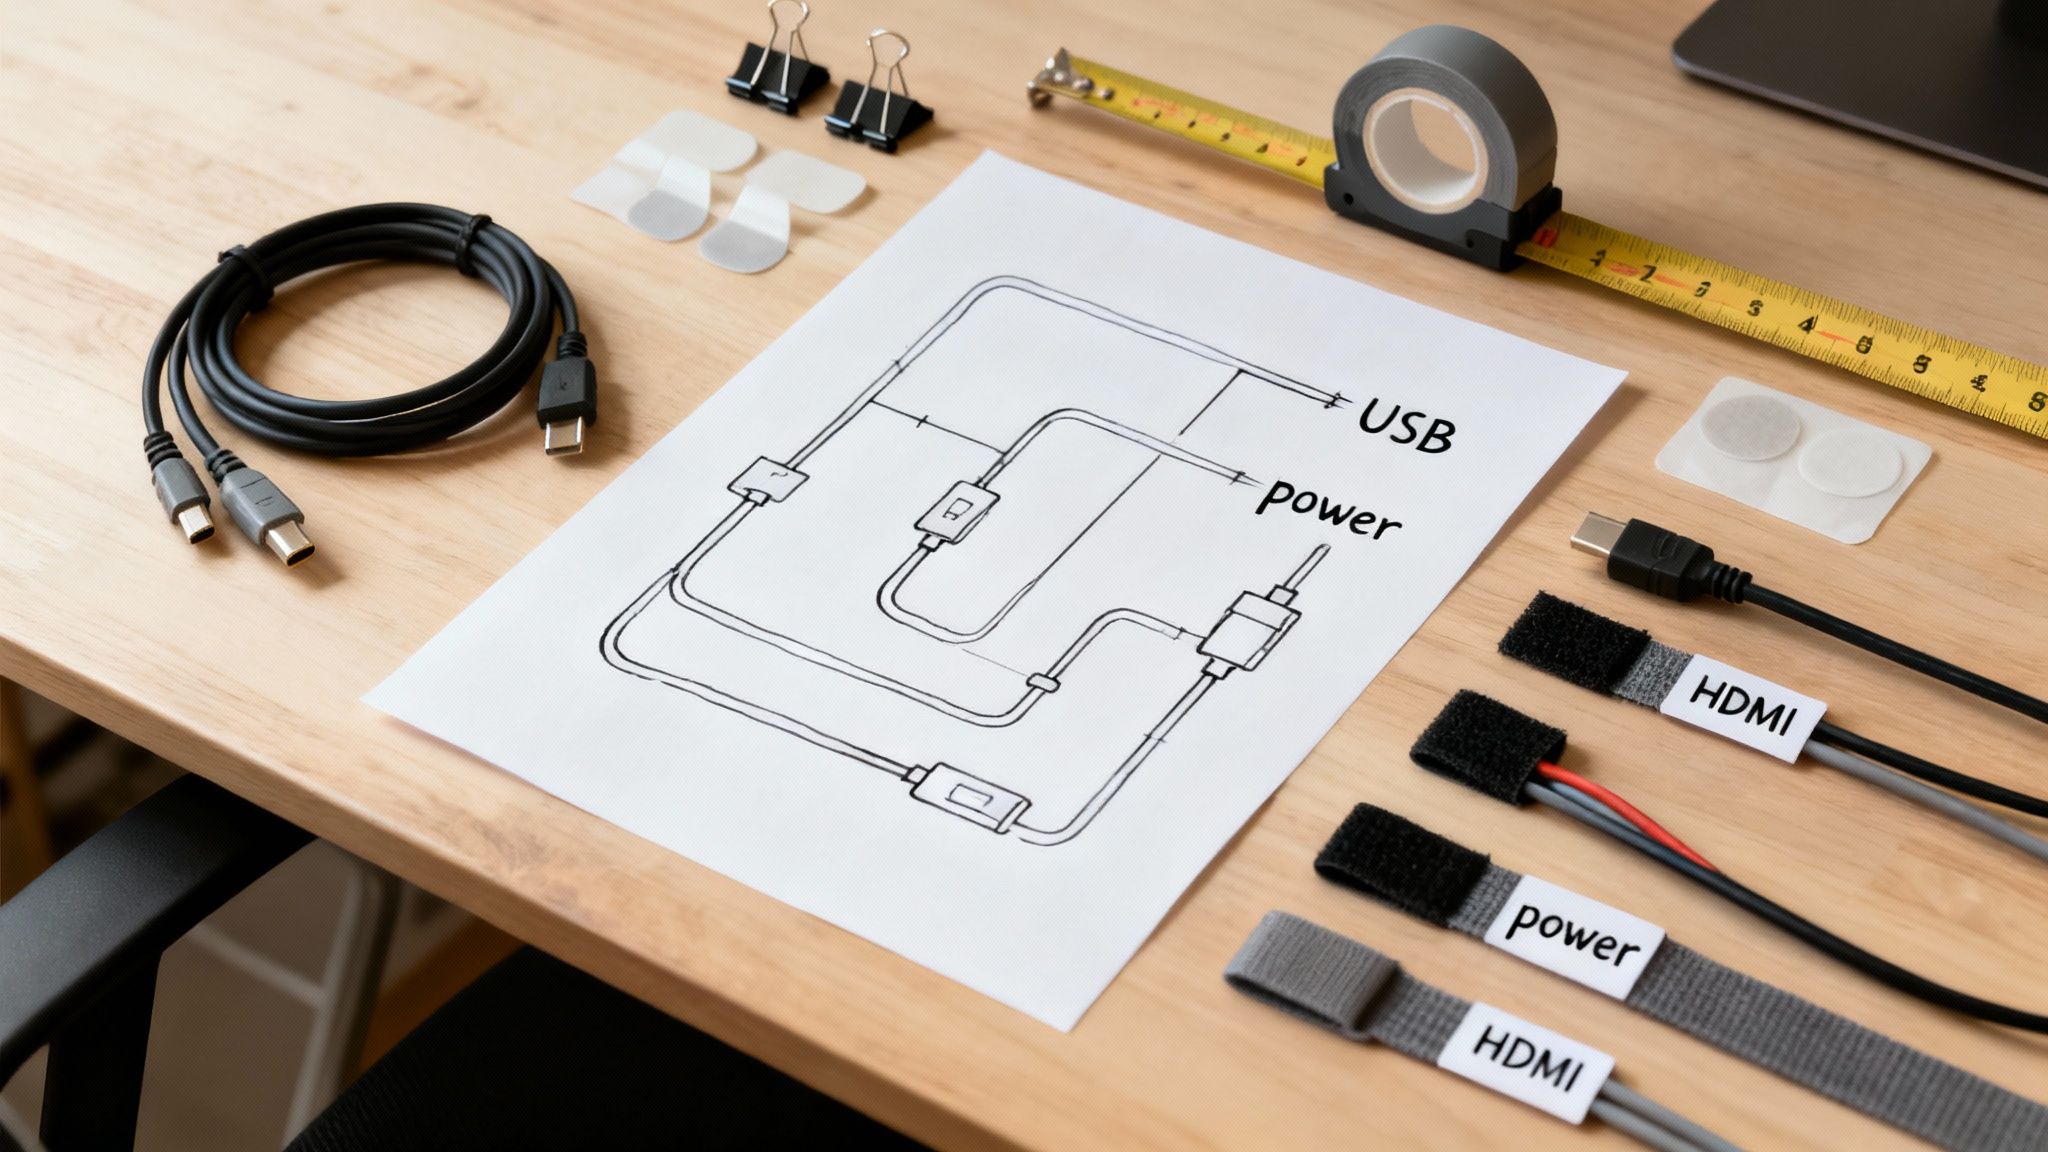
Before you unplug a single thing, take a moment to strategize. Think of this as creating a blueprint for your desk’s nerve center. Rushing the process is how you end up with a temporary fix instead of a permanent solution.
This isn't just about making things look tidy; it’s about creating a workspace that’s functional, safe, and easy to maintain down the road. Professionals are taking this seriously—the global market for desk cable management kits was valued at $1.2 billion and is expected to hit $2.45 billion by 2033. That’s because a clean setup directly impacts focus and efficiency.
First, a Complete Cable Inventory
Start by figuring out exactly what you're working with. Don't just peek under the desk; make a definitive list of every single device.
- Core Devices: This includes your computer, monitor(s), keyboard, and mouse.
- Power Sources: Make a note of every bulky power brick and adapter. These are usually the biggest offenders when it comes to clutter.
- Peripherals: List everything else—speakers, webcams, microphones, desk lamps, and chargers.
You’ll probably find cables for old devices you don’t even use anymore. Get rid of them! This simple audit tells you the true scope of the project. If you're looking to optimize your entire space, our guide to the ideal work-from-home office setup can help you think bigger.
Key Takeaway: A detailed inventory is non-negotiable. Knowing exactly what you need to manage prevents you from buying the wrong tools or underestimating the project's complexity.
Next, Visualize and Map Your Cable Pathways
With your list in hand, start thinking about the ideal route for each cable. The goal is a short, discreet path from each device to its power source or computer port. Grab a piece of paper and sketch a quick diagram of your desk's underside.
Decide where you’ll mount your power strip—the underside of the desk or along the back edge is usually best. This will be your central hub. From there, draw paths for each group of cables (like power cords vs. data cables). This simple map helps you pinpoint the best spots for cable raceways or clips and keeps wires from crisscrossing into another tangled mess.
Finally, Assemble Your Toolkit
Now that you have a plan, you know exactly what you need. Getting your tools together before you start makes the actual work go so much faster. Different setups require different solutions, but a solid toolkit can handle almost any desk.
Your Cable Management Toolkit Checklist
Gather these essential and optional tools to effectively organize your under-desk cables with professional results.
| Item | Primary Use | Why It's Recommended |
|---|---|---|
| Cable Raceway/Tray | Hiding power strips, adapters, and bundles of cables | The backbone of any clean setup. Keeps the bulkiest items completely out of sight. |
| Velcro Cable Ties | Bundling groups of cables together | Reusable and adjustable, unlike single-use zip ties. Perfect for future changes. |
| Adhesive Cable Clips | Guiding individual cables along edges, legs, or surfaces | Great for routing thin wires like mouse or keyboard cords discreetly. |
| Label Maker/Tape | Identifying plugs and cables | A lifesaver when you need to unplug a specific device without guessing. |
| Measuring Tape | Planning raceway placement and cable lengths | Ensures you buy the right size products and cut raceways accurately. |
| Drill (Optional) | Securely mounting trays or heavier raceways | Provides a more permanent and sturdy installation than adhesive alone. |
Having these items ready means you can get the job done in one go without any frustrating mid-project trips to the store.
Here's the rewritten section, crafted to sound like an experienced human expert and match the provided examples.
Clearing the Decks for a Fresh Start
Okay, you’ve got your plan and your gear is ready to go. Now for what I think is the most satisfying part of the whole process: getting a completely clean slate. To really wrangle those cables, you have to see exactly what you’re up against, and that means starting from zero.
First things first, shut down your computer and all your peripherals. Then, unplug everything. I know it sounds like a lot of work, but trust me, it’s the only way to properly untangle the mess and build your setup back up the right way.
A Deep Clean is Non-Negotiable
With everything disconnected, go ahead and move all your devices off the desk. This isn't just about making room; it's the perfect chance for a deep clean. You’d be shocked at how much dust, grime, and pet hair can build up under your desk over time.
This buildup is the #1 enemy of any adhesive-based cable management tools, like clips or the mounting tape on a cable raceway. For a bond that actually lasts, you need a spotless surface.
- Wipe Everything Down: Grab a damp cloth and a good cleaner to wipe the entire underside of your desk, the back edge, and the legs.
- Vacuum the Area: Give the floor a thorough vacuuming to get rid of any dust bunnies that are just waiting to get tangled in your new setup.
- Let It Dry Completely: Make sure every surface is 100% dry before you even think about sticking anything to it.
A pristine workspace is the foundation for a cable management system that will hold strong from day one.
The Single Most Important Tip: Label Everything
Before you do anything else, find your label maker or just some masking tape and a marker. This is a simple, game-changing tip I swear by: label both ends of every single cable. Seriously. Write down what device it’s for and where it plugs in (e.g., "Monitor 1 - HDMI" or "Webcam - USB").
This tiny, five-minute step will save you from a massive headache down the road. When it’s time to plug everything back in, you won’t be playing a guessing game with a handful of identical-looking black cords. It turns reassembly from a frustrating puzzle into a simple, follow-the-labels task.
Labeling is your future-proof map. Whether you're troubleshooting a bad connection or adding a new piece of gear, you'll be glad you took the time to identify every cord.
Sort and Group for a Logical Flow
With your cables labeled and untangled, lay them all out and start sorting them into logical groups. This little bit of organization simplifies the routing process immensely. Instead of fighting one giant, unruly snake of wires, you’ll have a few neat, manageable bundles.
I like to group them by function:
- Power Cables: All the cords with plugs and bulky power bricks go here.
- Video Cables: Your HDMI, DisplayPort, and any other monitor cables.
- Data & Peripherals: The USB cables for your keyboard, mouse, webcam, mic, etc.
Grouping cables like this lets you run them in clean, parallel paths. For example, you can tuck all the power cords into one side of a cord hider kit and the data cables into the other. This not only looks incredibly organized but also helps minimize any potential electronic interference.
Installing Your Cable Management System
Okay, your workspace is clean, your cables are sorted, and you're ready for the main event. This is where we build the hidden infrastructure that takes your setup from messy to magnificent. We're about to transform that chaotic zone under your desk into a clean, organized highway for all your wires.
The core of any great cable management system is its foundation. For most setups, that means using under-desk cable raceways or trays. Think of these as the backbone—they’re designed to hold the clunkiest items like your power strip and all those awkward power bricks, keeping them completely out of sight.
This quick flowchart breaks down the prep work that makes the actual installation a breeze.
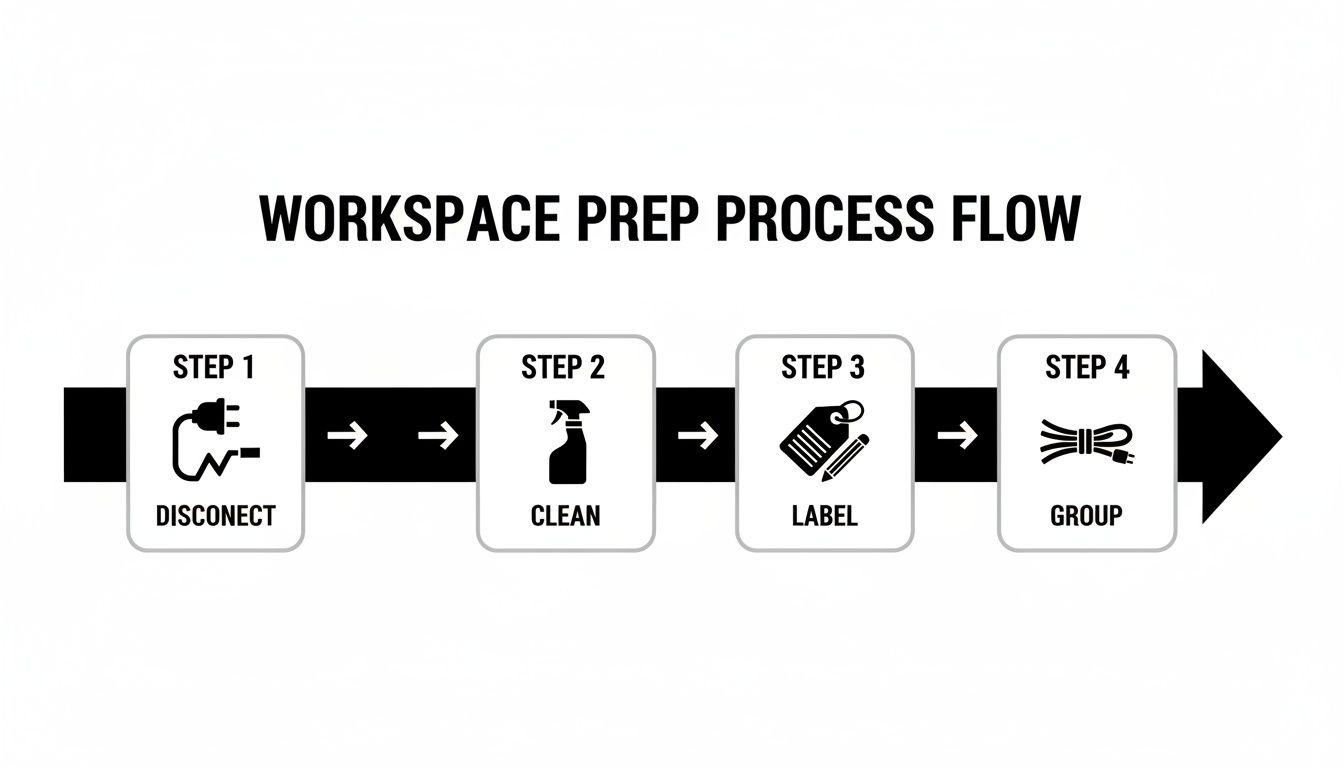
Nailing these steps—disconnecting, cleaning, labeling, and grouping—sets you up for a smooth installation and a clean look that will actually last.
Mounting Your Raceway or Tray
First things first: how are you going to attach the raceway to your desk? You basically have two choices: heavy-duty adhesive tape or good old-fashioned screws.
-
Adhesive Mounting: This is your drill-free option. It's perfect for metal desks or if you're just not keen on making permanent holes. The secret to making it stick? A perfectly clean surface. Any dust or oil will ruin the bond. I always recommend wiping the area with an alcohol wipe and letting it dry completely before you press it on.
-
Screw Mounting: If you want a rock-solid, permanent hold, screws are the way to go. This is the best choice if you have a lot of heavy gear or a solid wood desk. It guarantees your tray won't sag or fall off, even when it's packed with a power strip and a bunch of power bricks.
I almost always position the raceway along the back edge of the desk. This keeps it totally hidden from the front but leaves it just accessible enough for when you need to plug in a new device.
Routing Your Cable Bundles
With your main channel locked in place, it’s time to start feeding in your neatly grouped cables. I like to place the power strip inside the raceway first—it’s the central hub for everything. From there, start connecting your power adapters and neatly coil any extra slack inside the tray.
This is where your earlier prep work really pays off. Run your power cables down one side of the tray and your data cables (like USB and HDMI) down the other. This simple separation keeps everything incredibly tidy and can even help prevent electronic interference, so all your devices run smoothly. A complete under-desk cable management kit will have all the clips and ties you need for this.
Pro Tip: Don't cram the raceway full. Always leave a little wiggle room. It will make your life so much easier when you need to add or remove a cable down the road without undoing all your hard work.
Exploring Other Hiding Solutions
While raceways are the workhorse of under-desk organization, they aren't the only tool in the box. Sometimes, combining a few different solutions gives you that truly polished, professional look.
Flexible Cable Sleeves
For bundles of wires that need to travel together—say, from your monitor arm down to your PC—a flexible cable sleeve is a brilliant choice. These neoprene sleeves wrap around a group of cables, turning a messy bundle into a single, clean tube. They're especially great for setups that move, like a standing desk.
- Pros: They’re super flexible, it’s easy to add or remove cables, and you can find them in different colors to match your desk.
- Cons: They bundle cables but don’t hide them against a surface the way a raceway does.
Under-Desk Nets or Hammocks
A newer solution I’ve seen more of is the under-desk cable net. It’s basically a stretchy, mesh hammock that functions like a tray. These are incredibly forgiving and can easily hold bulky, awkwardly shaped power adapters that might not fit neatly in a rigid tray.
The growing popularity of these tools makes sense. The global cable management accessories market was valued at USD 3.10 billion and is expected to hit nearly USD 5.98 billion by 2034. It just goes to show how many people are investing in creating safer, more efficient workspaces. You can dig into the full report from Precedence Research if you're curious about the market drivers.
In the end, the best setup is often a hybrid one. You might use a rigid raceway for your power strip and a flexible sleeve for your monitor cables. It's all about creating a custom solution that perfectly fits the needs of your unique desk.
Putting the Finishing Touches on Your Setup
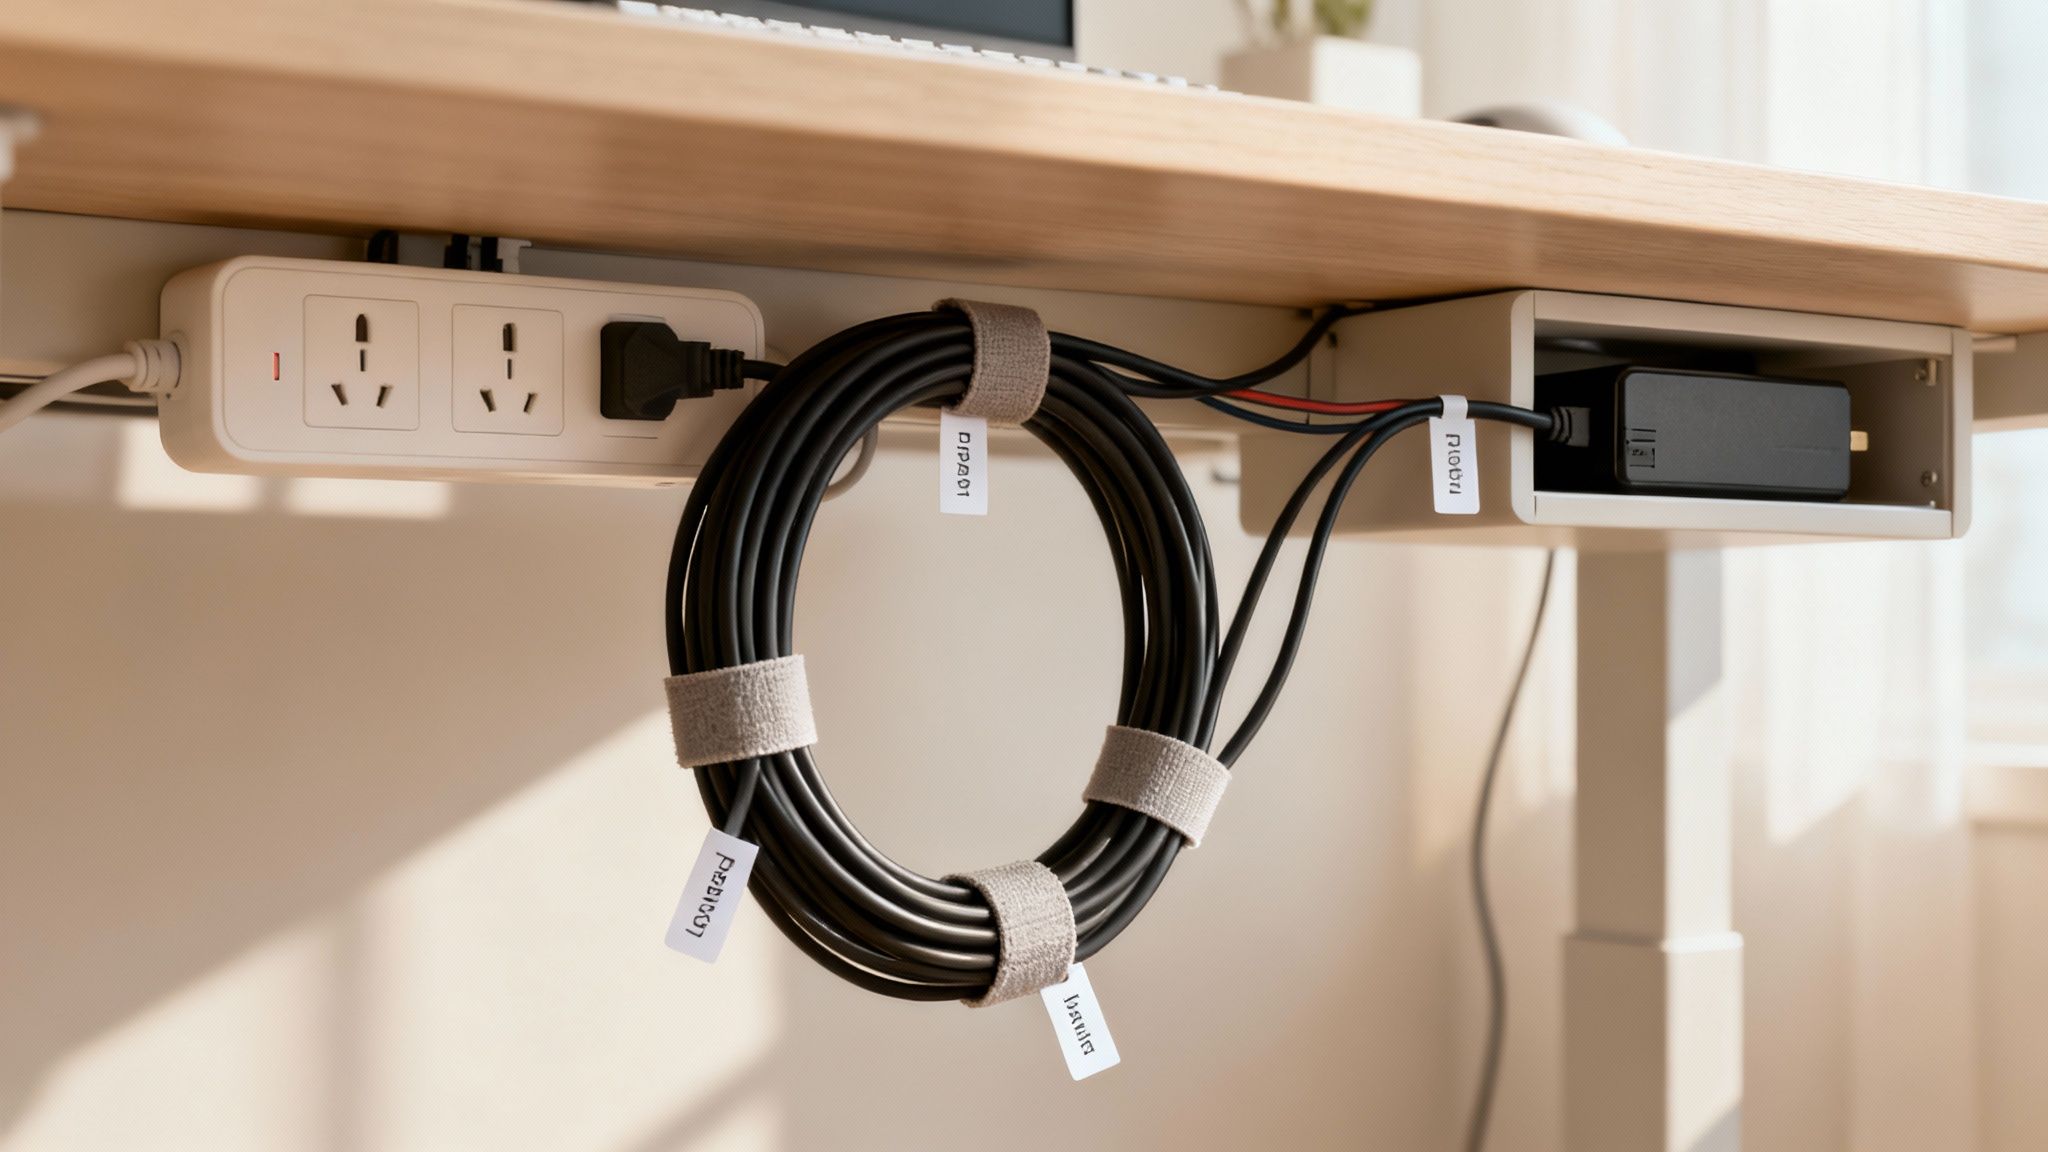
Alright, the heavy lifting is done. Your main raceways are mounted, and the bulkiest gear is tucked away neatly. Now comes the most satisfying part—the final details that take a setup from just "tidy" to something truly professional and easy to live with.
This is the polishing phase. Think of it like this: you’ve built the superhighway with your cable trays, and now you’re adding the clean signposts and making sure there are no traffic jams. These little touches are what make the system truly functional for the long haul.
The Art of Taming Cable Slack
No matter how perfectly you plan, some cables will just be too long. That dangling loop of extra cord is the final boss of a clean setup, but luckily, it's an easy one to beat. The goal is to coil any slack into a tidy bundle and secure it out of sight.
My absolute go-to for this is a pack of reusable velcro ties. They’re far better than single-use plastic zip ties because you can easily adjust them later when you inevitably add or change a device.
Here’s the best way to do it:
- First, plug the cable into both your device and the power strip.
- Gently pull the cord along its path so it's smooth but not stretched tight.
- Gather the leftover slack into a loose circle. Whatever you do, don't fold it sharply—that can damage the delicate wires inside over time.
- Wrap a velcro tie around the middle of the coil to hold it all together.
- Finally, tuck that neat little bundle into your cable raceway or use an adhesive clip to stick it to a hidden surface.
This simple trick gets rid of any "cable droop" and makes every wire look like it was custom-made for your desk.
Reconnecting Your Devices Like a Pro
With your power strip mounted securely in its tray, it's time to plug everything back in. Since you wisely labeled every cord earlier, this should be a breeze. Start by connecting the devices with the bulkiest power bricks first to make sure they fit comfortably inside your cable management tray.
As you plug each one in, give it a little push to ensure the connection is solid. This is also a great time to be strategic with your plug layout. I personally like to group all my monitor power cords on one side of the strip and my peripherals on the other.
My Favorite Power Strip Pro-Tip
Here’s a little trick I swear by: use your label maker to put a label on the actual outlet on the power strip. The next time you need to unplug your monitor to troubleshoot it, you won’t have to follow the wire all the way back from the screen. Just glance at the power strip, find the "Monitor 1" label, and you're done in seconds.
It’s a five-minute task that will save you a ton of frustration down the road.
Final Checks and Cable Grouping
Once everything is powered up, take one last look at the bundles of cables running from your tray to your devices. Use a few more velcro ties to group related wires together. For instance, the power and HDMI cables running to a single monitor can be bundled into one clean line.
This final step refines the whole look and stops one stray wire from messing up the clean aesthetic you've worked so hard for. You've now successfully learned how to organize cables under desk and created a workspace that’s not just visually stunning but also safer and way more functional. The result is a setup that feels intentional, professional, and just plain satisfying to use every day.
Solving Cable Challenges for Specialized Setups
A standard desk is one thing, but modern workspaces often have their own unique quirks. Standing desks and sprawling multi-monitor setups, in particular, introduce new variables that can quickly turn a tidy space into a tangled mess without the right strategy. These setups don’t just have more cables; they have cables that need to move, stretch, and follow complex paths.
The need for better organizational tools is clear, and not just in home offices. The global cable management system market was valued at an incredible USD 23.5 billion and is expected to keep growing. North America alone made up 36.9% of the revenue share in 2024. This isn't just about looks; it's a massive, worldwide push for safer, more efficient workspaces. You can get more details on this trend from Grand View Research.
Mastering the Standing Desk Service Loop
If there’s one golden rule for standing desk cable management, it's this: create enough slack. A cable that’s perfectly neat when you're sitting can become a disaster waiting to happen the second you raise your desk. A taut cord can strain ports, damage your gear, or even yank a device right off the desktop.
To get around this, you need to build what's called a service loop. This is just a deliberate, gentle "S" curve in your main cable bundle that allows it to expand and contract smoothly as the desk moves up and down.
- Bundle Flexibly: Group all the cables running from your desk to the floor or wall outlet into a single bundle. A flexible neoprene sleeve or a few loose velcro ties work perfectly.
- Mount Your Power Strip: This is the most important step. Mount your power strip directly to the underside of the desk itself. Now, only one main power cord has to deal with the vertical movement, not half a dozen individual ones.
- Test the Full Range: Before you call it a day, move your desk to its absolute highest and lowest positions. Keep a close eye on the service loop to make sure no single cable is being pulled tight at any point.
Key Insight: A standing desk’s main cable bundle should look like a relaxed spring, not a tight guitar string. The secret to achieving that smooth, unrestricted movement is mounting the power strip to the desk.
Taming Dual and Ultrawide Monitor Cables
Adding bigger or multiple monitors means wrangling thicker, less flexible video cables like DisplayPort or high-speed HDMI. Just shoving these into a standard raceway with your power cords can be a tight squeeze and look pretty bulky. There’s a much more elegant solution: your monitor arm.
Most quality monitor arms come with built-in cable management channels. These are specifically designed to guide video and power cords discreetly from the monitor down to the desk. This approach separates your display cables from the main under-desk bundle, giving you a much cleaner and more organized look. For a deeper dive into this, our guide on raceway cable management offers more specialized techniques.
Hiding Those Bulky Power Bricks
We've all seen them—those cumbersome power bricks for laptops, docking stations, and some monitors. They’re a major source of clutter, and leaving them on the floor is a recipe for a messy look and an accidental kicking hazard. Getting them off the floor and out of sight is a total game-changer.
The best way to do this is by mounting them directly to the underside of your desk. A few strips of heavy-duty, industrial-strength Velcro or specialized mounting brackets will do the trick. Tuck them inside or near your main cable tray. This keeps them secure, ventilated, and completely hidden, helping you achieve that professional, floating-desk aesthetic.
A Few Common Cable Management Questions
Even the most carefully planned project can hit a snag. Every desk setup has its own quirks, but thankfully, most of the common problems have surprisingly simple fixes. Think of this as your quick-and-dirty troubleshooting guide for those last few hurdles.
Here are the answers to the questions we hear all the time.
What's the Best Way to Hide a Power Strip?
Getting that power strip off the floor is the single biggest win you can score in this whole process. The best move is to mount it directly to the underside of your desk or along the back edge. This one change instantly stops you from accidentally kicking it and makes vacuuming a breeze.
For a completely damage-free option, a few heavy-duty Velcro command strips work wonders. They have a serious grip without needing any tools. If you’re looking for a more permanent, rock-solid solution, just use a couple of short screws through the mounting holes you’ll find on the back of most power strips.
Pro-tip: For the cleanest possible look, tuck the power strip and any of those big, clunky power bricks inside a dedicated under-desk cable management box or tray. It corrals the entire mess into one neat, hidden spot.
How Do I Manage Cables for a Standing Desk?
The secret to taming cables on a sit-stand desk is all about slack. If your cables are too tight, you risk yanking them out of their ports—or worse, pulling your expensive gear right off the desk when you raise it. The goal is a flexible "service loop" that moves right along with your desk.
It's easier than it sounds. Just bundle the cables together with a flexible sleeve or a few loose Velcro ties, leaving a gentle 'S' curve in the bundle. This little loop is what allows the cables to extend and retract smoothly.
Before you call it a day, always test the full range of motion. Move your desk to its absolute highest and lowest settings. Keep a close eye on the cable bundle to make sure nothing gets pulled taut at either extreme. This five-second test can save you from a very bad day.
Are Adhesive Cable Clips or Screw-In Mounts Better?
This is the classic debate, and the right answer really comes down to your desk's material and how permanent you want your setup to be. There's no single "best" choice, but here’s how to decide.
- Adhesive Cable Clips: These are a fantastic, drill-free choice for metal, laminate, or even glass desks. They're perfect if you don't want to leave permanent holes. The only catch is that the adhesive can weaken over time, especially if you're in a humid climate or are trying to support heavier cables.
- Screw-In Mounts: For solid wood desks, or for holding up heavy cable bundles and power bricks, screws are just plain better. They provide a much more secure, durable hold that you won't have to think about for years. If you're confident in your layout and want maximum reliability, screws are the way to go.
Honestly, a hybrid approach usually works best. You can use sturdy screw-in mounts for your main cable raceway and then use flexible adhesive clips to route the smaller, individual cables for your mouse and keyboard. You get the best of both worlds: unshakeable stability for the core system and easy adjustability for the details.
Ready to create a workspace that’s as professional and efficient as you are? The EVEO Under-Desk Cable Management Kit provides everything you need—from a sturdy raceway to all the clips and ties—to achieve a perfectly organized desk. Tame the clutter and reclaim your focus by visiting https://eveo.store today.
How to Clean Your Monitor Screen Without Streaks or Scratches
The Best Way to Organize Cables for a Clutter-Free Space