Before you even think about trying to fix a warped record, you’ve got to play detective. What caused the damage in the first place? It almost always boils down to two main culprits: too much heat or the wrong kind of pressure. Nailing down the "why" is the first step to choosing the right fix and, more importantly, making sure it doesn't happen again.
Understanding Why Vinyl Records Warp
A vinyl record is just a disc of polyvinyl chloride (PVC), which is a fancy way of saying it’s plastic. And like a lot of plastics, it’s incredibly sensitive to its environment. Heat, pressure, and even humidity are the sworn enemies of a flat record. Understanding these vulnerabilities is key to saving your warped LPs and protecting the rest of your collection.
Heat and Sunlight Are Public Enemy No. 1
Heat is, without a doubt, the fastest way to ruin a record. It doesn't take much for that solid PVC to soften up, making it totally pliable and ready to bend out of shape. Once it cools down in that new, warped position, that’s it—the damage is set.
We’ve all heard the horror stories. Leaving a record in a car on a sunny day is a classic, tragic mistake. The inside of a car can easily soar past 140°F (60°C), which is more than enough to turn a prized album into a wavy, unplayable mess.
Other common heat traps to watch out for include:
- Direct sunlight pouring through a window.
- Shelves right next to a radiator or heating vent.
- Setting a record down on top of a warm amplifier or receiver.
Key Takeaway: Just treat your vinyl like a vampire. Keep it out of the sun and away from any real heat source. The damage can happen way faster than you think and is a real pain to reverse.
The Slow Damage of Bad Storage
Beyond sudden heat, the way you store your records has a massive impact. Gravity is a relentless force, and when applied incorrectly over time, it will slowly but surely destroy your vinyl. Improper storage creates uneven pressure that leads to gradual, permanent warps.
The absolute worst storage mistake? Stacking your records flat on top of each other. The combined weight presses down on the LPs at the bottom, eventually causing a nasty "dish" warp. Storing them at a sharp angle against a wall is just as bad, creating a constant stress point that leads to an edge warp.
When It's Not Your Fault: Manufacturing & Shipping
Sometimes, a record arrives warped right out of the shrink wrap. It’s frustrating, but it happens. For a record to be perfectly flat, it needs to cool down slowly and evenly at the pressing plant. When production is rushed, that cooling process gets cut short, and a warp can form later.
Shipping is another minefield. Your new record might have been sitting in a scorching hot delivery truck or warehouse for hours. It’s not uncommon for a brand-new album to show up with a slight warp from its journey. This is exactly why knowing how to flatten a record is such a valuable skill for any collector.
Preparing Your Record for a Successful Fix
Jumping straight into flattening a warped record without prepping it first is a rookie mistake, and one that can cost you the album. Before you even think about applying heat or weight, a couple of steps are absolutely essential.
Think of it like this: you wouldn't paint a wall without cleaning and priming it first. The same logic applies here. Taking a few minutes to prepare properly dramatically increases your chances of a good outcome and prevents you from causing even more damage.
First, Diagnose the Warp
You need to know what you're up against. Not all warps are the same, and the type you have will dictate the best way to fix it—or if it can be fixed at all.
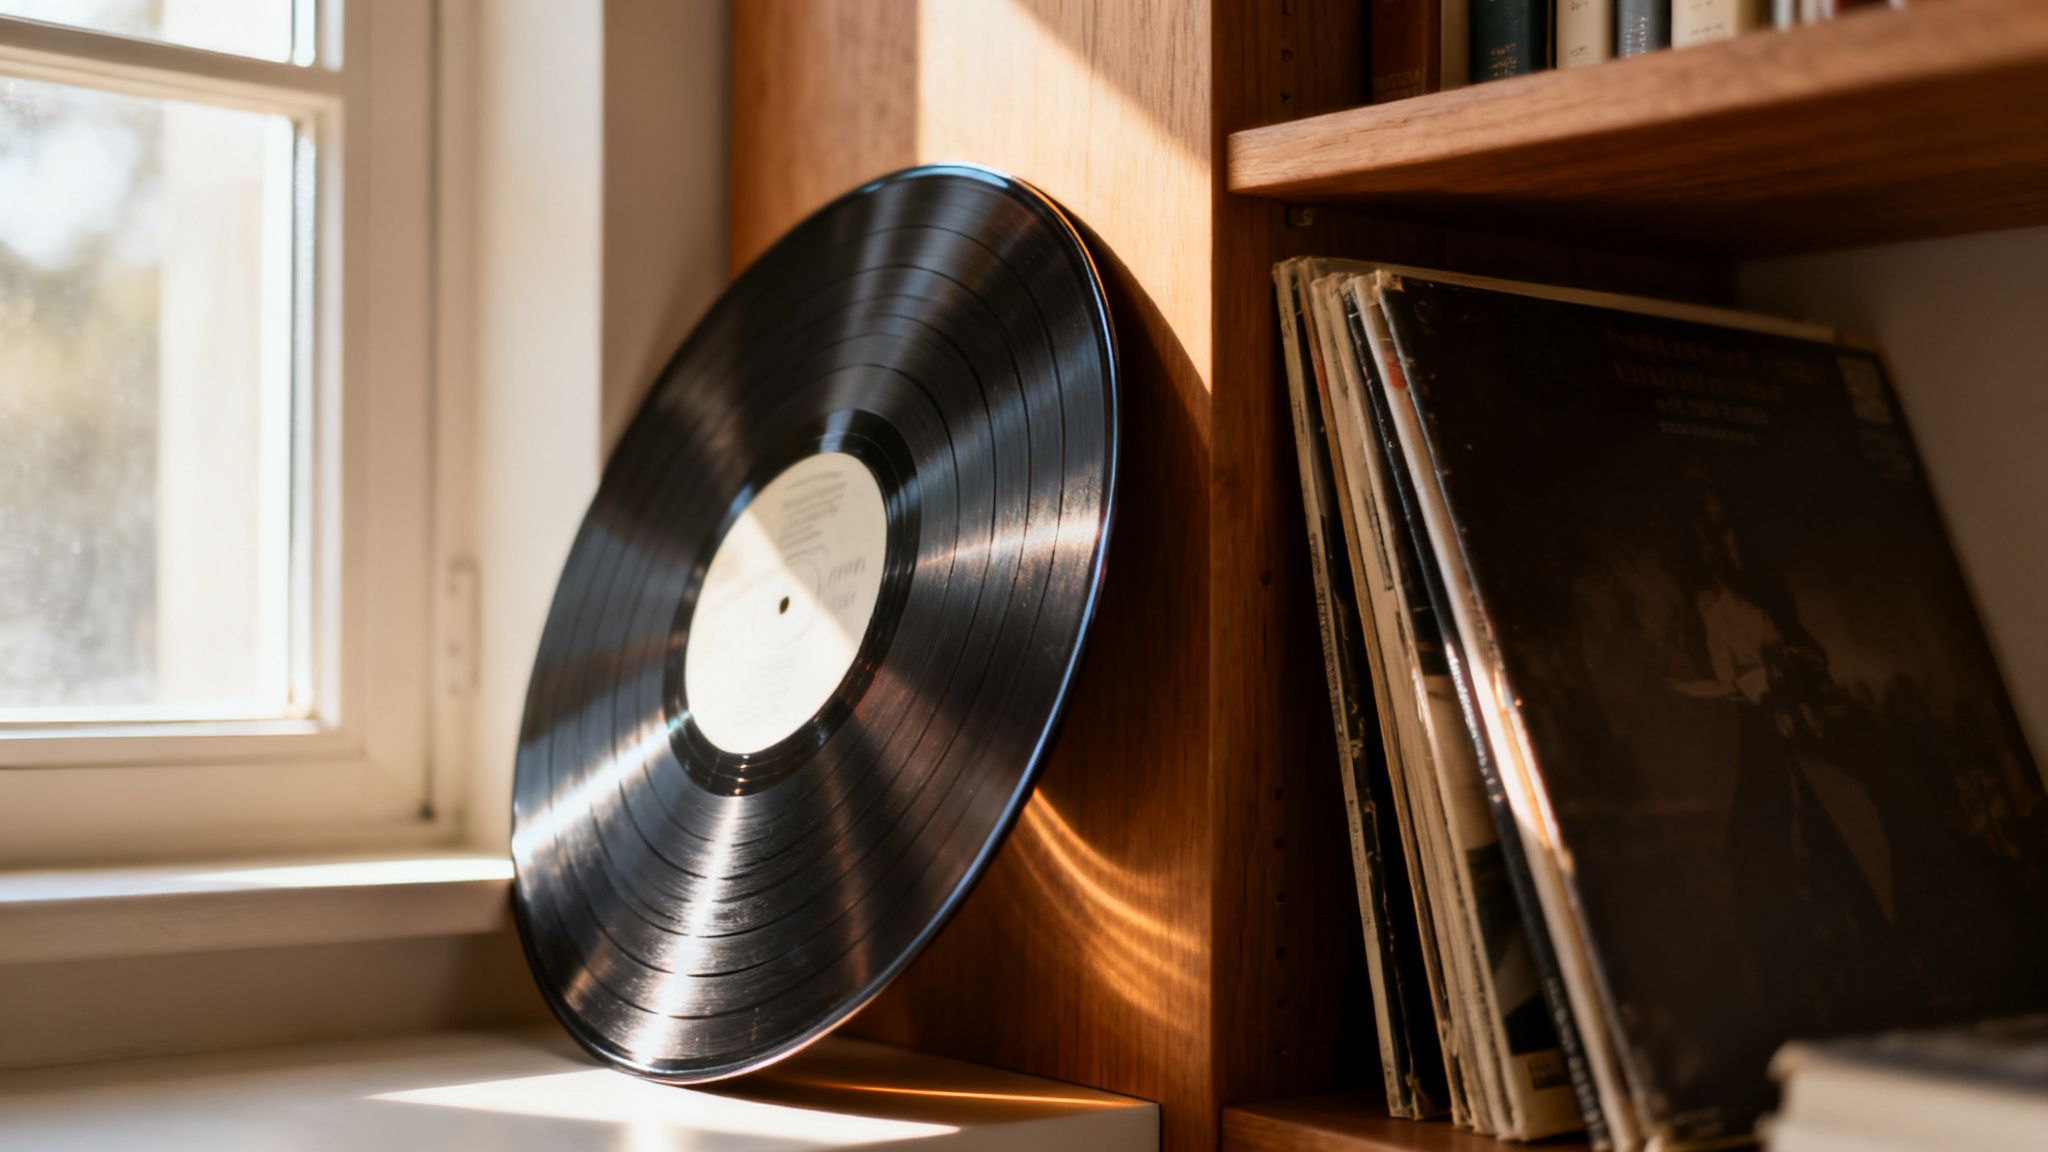
Lay the record on a surface you know is perfectly flat, like a kitchen countertop. Get down to eye level and take a close look. What do you see?
- Dish Warp: This is the classic bowl shape, where the whole record bows up or down. It’s probably the most common type and, thankfully, often the easiest to correct.
- Edge Warp: Here, the problem is just on the outer rim, causing a noticeable wave as the record spins. These are tougher because the bend is usually sharper and more localized.
- Pinch Warp: Often caused by shrink-wrap that was way too tight from the factory, this creates a subtle, localized bend. It's less severe but can still throw off playback.
Be honest about how bad it is. A slight dish warp might just need a little patience and some weight. A severe, gnarly edge warp? You might be looking at a professional job or accepting it as a wall-hanger.
Then, Give It a Deep Clean
Now for the most critical step: you have to clean the record. Thoroughly.
Trying to flatten a dirty LP is a disaster waiting to happen. Every speck of dust, oil from your fingers, or bit of grime will get permanently pressed into the grooves under heat and pressure. You’ll turn a fixable warp into a permanent wall of clicks, pops, and noise.
Don't even think about skipping this. Flattening a dirty record is like ironing a stained shirt—you're just setting that gunk in for good. You're trying to save the record, not bake a lifetime of noise right into the music.
Use a quality vinyl cleaning kit. You’ll want an anti-static brush and a good cleaning solution to get deep into those grooves and lift out any contaminants. This gives you a pristine surface to work with. Taking the time for proper how to handle vinyl records is a small price to pay for preserving its sound.
Once your record is clean and you know exactly what kind of warp you're dealing with, you're ready to pick your weapon of choice.
The Weight and Patience Method for Safe Flattening
If you're more about safety than speed, this is your technique. The weight and patience method is by far the simplest and least risky way to tackle minor to moderate warps. It doesn't involve any heat, requires minimal gear, and its biggest ask is your time. This makes it the perfect place to start for any collector who's a bit nervous about trying more aggressive fixes.
At its heart, this approach uses steady, even pressure over a long time to gently coax the vinyl back into shape. Think of it as slowly retraining the PVC plastic to forget the curve it picked up. It's especially good for a record that was stored badly—maybe leaning against something for years—where the warp came from long-term pressure, not a sudden blast of heat.
Creating the Perfect Record Sandwich
The secret here is what collectors call a "record sandwich." You’re going to place your warped record between two perfectly flat, heavy, and rigid surfaces. The whole point is to spread the pressure evenly across the entire LP, so you don't create new stress points that could make things worse.
What you use for the "bread" in this sandwich really matters. You need surfaces that won't bend or give under pressure.
- Thick Panes of Glass: Two clean, scratch-free pieces of glass, a little bigger than the record (like 13x13 inches), are perfect. They’re completely flat and strong.
- Large, Heavy Books: Think old encyclopedias or massive coffee table books. Just make sure their covers are totally flat, not embossed or textured.
- Polished Stone Slabs: Things like marble or granite cutting boards work great because they're heavy and perfectly flat.
Before you build your sandwich, make sure the record is absolutely spotless. For the best outcome, give it a proper cleaning to get rid of any dust or grime. You can find a complete walkthrough in our guide on how to clean vinyl records. Once it's clean, slide it into a fresh, anti-static inner sleeve to protect the grooves while it's being pressed.
This simple flowchart lays out the prep work you should do before trying to flatten any record.
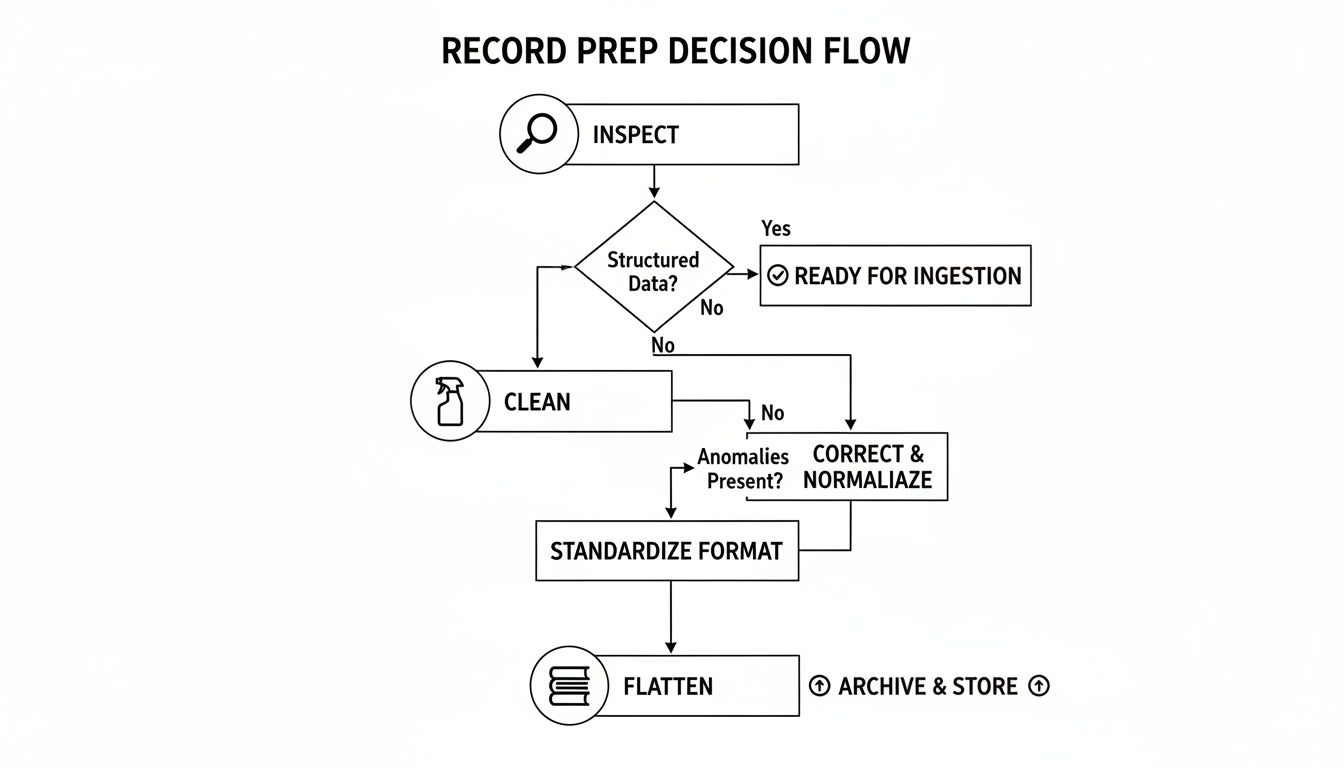
As you can see, inspecting and cleaning aren't just suggestions—they're the foundation for getting this right.
Applying the Right Amount of Pressure
With your sleeved record nestled between its two flat surfaces, it's time to add weight. You're looking for a good amount of pressure, but not enough to cause damage. A good target is somewhere between 25 to 50 pounds (11 to 23 kg). That's enough to apply consistent force without risking a cracked record.
Stack more heavy books, a toolbox, or other hefty objects on top. The most important part is to make sure the weight is centered and balanced. If your stack is lopsided, you'll get uneven pressure, which completely defeats the purpose.
Pro Tip: If you're using books as your main sandwich surfaces, put a clean microfiber cloth on either side of the record sleeve. It adds a nice, soft buffer and stops the sleeve and book covers from getting scuffed up.
The Waiting Game: How Long It Takes
Here's where the "patience" part really comes into play. This is not a fast process. You'll need to leave the record under pressure for at least a week, but for more stubborn warps, you should probably plan on three to four weeks, maybe even longer.
Find a spot for your setup where it won't be disturbed—under a bed or on the bottom of a solid shelf works well. The key is to keep it at a stable room temperature, far away from direct sunlight or heat vents, since temperature swings can mess with the process.
It's a good idea to check on its progress once a week. Carefully take the weights off, pull the record out, and lay it on a flat surface to see how it's doing. If it's still not flat, just put everything back together and give it more time. Don't get discouraged if you don't see results right away. Slow and steady wins this race.
Using Gentle Heat for More Stubborn Warps
When weeks of patient pressing don’t make a dent in a stubborn warp, it's time to bring in the big guns. Adding a little controlled, gentle heat can make the vinyl just pliable enough to relax back into its flat, happy state.
Now, this method is definitely more hands-on and carries more risk than just using weight. But for those moderate warps that refuse to give up, it can be a total game-changer.
Let's be clear: this isn't an invitation to blast your record with a hairdryer or toss it in a hot oven. The name of the game is low, even, and meticulously controlled heat. Get it right, and you can rescue an album that seemed destined for the thrift store bin. Get it wrong, and you’ll have a melted, unplayable puddle of plastic.
The Glass Sandwich Oven Method Explained
The most reliable way I’ve found to apply gentle heat is by using a standard kitchen oven on its lowest possible setting. The idea is to soften the PVC just enough for it to become malleable under pressure—we are not trying to cook it. This whole process demands precision, a bit of patience, and the right gear.
Before you even think about turning the oven on, you'll need two things besides your clean record:
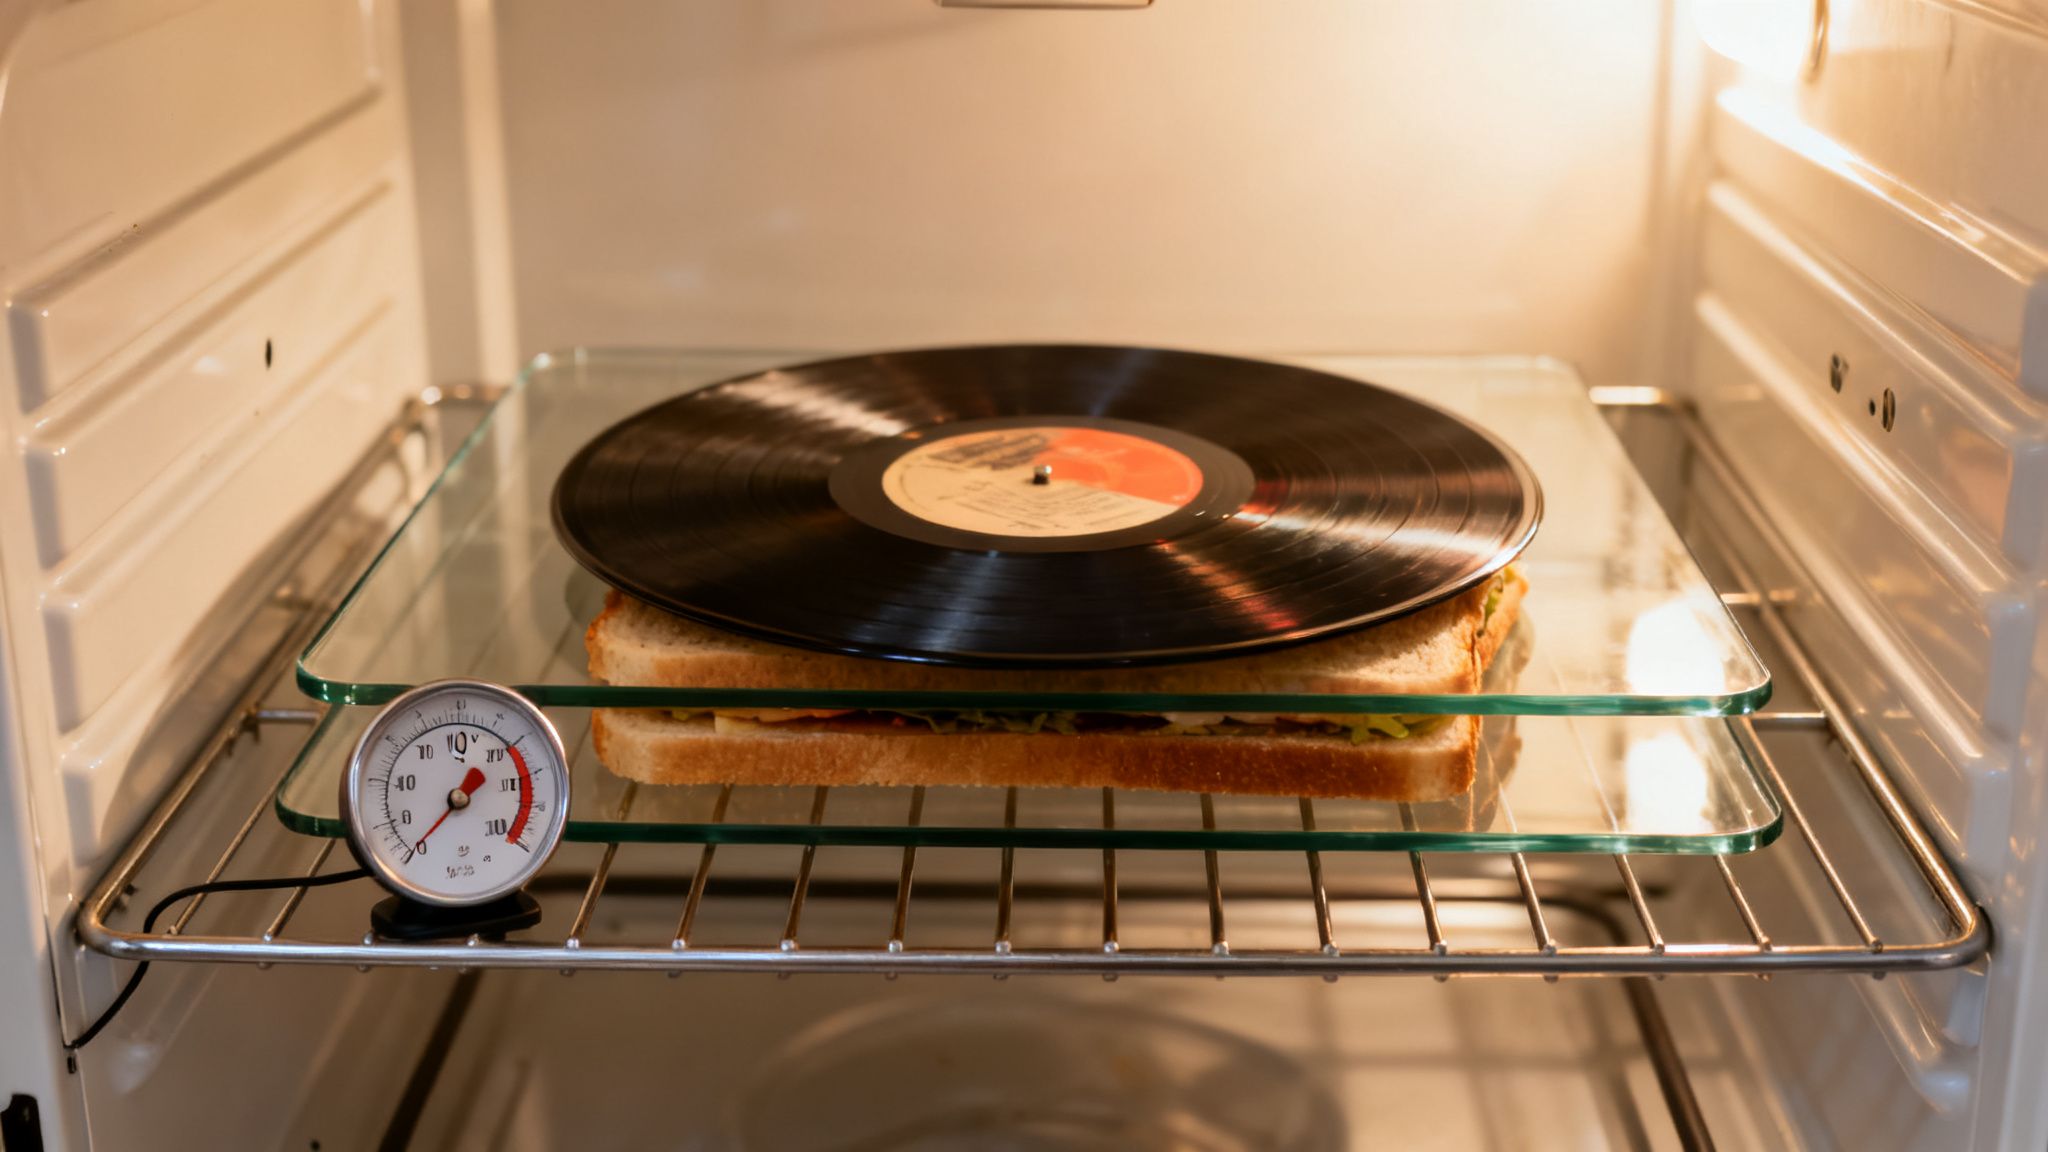
- Two thick, perfectly flat panes of glass, just a bit larger than the record itself (something like 13x13 inches is perfect). Clean, unscratched glass from a picture frame works great.
- A reliable oven thermometer. Seriously, do not trust your oven's built-in dial. They are notoriously inaccurate at low temperatures. You need a separate, independent thermometer placed right there in the oven to know what’s really going on.
This approach builds on the simple "record sandwich" idea, but the oven adds a critical new element. Your success is entirely dependent on hitting and holding a very specific, stable temperature.
Temperature Is Everything
The magic number you're aiming for is somewhere between 100°F and 120°F (38°C to 49°C). This narrow window is just warm enough to make the vinyl flexible without risking any damage to those delicate grooves. Pushing it even a few degrees higher can spell disaster.
Once a record hits 140°F (60°C), the material starts to melt, which permanently destroys the microgrooves that create the sound. Think of those melted record bowls you see at craft fairs—that’s exactly what we’re trying to avoid. Precision isn't just a suggestion; it's essential.
When done carefully, this low-heat oven method has a fantastic 80-90% success rate for moderate warps, making it a powerful tool for any serious collector. And it’s a skill worth having. With the global vinyl market hitting 95 million units in 2024, warped records are a bigger issue than ever. During the 2021 U.S. heatwaves, some record labels saw a shocking 300% spike in returns for warps, often caused by shipping trucks and car interiors that can soar past 150°F. If you want to learn more, there's a great guide on how to fix and prevent warped vinyl records easily.
This all just goes to show why mastering a safe flattening technique is so valuable.
A Step-By-Step Guide To The Process
Alright, you've got your gear ready and your record is sparkling clean. Let's walk through it. Take your time with each step and never, ever rush this.
- Preheat the Oven: Pop your oven thermometer on the middle rack and set the oven to its absolute lowest setting. You'll need to watch the thermometer closely until the temperature settles nicely within that 100-120°F sweet spot. This might take a little fiddling.
- Assemble the Sandwich: While the oven is preheating, slide your clean, sleeved record between the two panes of glass. Make sure it's all centered up.
- Heat the Record: Carefully place the entire glass sandwich onto the center of the oven rack. Set a timer for 30 to 45 minutes, and don't wander off.
- The Critical Cooling Phase: This is where the real work gets done. After the timer goes off, turn the oven off but do not open the door. Let the whole thing cool down slowly and completely right there inside the oven. This slow, gradual cooling is what prevents the record from just warping again as it cools. Be patient; it could take several hours.
- Add Final Pressing Weight: Once the glass is completely cool to the touch, you can take the sandwich out of the oven. Place it on a flat, stable surface (like the floor) and stack some heavy books on top. Leave it under this pressure for at least 24 to 48 hours. This final press ensures the vinyl fully sets in its new, flat shape.
This one-two punch of gentle heat followed by a slow, weighted cooling process is your best shot at saving a record that pressure alone just couldn't fix.
Professional Tools and Services: When DIY Isn't Enough
Let's be honest. When you’re staring at a warped first pressing of a favorite album or a record with real sentimental value, using your kitchen oven feels like a massive gamble. It can be a little terrifying.
For those truly irreplaceable records, or for serious collectors who just can't risk it, it’s time to call in the big guns. Specialized tools and professional services trade a higher cost for something much more valuable: precision, reliability, and peace of mind.
Investing in a Dedicated Vinyl Flattener
If you're constantly buying used vinyl or have a large collection, a dedicated flattening machine might just be your new best friend. It takes the guesswork completely out of the equation.
The Vinyl Flat Record Flattener is a popular choice for a reason. These devices are purpose-built for one job. You simply sandwich your record between two heavy, perfectly flat metal plates and slide it into a custom heating pouch.
Compared to trying it yourself, the benefits are huge:
- Controlled Heat: The pouch maintains a consistent, safe temperature, so you're not one wrong move away from a melted puddle of vinyl.
- Even Pressure: Those heavy plates distribute pressure flawlessly across the entire record. This is absolutely key to getting a perfectly flat result without squashing the grooves.
- Repeatable Success: Once you dial in the right settings, you can get the same great results every single time.
A machine like the Vinyl Flat can set you back a few hundred dollars, which sounds like a lot. But think about it—if it saves even one or two of your rare or out-of-print LPs, it’s already paid for itself.
When to Trust the Professionals
Don't have the space or budget for another piece of gear? There’s an even easier option: let a pro handle it. Many high-end audio shops and dedicated record stores offer professional flattening services.
They use industrial-grade machines that are far more advanced than anything you can buy for home use, which means their success rate is incredibly high.
For a one-off fix on a valuable record, entrusting it to an expert is often the smartest move. They have the experience and top-tier equipment to minimize risk and give you the best possible chance of a perfect restoration.
You can usually expect to pay somewhere between $15 and $30 per record. The process often takes a few days because they run the vinyl through a very careful, slow heating and cooling cycle. It's the ultimate hands-off solution for your most prized albums, and it’s the safest bet you can make.
Preventing Warps with Smart Storage and Handling
Look, knowing how to flatten a warped record is a great skill to have in your back pocket. But the real pro move? Never having to do it in the first place.
When it comes to keeping your vinyl collection in pristine shape for decades, a little proactive care goes a long, long way. It all boils down to managing two things: pressure and temperature. These are the mortal enemies of flat records.
The absolute golden rule of vinyl storage is simple, but it's not up for debate: always store your records vertically. Stacking them flat like pancakes is a recipe for disaster. The weight adds up fast, putting a ton of uneven pressure on the LPs at the bottom of the pile. Before you know it, you've got a classic "dish warp" on your hands.
Creating the Ideal Environment
Where you store your records is just as important as how you store them. Vinyl is essentially PVC, a plastic that’s surprisingly sensitive to its surroundings. You're looking for a cool, dry room where the temperature and humidity don't swing wildly.
Here's what to aim for:
- Temperature: A stable 65-70°F (18-21°C) is the sweet spot.
- Humidity: Keep it between 40-50% relative humidity to avoid any moisture-related headaches.
This means attics, basements, and garages are usually bad news. For a truly prized collection or if you're putting records away for the long haul, looking into climate controlled storage units can give you that extra peace of mind.
The Gear That Protects Your Grooves
Beyond the big-picture stuff, the little details really add up. Quality inner and outer sleeves are non-negotiable for any serious collector.
The inner sleeve is the first line of defense, shielding the record's surface from dust and annoying scuffs. The outer sleeve protects that beautiful album art from fading and ring wear. Taking the time to do this right is a true investment, and we dive deeper into this in our guide on the art of collecting, cleaning, and protecting vinyl records.
Here's a tip you don't always hear: using a record weight or clamp during playback can help. This little puck sits on the center label, helping to keep the record perfectly stable against the platter. It can gently counteract minor undulations before they even think about becoming permanent.
Remember, heat is the number one cause of warped records. It only takes a temperature of around 140°F (60°C) to soften the PVC enough to cause a permanent bend. This is why prevention is everything. Storing your records upright in a cool, stable spot is the single best thing you can do for their longevity. Get the storage and handling right from the start, and you'll avoid ever needing a fix.
Alright, let's get those common questions answered. It's totally normal to feel a bit nervous before you try to flatten a prized record. Applying heat and pressure to vinyl can feel like surgery, but knowing the answers to a few key questions will give you the confidence to do it right.
Let's walk through some of the biggest concerns collectors have.
Can Every Warped Record Be Saved?
I wish I could say yes, but honestly, some records are just too far gone. Success really boils down to the type of warp you're dealing with.
Some damage is almost certainly permanent. We're talking about things like:
- Sharp Bends or Creases: If you can see a distinct fold line in the vinyl, the PVC has been stretched past its breaking point. There's no coming back from that.
- "S" Warps: Those complex, wavy warps that go in multiple directions are a nightmare to fix evenly.
- Serious Heat Damage: If a record looks like a Dali painting because it melted in a hot car, flattening it won't magically restore the grooves. The audio information is gone for good.
The best candidates for a successful fix are those with gentle "dish" warps or minor lifts along the edge. Think of it less like a repair and more like gently coaxing the vinyl back into shape. You can guide it, but you can’t fix a catastrophic break.
Will Flattening Affect Sound Quality?
When you do it right, flattening a record will make it sound so much better. The whole point is to get rid of that annoying "wow and flutter"—the pitchy sound you hear as the stylus travels over the warp.
A flat record lets the needle track the grooves perfectly, giving you the stable, clear audio the artist intended.
The risk, of course, is in the "how." Too much heat is the enemy here. It can literally melt the delicate microgrooves, creating permanent distortion or surface noise. Applying pressure unevenly can also introduce new, subtle warps. This is exactly why you should always start with the gentlest method first and work your way up.
Is It Safe to Use a Hairdryer or Microwave?
Please, don't do it. Just... don't. Using a hairdryer or a microwave on a record is a speedrun to vinyl destruction.
A hairdryer shoots out a concentrated blast of hot air that you can't possibly control or distribute evenly. You'll almost certainly melt a spot on the record within seconds.
A microwave is even worse. It will completely destroy the vinyl and could even be a safety hazard. Stick to methods that offer low, even, and controllable heat, like the oven technique done with extreme care. Patience and precision are your best friends in this process.
At EVEO, we believe in preserving the things you love. From protecting your workspace to caring for your vinyl collection, our products are designed for reliability and peace of mind. Explore our solutions today at https://eveo.store and see why millions of customers trust us to keep their valuables safe and organized.
Your Guide to Using a Record Player Cleaning Kit for Flawless Sound
The Definitive Guide to Vinyl Record Storage Containers