When you hear "under desk cable management," you might picture a complicated system of trays, raceways, and clips designed to organize the wires under your desk. You'd be right. It's the single best way to take that tangled, frustrating mess and create a clean, safe, and genuinely productive workspace by tucking power strips, bulky adapters, and loose cords neatly out of sight.
The True Cost of Cable Clutter
Let's be honest—that nest of wires under your desk is more than just an eyesore. It's a silent killer of productivity, a low-key safety hazard, and a source of friction you just don't need in your day.
Every time you accidentally kick a plug loose or waste minutes trying to trace one specific cord through a tangled web, you’re pulled out of your flow state. This kind of chaos creates a subtle but constant feeling of disorder that chips away at your mental clarity. For anyone working from home, gaming, or creating, it’s a story we all know too well: a great day of focus gets derailed because a stray foot disconnected the internet.
Beyond Annoyance to Actual Risk
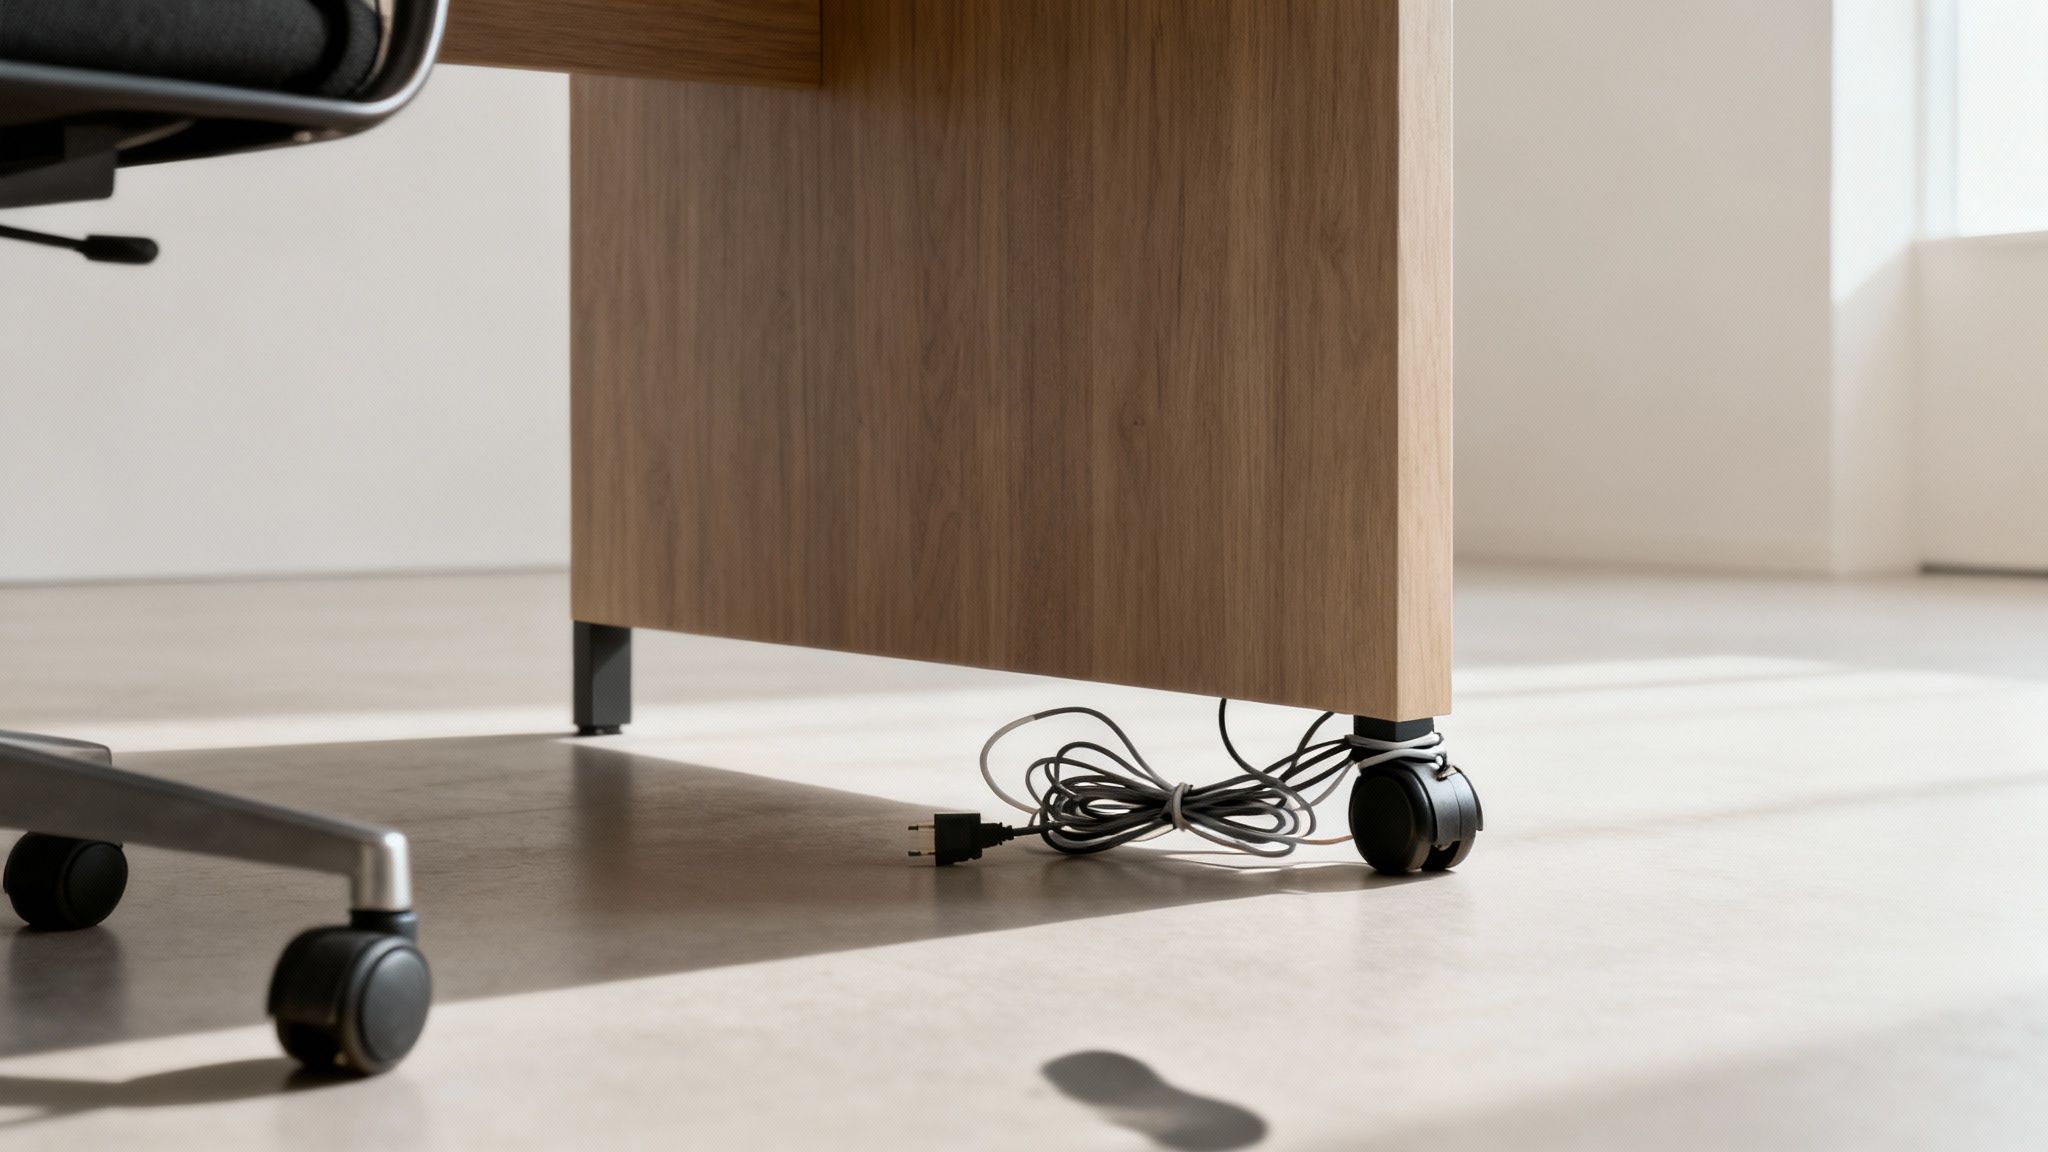
Ignoring the cable mess can lead to problems bigger than just frustration. Loose wires snaking across the floor are a legitimate trip hazard for you, your family, or your pets. One bad snag could send a monitor, laptop, or external hard drive crashing to the ground, resulting in some seriously expensive damage.
On top of that, disorganized cables just don't last as long. Cords that are bent at sharp angles, pinched under the leg of a desk, or constantly getting stepped on will wear out fast. That strain can damage the internal wiring, creating a risk of electrical shorts or sudden device failure.
An organized workspace isn't a luxury; it's a foundational element of a focused and efficient environment. Taking control of your cables is a direct investment in your daily workflow and peace of mind.
The Growing Demand for Order
As home office setups become more powerful and complex, the need for real solutions has skyrocketed. The global cable management market isn't just growing; it's exploding. Valued at $27.6 billion in 2023, it’s projected to hit an incredible $64.7 billion by 2032.
This trend isn't just about corporate offices; it reflects a universal desire for cleaner, safer, and more functional personal workspaces. You can read the full research on this market trend to see just how widespread this movement is.
Ultimately, setting up a solid under-desk cable system is one of the highest-impact upgrades you can make. It’s a crucial step when you decide to upgrade your workspace to build a desk setup that works for you.
Mapping Out Your Cable Management Blueprint

A truly great under desk cable management system doesn’t start with drilling holes or sticking on clips. It begins with a thoughtful plan. Before you buy a single product, take a moment to perform a quick 'cable audit' to understand exactly what you're dealing with.
Unplug everything and lay it all out. This simple step gives you the full picture—every monitor cable, USB hub, phone charger, and power brick that needs a home. It's the only way to avoid that classic mistake of buying a solution that's too small or just doesn't fit your specific hardware.
Assess Your Workspace and Cable Paths
Now, take a good look at your desk and its surroundings. Where's the nearest power outlet? Your goal is to create the most direct, hidden path from each device to its destination, minimizing any visible slack. Think of it like a city planner designing a road system—you want efficient routes with the least amount of clutter.
For a minimalist laptop user, this might be a single, clean line from the wall to a power strip mounted under the desk. But for a dual-monitor setup with speakers, a microphone, and an external drive, the map gets a lot more complex, often requiring separate paths for power and data cables.
Planning isn't about perfection; it's about prevention. A ten-minute audit now prevents hours of frustration later when you realize your power strip won't fit or a cable is just a few inches too short.
Taking Measurements and Identifying Anchor Points
Grab a tape measure and get the key dimensions of your desk's underside. Pay close attention to support beams, legs, or drawers that could get in the way of mounting a cable tray or raceway. You'll want to identify the flat, open surfaces that will serve as prime real estate for your new system.
Your planning checklist should cover:
- Total Cable Count: How many individual cords are you wrangling?
- Bulky Items: Note the size of any large power bricks or adapters. These guys take up more room than you'd think.
- Mounting Space: Measure the length and width of the largest clear area under your desk.
- Desk Type: Is it a sit-stand desk? If so, you'll need to account for movement and leave extra slack in your cables to avoid unplugging everything when you stand up.
This proactive approach is what helps you choose the right tools for the job. For instance, knowing you have three bulky power bricks immediately tells you that a simple sleeve isn't going to cut it; you’ll need a proper tray or net.
The market for solutions like under-desk nets alone hit $1.21 billion in 2024, which shows just how many people are looking for effective ways to organize their setups. Our guide on raceway cable management can also help you explore some excellent options for channeling those cords cleanly along walls or desk legs.
Selecting Your Cable Management Toolkit
With your cable blueprint in hand, it’s time to pick the right tools for the job. The world of under desk cable management is full of options, and honestly, the best setups usually mix and match a few different products. A one-size-fits-all approach just doesn't work here.
Think of it like this: a simple laptop and monitor setup is like a quiet country road—a few clips will do. But a full-blown gaming rig with multiple monitors, speakers, and a dozen peripherals? That’s a downtown intersection at rush hour. It needs a real traffic management system, like a proper cable tray.
The Foundation: Your Cable Tray or Raceway
For any setup that has more than just a couple of cords, you absolutely need a primary container. This is where you’ll stash the bulky power strips and adapters, getting them up off the floor for good.
- Cable Trays: These are the heavy lifters of cable management. Usually made of metal or plastic, these baskets mount right under your desk and give you plenty of room for power bricks to breathe. Their open design is a lifesaver when you need to add or remove a cable down the line.
- Adhesive Raceways: These are sleek, enclosed plastic channels that stick right onto your desk. They're perfect for running a few cables cleanly along the back edge or down a desk leg, hiding them in plain sight.
For a great overview of how these channels can streamline your space, you can explore various types of cord hiders that work on all sorts of surfaces.
A common mistake I see all the time is underestimating how much space you'll need. Always, always choose a tray or raceway that feels a little bigger than necessary. You’ll thank yourself later when you get that new gadget.
To make picking the right tools a bit easier, here’s a quick comparison of the most common solutions and what they do best.
Cable Management Solutions At a Glance
| Solution Type | Best For | Installation Method | Flexibility |
|---|---|---|---|
| Cable Tray | Multiple power bricks, complex setups | Screws (most secure) | High |
| Adhesive Raceway | Single, visible cable runs | Adhesive tape | Low |
| Velcro Ties | Bundling cables together | Wrap-around | Very High |
| Cable Sleeve | Grouping final run to the wall | Zipper or wrap | Medium |
Choosing the right combination from this list is the key to a setup that's not just clean, but also easy to manage long-term.
The Supporting Cast: Ties, Clips, and Sleeves
Once your main container is in, it's the little details that really bring the whole thing together. These smaller accessories are what take you from "less messy" to "perfectly organized."
Velcro ties are an absolute must-have. Forget single-use zip ties—these are reusable, so you can adjust things without having to cut anything. Use them to bundle cables heading in the same direction, like your monitor's power and display cords, before tucking them into the tray.
Adhesive cable clips are small but mighty. They're perfect for guiding a single cable along a specific path, like routing your webcam wire discreetly along the edge of your desk. They keep everything exactly where you put it.
Cable sleeves are flexible tubes, usually made of fabric or neoprene, that wrap around a whole bundle of wires. They're ideal for that final run of cables from your desk to the wall outlet, turning a messy handful of cords into one clean, thick tube. This is especially clutch for standing desks, where those cables need to move and flex without snagging.
Executing Your Cable Taming Project
You’ve got your blueprint, your tools are laid out—now for the fun part. This is where the planning pays off and you finally get to see that tangled mess transform into a clean, organized workspace. The key here is to take your time and work methodically. Don't rush it.
First things first: power down and unplug everything from the wall outlet. Seriously. This isn't just about protecting your expensive gear; it's about protecting yourself. Never work on wiring with live electricity. Unplugging everything gives you a completely clean slate to start from.
Mounting Your Core Solutions
I always start by installing the biggest pieces first, which is usually the cable tray or the main raceway. This is the backbone of your entire setup, so you want to get its placement just right. Mount it securely under your desk, typically somewhere central that’s easy to get to but still hidden from everyday view.
If you’re screwing the tray into your desk—which I highly recommend, especially if it’s going to hold heavy power bricks—take a second to double-check your positioning. Here’s a little pro tip: use painter's tape to temporarily hold the tray in place. It lets you step back, see how it looks, and make sure you love the placement before drilling any permanent holes.
The Logic of Routing Cables
Once your tray is locked in, it's time to start running the cables. The best practice is to keep your power cords separate from your data cables (like your HDMI, USB, or Ethernet cords). When they run too close together, you can sometimes get signal interference. It’s a small step that makes a big difference in performance.
Start bundling cords that are all heading to the same place. For example, I’ll take a monitor’s power cord and its display cable and wrap them together with a Velcro tie before laying them in the tray. This prevents a bunch of loose, individual wires from making a new mess inside your brand-new management system.
This simple workflow shows how different tools come together for a clean result.
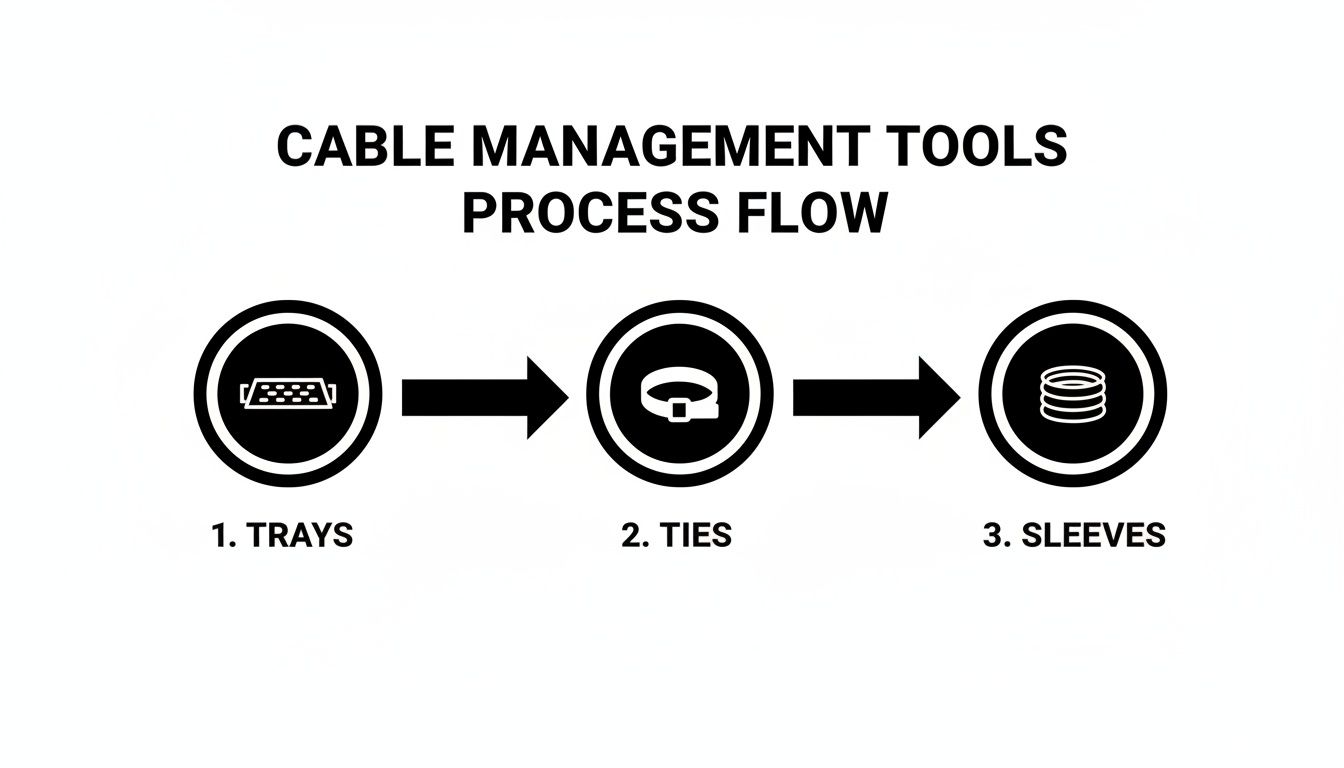
You start with a tray for the bulky items, use ties to bundle everything neatly, and then can use a sleeve for that final, clean run of cables heading down to the wall outlet.
Final Connections and Adjustments
Next, place your power strip or surge protector inside the cable tray and start plugging in all your power bricks. Use a few more Velcro ties to hold them snugly in place so they don't slide around. Once the power side is handled, you can route your data cables cleanly to your computer and monitors, using adhesive clips to guide any stragglers along the edge of the desk.
But before you cinch that last tie, stop. You need to leave some slack.
Always leave a small "service loop"—a gentle coil of extra cable—for each device. This makes it infinitely easier to adjust your monitor, unplug a single device, or move your setup later without having to undo all your hard work.
This is absolutely critical if you have a sit-stand desk. You have to test the desk's full range of motion, moving it from its lowest point to its highest, to make sure no cables get pulled tight or snagged.
The need for this kind of flexible, user-friendly setup is why the cable management market is booming. It surged from $27.71 billion in 2024 and is projected to hit $29.42 billion in 2025. As more people build out their home offices, smart solutions like these are becoming non-negotiable. You can explore more about these market trends to see just how fast the demand is growing.
Advanced Techniques for a Polished Setup
Getting your main cables tucked into a tray or raceway is a huge win, but it's the finishing touches that really take your under desk cable management from just "tidy" to something that looks professionally done. These next few steps are all about tackling that final 10%—the small details that create a setup built for the long haul.
One of the most common final hurdles is figuring out what to do with those thick, stubborn monitor cables or the thin, wild wires from webcams and mics. Instead of just letting them dangle, grab some small, adhesive cable clips. You can use them to create a clean, intentional path along the back edge of your desk or right up your monitor arm. It keeps them secure and makes them practically disappear.
Mastering the Service Loop
Here's a trick straight from the IT pro playbook: create a "service loop." It’s a fancy name for a simple concept—leaving a small, neat coil of extra cable and securing it with a Velcro tie before tucking it away. It might feel a bit weird to intentionally add a coil when you're trying to get rid of slack, but trust me, there's a good reason.
That little loop of extra wire will be your best friend later. Need to shift your monitor a few inches to the side? Have to pull out a device to check the serial number? The service loop gives you just enough slack to make those adjustments without having to rip apart your entire setup.
Think of a service loop as building flexibility right into your system. It’s the difference between a five-second tweak and a twenty-minute rewiring headache down the road. It's a simple habit that saves a ton of frustration.
If you’re running a dual-monitor setup, this is basically mandatory. A gentle service loop for each display means you can adjust them independently without yanking a cord taut or unplugging something by accident.
Labeling Your Power Bricks
This is a simple trick that will honestly change your life: label your power bricks. We've all been there—crouched under a desk, trying to trace one black cord through a jungle of other black cords, only to unplug the wrong thing at the worst possible moment. It's completely avoidable.
A proper label maker is great, but a piece of masking tape and a marker works just as well. Before you plug anything into your power strip, just label each adapter:
- "Left Monitor"
- "Right Monitor"
- "Docking Station"
- "Speakers"
This takes less than five minutes but pays off forever. Troubleshooting goes from a frustrating guessing game to a quick, easy task. These are the kinds of expert touches that separate a decent cable management job from one that feels intentional, organized, and super easy to maintain.
Of course. Here is the rewritten section, crafted to sound like it was written by an experienced human expert.
Got Questions? Let's Talk Cable Management Details
Even the most well-thought-out plan can leave you with a few head-scratchers once you start working. That's totally normal. Nailing your under desk cable management usually comes down to solving a few common, real-world problems. Let’s tackle some of the questions that come up all the time.
Getting these final details right is what separates a setup that looks good for a day from one that stays clean and functional for years. It’s all about creating a system that actually works for you.
How Do I Manage Cables for a Standing Desk?
This is probably the number one question for anyone with an adjustable desk, and for good reason. The secret isn't complicated: it’s all about flexibility. The key is to mount your power strip and all those clunky power bricks directly to the underside of your desk. A cable tray or a net is perfect for this.
When you do this, all your device cables—monitor, laptop, speakers, everything—move with the desk as one unified system. Suddenly, the only cord you have to worry about is the single one running from your power strip to the wall outlet. Just bundle that main cord into a flexible cable sleeve or a neat-looking cable spine, making sure to leave enough slack for the desk to travel to its highest point without yanking on the plug.
Pro Tip: Before you call it a day, test the full range of motion. Run your desk all the way up and all the way down. Watch carefully to make sure no cables get snagged, stretched too tight, or unplugged. This one simple check will save you so many future headaches.
Can I Just Use Adhesive Mounts on Any Desk?
Adhesive clips and raceways are amazing little tools, but they’re picky about where they stick. They work best on smooth, clean, non-porous surfaces—think finished wood, laminate, metal, or plastic.
Where do they fail? Rough or unfinished wood, porous materials, and heavily textured finishes are their enemies. If you want a bond you can trust, always clean the spot with a little isopropyl alcohol first. It gets rid of any dust or oils that could ruin the stick.
A quick word of caution, though: if you're mounting anything with some real weight to it, like a fully loaded power strip or a thick bundle of cables, just use a screw-in mount. It's safer. Adhesives can and do fail over time, especially when heat, humidity, or the constant pull of gravity gets involved.
What’s the Best Way to Hide a Bulky Power Brick?
Ah, the dreaded power brick. Those chunky adapters are the number one enemy of a clean, minimalist setup. The best strategy is to get them off the floor and out of sight entirely, using a dedicated holder under your desk.
Here are your best bets:
- Under-Desk Cable Tray: This is the gold standard. A wire mesh or solid metal tray gives you a sturdy shelf to tuck away multiple power bricks. Plus, the open design allows for great airflow, so they won’t overheat.
- Cable Net: Think of this as a flexible mesh hammock for your electronics. It’s another fantastic option that creates a secure pouch to hold adapters and all their excess cord slack.
Whatever you choose, use a few Velcro straps to secure the bricks inside the tray or net. This stops them from sliding around. And please, never let a heavy adapter just hang by its cord—that puts a ton of strain on the connection points and is just asking for it to fail.
Ready to conquer the cable chaos for good? The EVEO Under Desk Cable Management Tray is the perfect foundation for a clean, safe, and professional workspace.
Get your workspace organized with EVEO's top-rated solutions
A Guide to Mounting Brackets for Monitors
How to Hide Computer Cables for a Flawless Workspace