
Let’s be honest, the clunky stand that came with your monitor is probably a space-hogging afterthought. It locks your screen in one spot, forcing you to crane your neck and hunch over, all while eating up valuable desk real estate. If that sounds familiar, a mounting bracket for monitors is the simple, game-changing upgrade your workspace has been waiting for.
Why You Need a Monitor Mount
That nagging neck strain after a long day? The cluttered desk that makes it hard to focus? A dedicated monitor mount solves both problems at once. It lifts your screen completely off your desk, replacing that bulky stand with a sleek, flexible arm.
Think of it as an instant ergonomic makeover. Instead of slouching to meet your screen, you can bring your screen to you. A quick adjustment is all it takes to set the perfect height, angle, and depth for your natural eye level. This small change makes a massive difference, cutting down on physical strain and letting you work comfortably for hours.
But it’s not just about comfort. Monitor mounts are the secret to a cleaner, more productive setup. They open up your desk, creating a minimalist look that cuts down on distractions and helps you lock in on your work. This is especially true if you’re running multiple displays. A dual monitor arm aligns two screens so perfectly it creates one seamless digital canvas, making multitasking feel completely effortless.
A quality monitor mount delivers:
- Reclaimed Desk Space: Finally, you'll have room for notebooks, gadgets, or just the clean, open space your mind needs to think.
- Improved Ergonomics: Position your monitor at the ideal height and angle to stop neck, back, and eye strain before it starts.
- Enhanced Productivity: A more organized and focused setup is key, especially when you’re juggling tasks on dual or ultrawide screens.
- Greater Flexibility: Easily swing your screen around to show a colleague what you’re working on or pivot it to portrait mode for coding or reading long documents.
A monitor mount isn’t just another piece of hardware. It's an investment in your daily comfort and efficiency, turning your static desk into a dynamic workstation built just for you.
This guide is your roadmap to creating a more efficient, comfortable, and inspiring workspace. We'll walk you through everything—from picking the right type of mount to understanding the tech specs and getting it installed like a pro. Let's dive in.
Finding the Right Monitor Mount for Your Space
Choosing the right mounting bracket for your monitor is a bit like picking the perfect foundation for a house—it has to fit your environment, support the weight, and meet your specific needs. The type of mount you pick will completely define how you interact with your screen and, just as importantly, how much precious desk real estate you get back.
Let's walk through the most popular options to find the one that’s a perfect match for your setup.
Whether you're fighting a cramped desk or just trying to fix your posture, the answer is almost always a monitor mount. This flowchart helps visualize that decision.

As you can see, no matter if your main goal is reclaiming space or improving ergonomics, a monitor arm is the logical next step. Now, let’s figure out which kind is best for you.
To make things even clearer, here’s a quick-glance comparison of the most common types.
Monitor Mount Type Comparison
| Mount Type | Best For | Installation Method | Key Advantage |
|---|---|---|---|
| Desk Clamp | Renters, flexible setups, easy installation | Clamps onto the edge of the desk | No permanent modification needed |
| Grommet Mount | Permanent setups, minimalist aesthetics | Bolts through a hole in the desk | Extremely stable with a clean look |
| Wall Mount | Maximizing desk space, small desks | Drills directly into a wall stud | Frees up 100% of your desk surface |
Each of these has its place, but the best one for you really comes down to your desk, your room, and your long-term plans.
The Versatile Desk Clamp Mount
Think of a desk clamp mount as the most adaptable, renter-friendly option out there. It uses a heavy-duty C-clamp that grabs onto the back or side edge of your desk, holding the monitor arm firmly in place without any drilling or permanent marks.
This is the perfect non-permanent solution if you’re always rearranging your setup, work in a shared office, or just don’t want to damage your furniture. Just make sure your desk has a solid edge for the clamp to grip—and that it fits the thickness requirements, usually between 0.4 and 3.5 inches. Be careful with fragile surfaces like glass, though, as the focused pressure can cause cracks.
The Sleek Grommet Mount
For a cleaner, more built-in look, the grommet mount is a fantastic choice. This style secures the monitor arm by bolting it through an existing hole in your desk, like one made for cable management. If you don't have a hole, you can always drill one to create the perfect mounting spot.
The result is a super stable, low-profile base that looks like it came with the desk. This makes grommet mounts a favorite for anyone aiming for a minimalist vibe or building a permanent home office where a polished look is a priority. It gives you a rock-solid anchor point that’s often even more stable than a clamp.
A grommet mount trades the quick setup of a clamp for a more permanent and visually appealing installation. It’s the go-to for anyone building a dedicated, long-term workspace with an emphasis on clean lines and maximum stability.
The Space-Saving Wall Mount
When getting back every square inch of desk space is the absolute top priority, a wall mount is the ultimate answer. By attaching the monitor arm directly to the wall behind your desk, you completely remove its footprint from your work surface. This creates an ultra-clean, "floating monitor" effect that looks amazing and is incredibly practical.
Wall mounts are ideal for tiny desks or any setup where surface area is a luxury. The trade-off is a more involved installation. You'll need to find a wall stud and drill into it securely to make sure it can handle your monitor's weight. That makes it a more permanent fixture, best for homeowners or offices where you have permission to make a few holes.
It's no surprise that desk-based mounts dominate the market. They're a huge part of the ergonomic revolution, especially with the explosion of remote work. Valued at over USD 1.6 billion, the monitor arm sector is projected to hit USD 2.1 billion by 2030, with desk clamps and grommets leading the charge. You can read more about these market trends to see why the demand just keeps growing. Each type offers its own clear benefits, so choosing the right one is all about balancing flexibility, looks, and the realities of your workspace.
Understanding VESA Standards and Weight Capacity
Before you click "add to cart" on any monitor mount, there's a quick compatibility check you absolutely have to do. Getting this wrong is like trying to fit the wrong key in a lock—it just won't work, and you risk damaging your gear. We're talking about two make-or-break factors: VESA standards and weight capacity.
Think of the VESA standard as a universal language that lets monitors and mounts communicate perfectly. It's a set of guidelines from the Video Electronics Standards Association that dictates the exact spacing of the four screw holes on the back of your display.
This simple standard is a game-changer because it takes all the guesswork out of the equation. It guarantees that any VESA-compliant monitor will line up flawlessly with any VESA-compliant mount, creating the secure, stable foundation your setup needs.
How to Check Your Monitor's VESA Pattern
Finding your monitor’s VESA pattern is usually pretty simple. Just turn your screen around and look for a square or rectangular pattern of four screw holes. The VESA measurement is just the distance between these holes in millimeters—first measured horizontally, then vertically.
The most common patterns you'll run into are:
- 75mm x 75mm: Typically found on smaller, lighter monitors.
- 100mm x 100mm: This is the go-to standard for most desktop monitors up to around 32 inches.
- 200mm x 100mm or 200mm x 200mm: You'll see these on larger displays and some smaller TVs.
If you don't see the holes right away, don't panic. They might be hiding underneath the plate where the original stand connects. Once you pop that off, the VESA interface should be right there. Still not sure? A quick online search for your monitor’s model number will tell you everything you need to know.
To dig deeper into this crucial standard, check out our guide on understanding the desk mount VESA system.
Why Weight and Size Capacity Matter
Just as critical as the VESA pattern is your monitor's actual weight. Every single monitor mount is engineered with a maximum weight it can safely handle. Pushing past this limit is asking for trouble—it could lead to a slow, frustrating sag or, even worse, a sudden crash that destroys your expensive screen.
A quick pro-tip: always check your monitor's weight without its original stand. That's the number that matters, since the stand comes off anyway.
Beyond weight, you also need to check the maximum screen size the arm is designed for. While weight is the main structural concern, a wider screen creates more leverage. This can put extra stress on the joints that control tilt and swivel, even if the monitor is technically under the weight limit.
Sticking to the manufacturer’s size recommendation ensures the arm’s joints can handle your display's dimensions without any wobbling or drooping. Before you buy, just confirm these three things:
- Your monitor is VESA compliant.
- Its weight (minus the stand) is under the mount’s limit.
- Its screen size is within the mount's recommended range.
Nailing these details is the most important step in choosing the right monitor mount. It's your guarantee of a secure, stable, and long-lasting setup you can trust.
Choosing the Right Materials and Adjustability
Once you've got VESA and weight compatibility squared away, it’s time to look at what separates a good monitor mount from a great one. The real difference comes down to the materials it's made of and, most importantly, how much you can actually move it around. This freedom of movement is called articulation, and it's what transforms your desk from a static space into a dynamic, comfortable command center.
The materials don't just affect strength and durability; they define the entire look and feel of your setup. It’s like choosing between a rugged off-road vehicle and a sleek city cruiser—both get the job done, but the experience is worlds apart.
- Solid Steel: This is the heavyweight champion. Steel is unbelievably strong, making it the go-to for massive ultrawide monitors or multi-screen arrays. Its main benefit is rock-solid stability, which means zero wobble and the peace of mind that your screens are staying put.
- Lightweight Aluminum: If steel is the workhorse, aluminum is the nimble athlete. It strikes a perfect balance between strength and light weight, and it often comes in a polished, modern finish that just looks fantastic in a clean workspace. Aluminum is also naturally resistant to corrosion, so it’ll look just as good years from now.
While steel offers unmatched sturdiness, aluminum brings a more refined feel, making it a huge favorite for home offices and professional spaces where aesthetics are just as important as function.
The Power of Full Articulation
Beyond the frame, the real magic is in the movement. Full articulation is what lets you fine-tune your screen's position for any task, at any time. Imagine effortlessly flipping your monitor into vertical portrait mode to read long documents or code, or swiveling it around to share your screen with a coworker without even getting up.
A fully articulating arm gives you a few key superpowers:
- Tilt: This lets you angle the screen up or down to kill annoying glare from windows or overhead lights. A typical range is +35° to -50°.
- Swivel: Turn the monitor left or right, a must-have for collaboration or just tweaking your view. Most quality arms offer a full 180° swivel.
- Rotation: This is the game-changer—the ability to spin your monitor a full 360° to switch between landscape and portrait views in seconds.
These adjustments turn your monitor from a dumb display into a flexible tool that adapts to you. It's no wonder the demand for ergonomic hardware has exploded. The global market for TV and monitor mounts has already hit over USD 3.1 billion and is on track to reach nearly USD 5.75 billion by 2033. This massive growth is all thanks to people like us demanding more comfortable and flexible workspaces. You can discover more insights about this market growth to see how our needs are shaping the industry.
Gas Spring vs. Mechanical Spring Mechanisms
The final piece of the puzzle is what powers the arm's movement. This is where you’ll run into two main types of tech, and the difference is all in the feel.
Choosing between a gas spring and a mechanical spring is like deciding between power steering and manual steering in a car. Both get you where you’re going, but one feels completely effortless.
A gas spring arm uses a pressurized air cylinder to perfectly counterbalance your monitor's weight. The result is buttery-smooth, one-touch adjustment. You can literally guide your screen into place with a fingertip. It’s the premium choice for anyone who constantly tweaks their setup.
A mechanical spring arm relies on a traditional coiled spring. These are incredibly reliable and durable, but they usually take a bit more muscle to adjust. The movement can feel a little stiffer, and sometimes you have to lock it into set positions instead of having an infinite range. For someone who likes to "set it and forget it," a mechanical spring is a dependable and more budget-friendly option.
Installing Your Mount and Managing Cables
You’ve picked out the perfect mounting bracket for your monitor. Now comes the best part: turning that box of parts into a sleek, functional upgrade for your entire desk.
Installation can look a little intimidating, but most modern monitor arms are designed to be a frustration-free experience. In nearly every case, the only tools you’ll need are the ones that come right in the box. Think of it like assembling a simple piece of furniture.
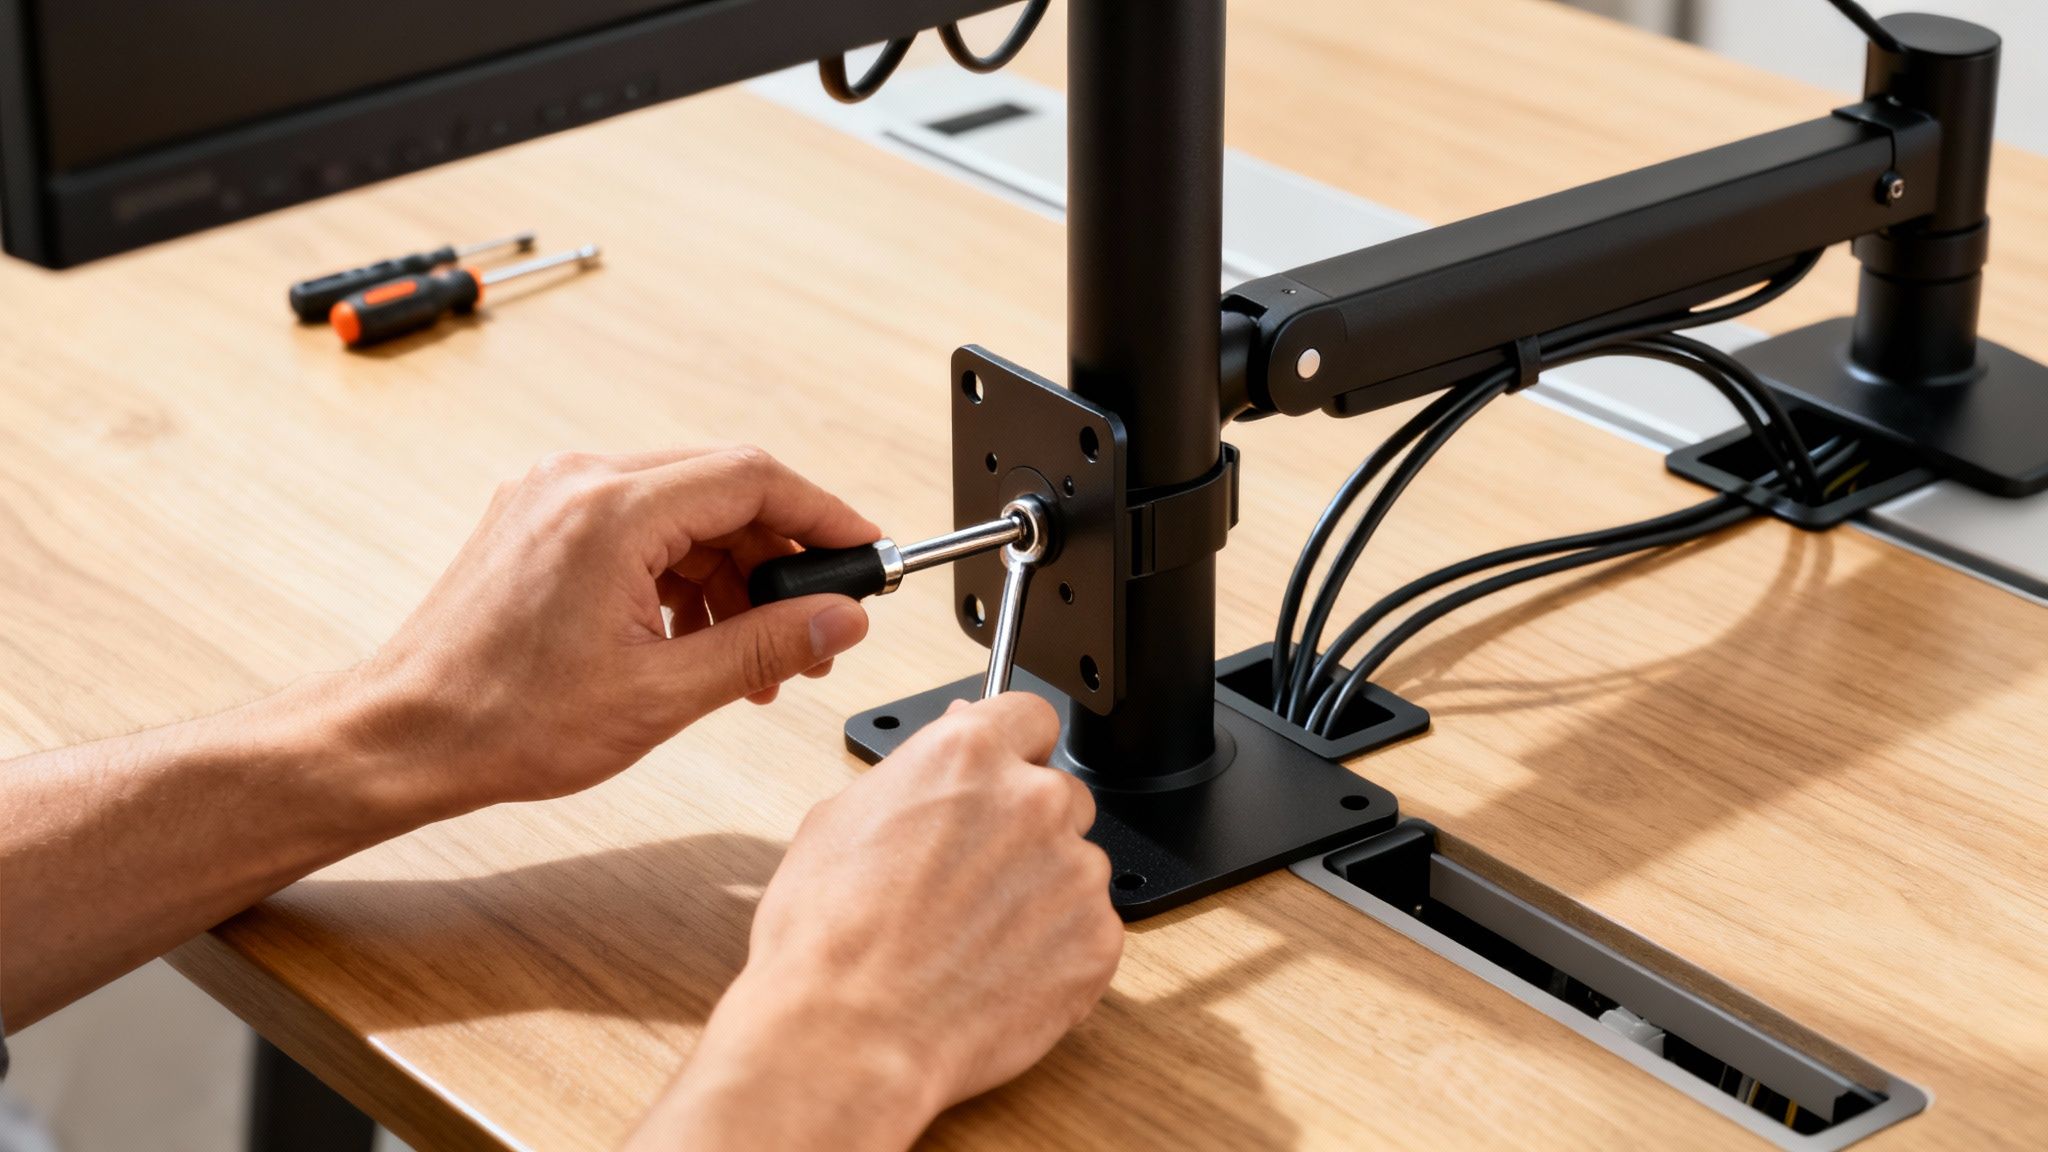
You'll start by putting together the base—whether it’s a C-clamp or a grommet mount—and getting it locked down tight on your desk. From there, you just connect the arm segments, which usually slide right into place. The last big step is attaching the VESA plate to your monitor before lifting it onto the arm.
Your Step-by-Step Installation Guide
While every model is a little different, the core process for installing mounting brackets for monitors is pretty consistent. It always pays to lay out all the parts first and give the instruction manual a quick read.
- Assemble and Secure the Base: For a C-clamp, just tighten it onto the edge of your desk until it feels firm and doesn't wobble at all. If you're going with a grommet mount, pass the bolt through the hole in your desk and secure it from underneath. This base is the foundation for everything, so make sure it’s rock-solid.
- Attach the Arm to the Base: Most monitor arms come in one or two pieces. Just slide the lower part of the arm onto the base post. If there’s an upper section, connect that next.
- Mount the VESA Plate: Take your monitor's original stand off. Then, screw the VESA plate from your mount kit onto the back of your monitor with the screws they provide. Get it nice and snug.
- Connect the Monitor to the Arm: This is often the trickiest part, so grabbing a friend to help is a great idea. Carefully lift your monitor and slide or click the VESA plate onto the end of the monitor arm. Most modern designs have a quick-release system that makes this much simpler.
- Adjust the Tension: If you have a gas spring arm, you’ll need to adjust its tension so it perfectly balances your monitor’s weight. Use the included Allen wrench to turn the adjustment screw until the monitor holds its position without drifting up or sinking down.
Installation is more than just assembly; it's about creating a stable, reliable structure. Double-check every connection to ensure your expensive equipment is safe and your adjustments are smooth.
Taming the Cable Chaos
A floating monitor is a beautiful thing, but a mess of tangled wires can completely ruin that clean, minimal look. This is where cable management comes in to save the day. A truly great monitor arm doesn't just hold your screen; it helps you hide the power and display cables for a genuinely professional setup.
Most quality arms have features built right in to help you with this:
- Integrated Channels: Look for removable plastic covers running along the arm segments. You can pop these off, tuck your cables inside, and snap them back on. The result? A completely hidden solution.
- Cable Clips: Some models use simple clips that attach right to the arm. Just run your cables along the arm and use the clips to hold them in place.
The goal is to guide your cables from the back of the monitor, down the arm, and over to your computer or power strip in one neat, tidy bundle. For an even cleaner look, you can learn more about using a raceway for cable management to hide wires along your desk or wall.
Taking just a few extra minutes to manage your cables properly prevents snags when you move your screen around and truly completes the transformation of your workspace into a tidy, organized, and much more productive environment.
Fine-Tuning Your Setup for Comfort and Productivity

So, you’ve installed your new mounting bracket for monitors and reclaimed all that glorious desk space. Fantastic. But the real win is what comes next: dialing in your setup so it works for you, boosting your comfort and focus. This is where a good piece of hardware becomes a powerful tool for your health and daily output.
The goal here is simple: find a neutral posture. That’s when your body is aligned and relaxed, not hunched over or strained. Think of your monitor arm as the bridge that brings the screen to you, saving you from craning your neck to see it. Getting this right is the secret to ditching the aches and fatigue that creep in after a long day at the desk.
The Golden Rules of Monitor Ergonomics
Don't worry, you don’t need a degree in ergonomics for this. It all boils down to a few straightforward principles you can set up in minutes. Just sit comfortably in your chair, with your back straight and your feet flat on the floor.
Now, use your monitor arm to hit these three crucial targets:
- Screen Height: The very top edge of your screen should sit at or just below eye level. This simple adjustment keeps your neck straight and your gaze level, preventing that all-too-common forward slump.
- Viewing Distance: Your screen should be about an arm's length away. If you’re leaning forward to read text, it’s too far. If you feel like you're sitting in the front row of a movie theater, it's too close.
- Monitor Tilt: Give the monitor a slight upward tilt, somewhere around 10 to 20 degrees. It’s a small tweak, but it does wonders for cutting down glare from overhead lights or windows—a major cause of eye strain.
Proper monitor alignment isn't just a "nice-to-have." It’s the foundation of a healthy, sustainable work routine. It actively fights the physical stress that leads to burnout, helping you stay in the zone for longer.
Unlocking Your Workflow with Multiple Monitors
For power users, designers, and anyone juggling multiple tasks, the benefits really stack up with dual-monitor or ultrawide setups. A flexible monitor arm isn’t just helpful here; it’s essential for creating a smooth, unified digital canvas. The demand for great mounts has exploded as more people realize the huge productivity gains.
In fact, some studies have found that using two monitors can help you complete tasks up to 42% faster than working on a single screen. You can dig into more of the data on how ergonomic trends are shaping the market.
To make the most of it, arrange your monitors to minimize head-turning. If one screen is your main workspace, put it directly in front of you and place the secondary one just off to the side, angled slightly toward you. If you use both equally, set them up so their inner edges meet right in your center line of sight. To really nail that multi-screen workspace, check out our guide on finding the best monitor arms for dual monitors. This kind of thoughtful layout cuts down on wasted movement and keeps you focused and in the flow.
Of course. Here is the rewritten section, crafted to match the human, expert tone of the provided examples.
Common Questions About Monitor Mounts
Even with all the details covered, a few questions always seem to pop up right when you're ready to choose. That's perfectly normal. Getting these last few things sorted out is the final step to building a setup you'll love, with no guesswork involved.
Let's tackle the most common ones head-on.
What If My Monitor Isn't VESA Compatible?
So you've found the perfect arm, but your monitor's back is completely flat—no screw holes in sight. Don't worry, you don't have to buy a new screen. The solution is a non-VESA adapter kit.
These smart little brackets are designed to grip your monitor securely by its frame. Once attached, the adapter gives your screen a standard VESA mounting plate, allowing you to connect it to virtually any monitor arm. Just be sure to check that the adapter is a good fit for your monitor's specific size and thickness.
How Can I Tell If My Desk Is Strong Enough for a Clamp?
This is a great question. Most desks made from solid wood, MDF, or even thick particleboard can handle a clamp mount just fine, especially if they are between 0.4 and 3.5 inches thick. The real weak points are usually glass tops or hollow-core desks.
The focused pressure from a C-clamp can easily crack glass or punch through a hollow surface. Always clamp onto a solid part of your desk, and steer clear of any edges that are already chipped or damaged.
A quick check of your mount's required desk thickness and your desk's overall weight capacity will give you all the confidence you need.
Are Gas Spring Arms Really Better Than Mechanical Ones?
This one comes down to how you work. Think of a gas spring arm like a high-end office chair—it offers incredibly smooth, one-touch adjustments. If you're constantly shifting your screen's height and angle for different tasks, a gas spring is absolutely worth it.
Mechanical arms are the reliable workhorses. They're built tough and are often more budget-friendly. The trade-off is that adjustments can feel a bit clunkier, sometimes requiring you to lock the arm into specific height slots. For pure, effortless flexibility, gas springs win every time.
What's the Best Way to Tame Cables on a Dual Monitor Setup?
A two-monitor setup can quickly turn into a spaghetti monster of cables, but keeping it clean is simple if you follow a three-step plan. First, run each monitor's cables along the channels built right into your dual monitor arm.
Next, bundle them together with a cable sleeve or a few velcro ties where they exit the arm's base. Finally, hide that single, tidy bundle inside an adhesive cable raceway that runs along the back of your desk to your power strip. It's a methodical approach that creates a completely professional and clutter-free look.
Ready to create a more ergonomic and productive workspace? At EVEO, we specialize in high-quality monitor arms and cable management solutions designed for modern professionals. Explore our collection and transform your desk today.
Best record cleaner kit: Top Picks for Pristine Vinyl
The Ultimate Guide to Under Desk Cable Management